How Wan 2.2 Img2Vid Creates Smooth Long Videos Using Looping?
I’m going to show a more advanced workflow for long length video generation using Wan 2.2 Img2Vid. I generated the samples here from a single image and a set of text prompts that guide emotion, action, and motion. The first time I combined Wan 2.2 Img2Vid with the long-length looping technique I used on Wan 2.1, I realized this approach is much easier than video-to-video mask editing because image-to-video is simpler to condition and extend.
The goal is smooth long animations without stutter between segments. A lot of stitched long videos show frame stacking or a glitchy feel. The setup below avoids that.
How Wan 2.2 Img2Vid Creates Smooth Long Videos Using Looping?
Why this method
- I don’t chain sampler groups like a long snake of nodes. That feels bulky and hard coded.
- I apply a loop and control how many times it runs based on the target video length.
- I use a string list for multiple prompts that map to each loop index, so prompts evolve across segments.
- The native Img2Vid node works best with looping because it is more flexible than wrappers.
Model files you need for Wan 2.2 Img2Vid
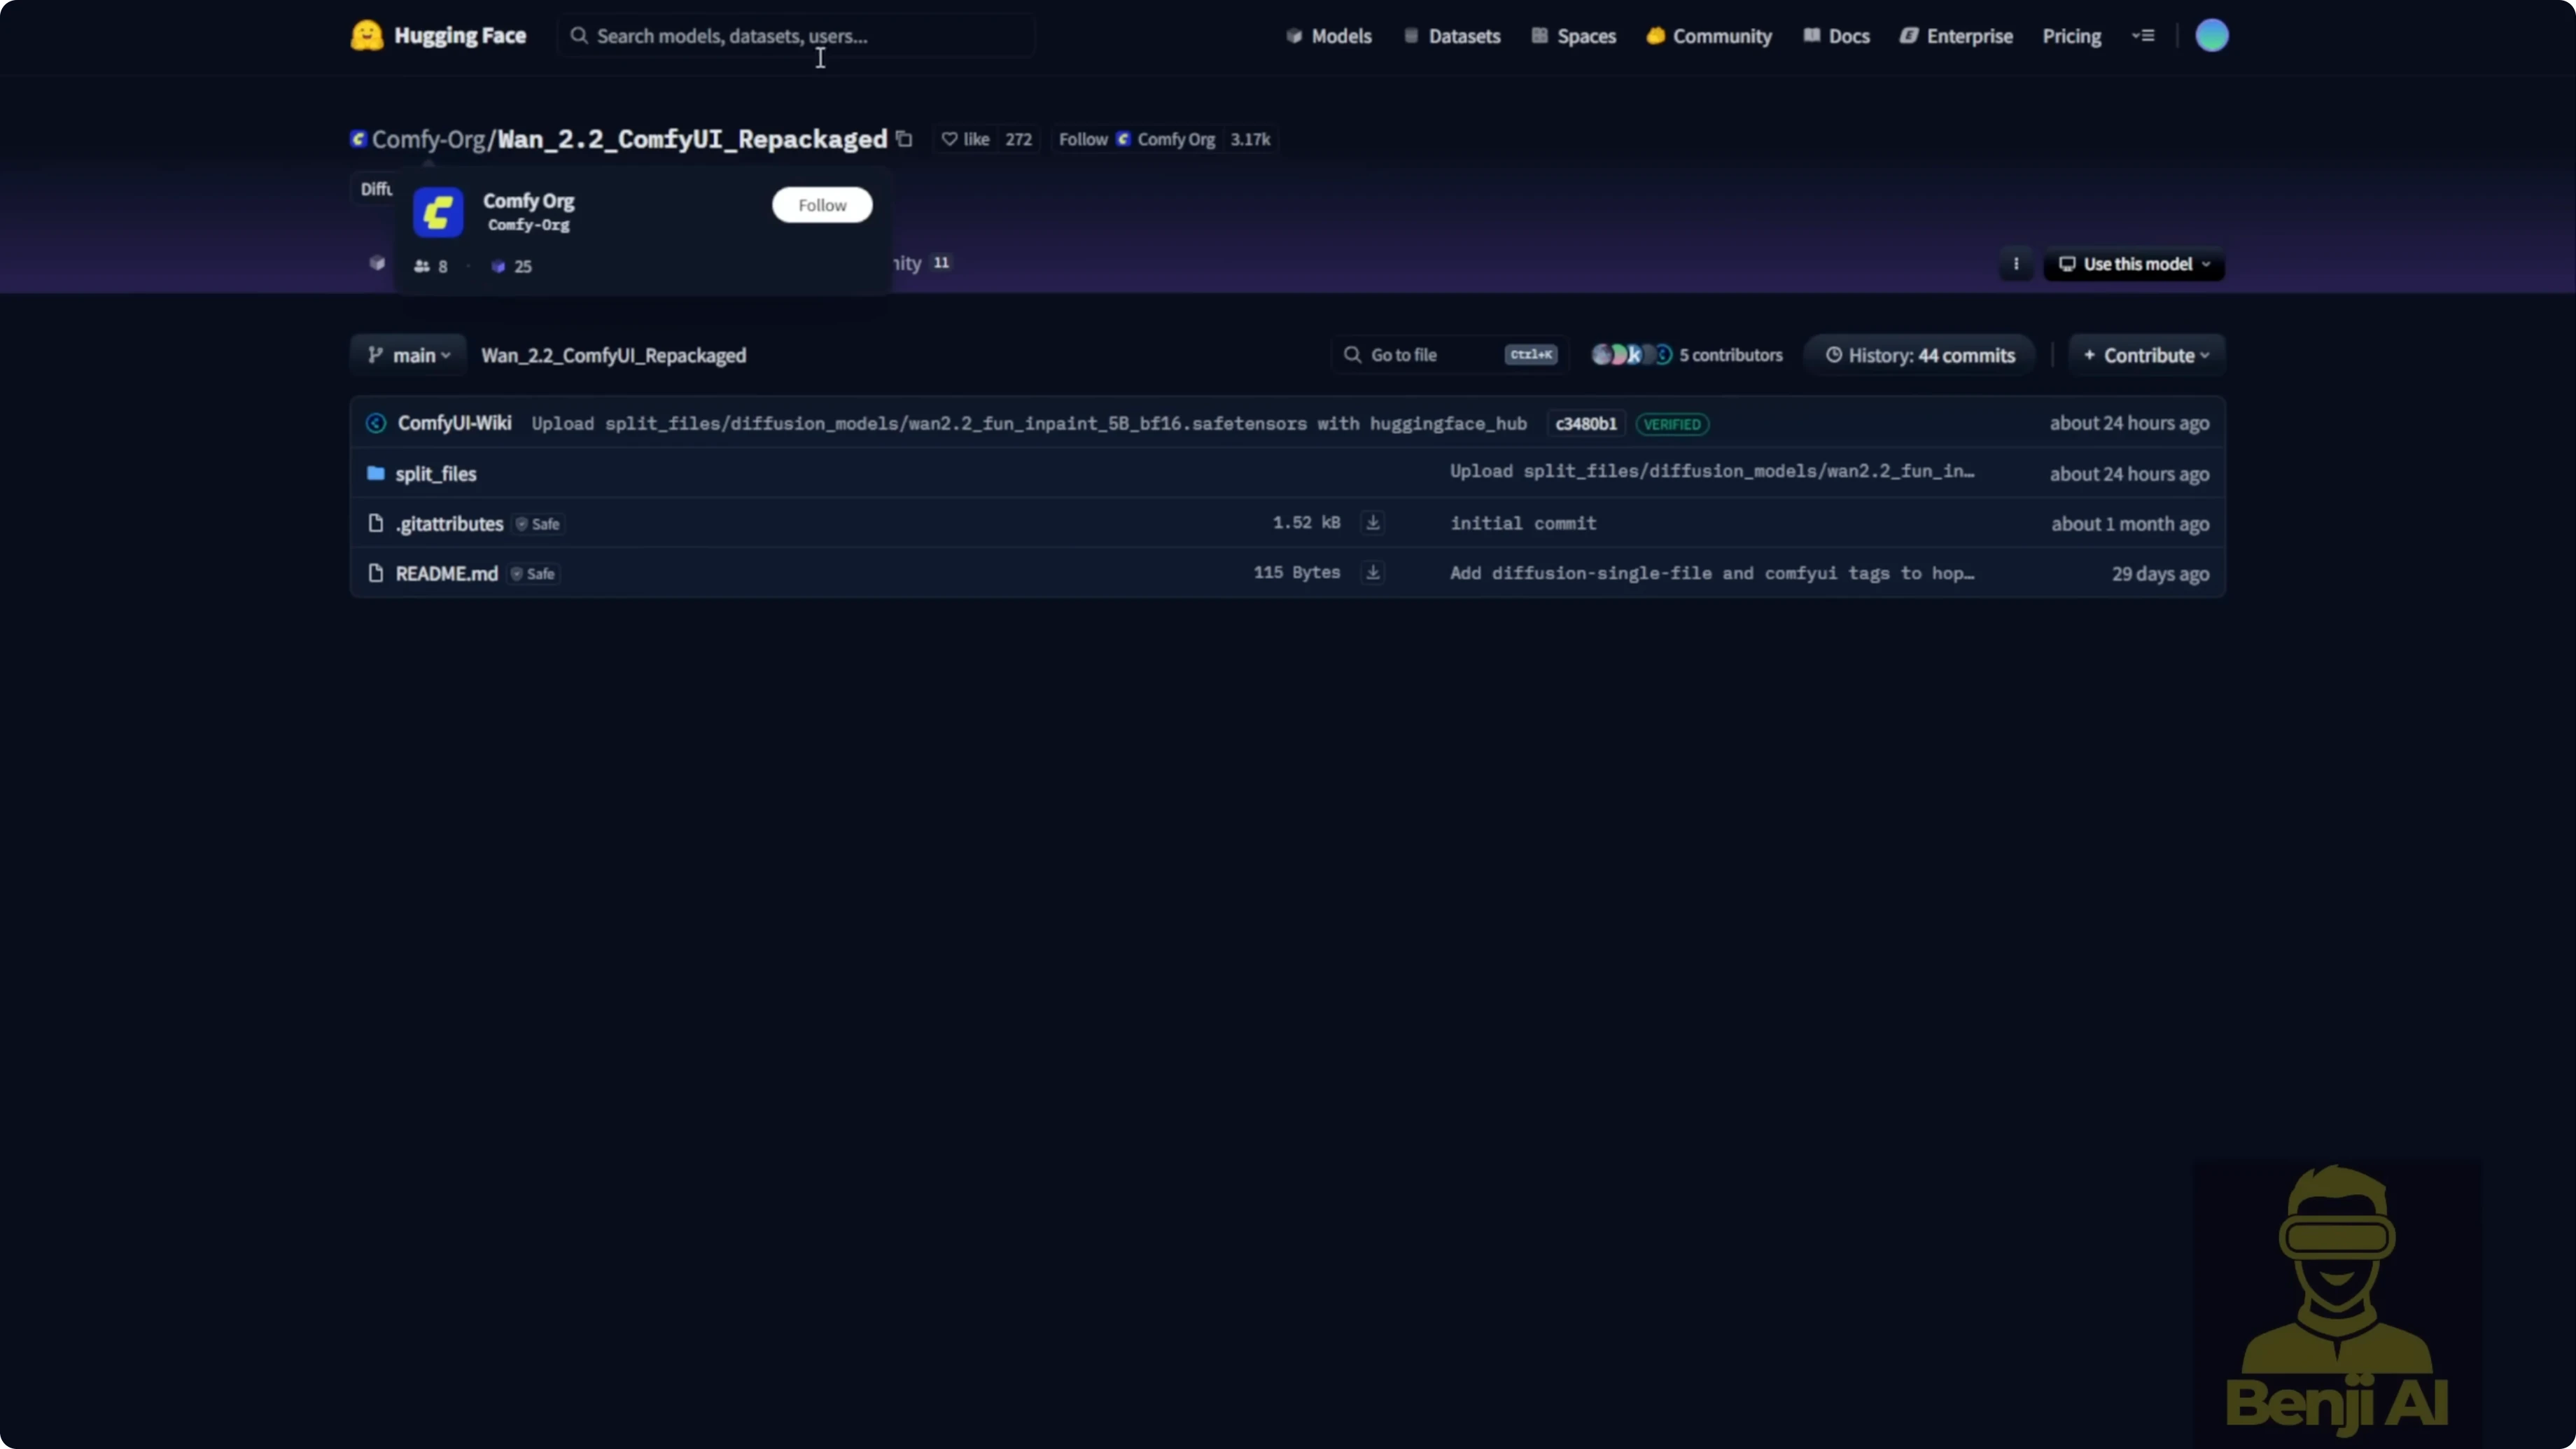
- The ComfyUI Wan 2.2 video model package includes the VAE, text encoder, diffusion model, and required LORAs like the Light X2V.
- On low VRAM, use GGUF quantized variants of the Wan 2.2 Img2Vid model. Q2 to Q8 options are available.
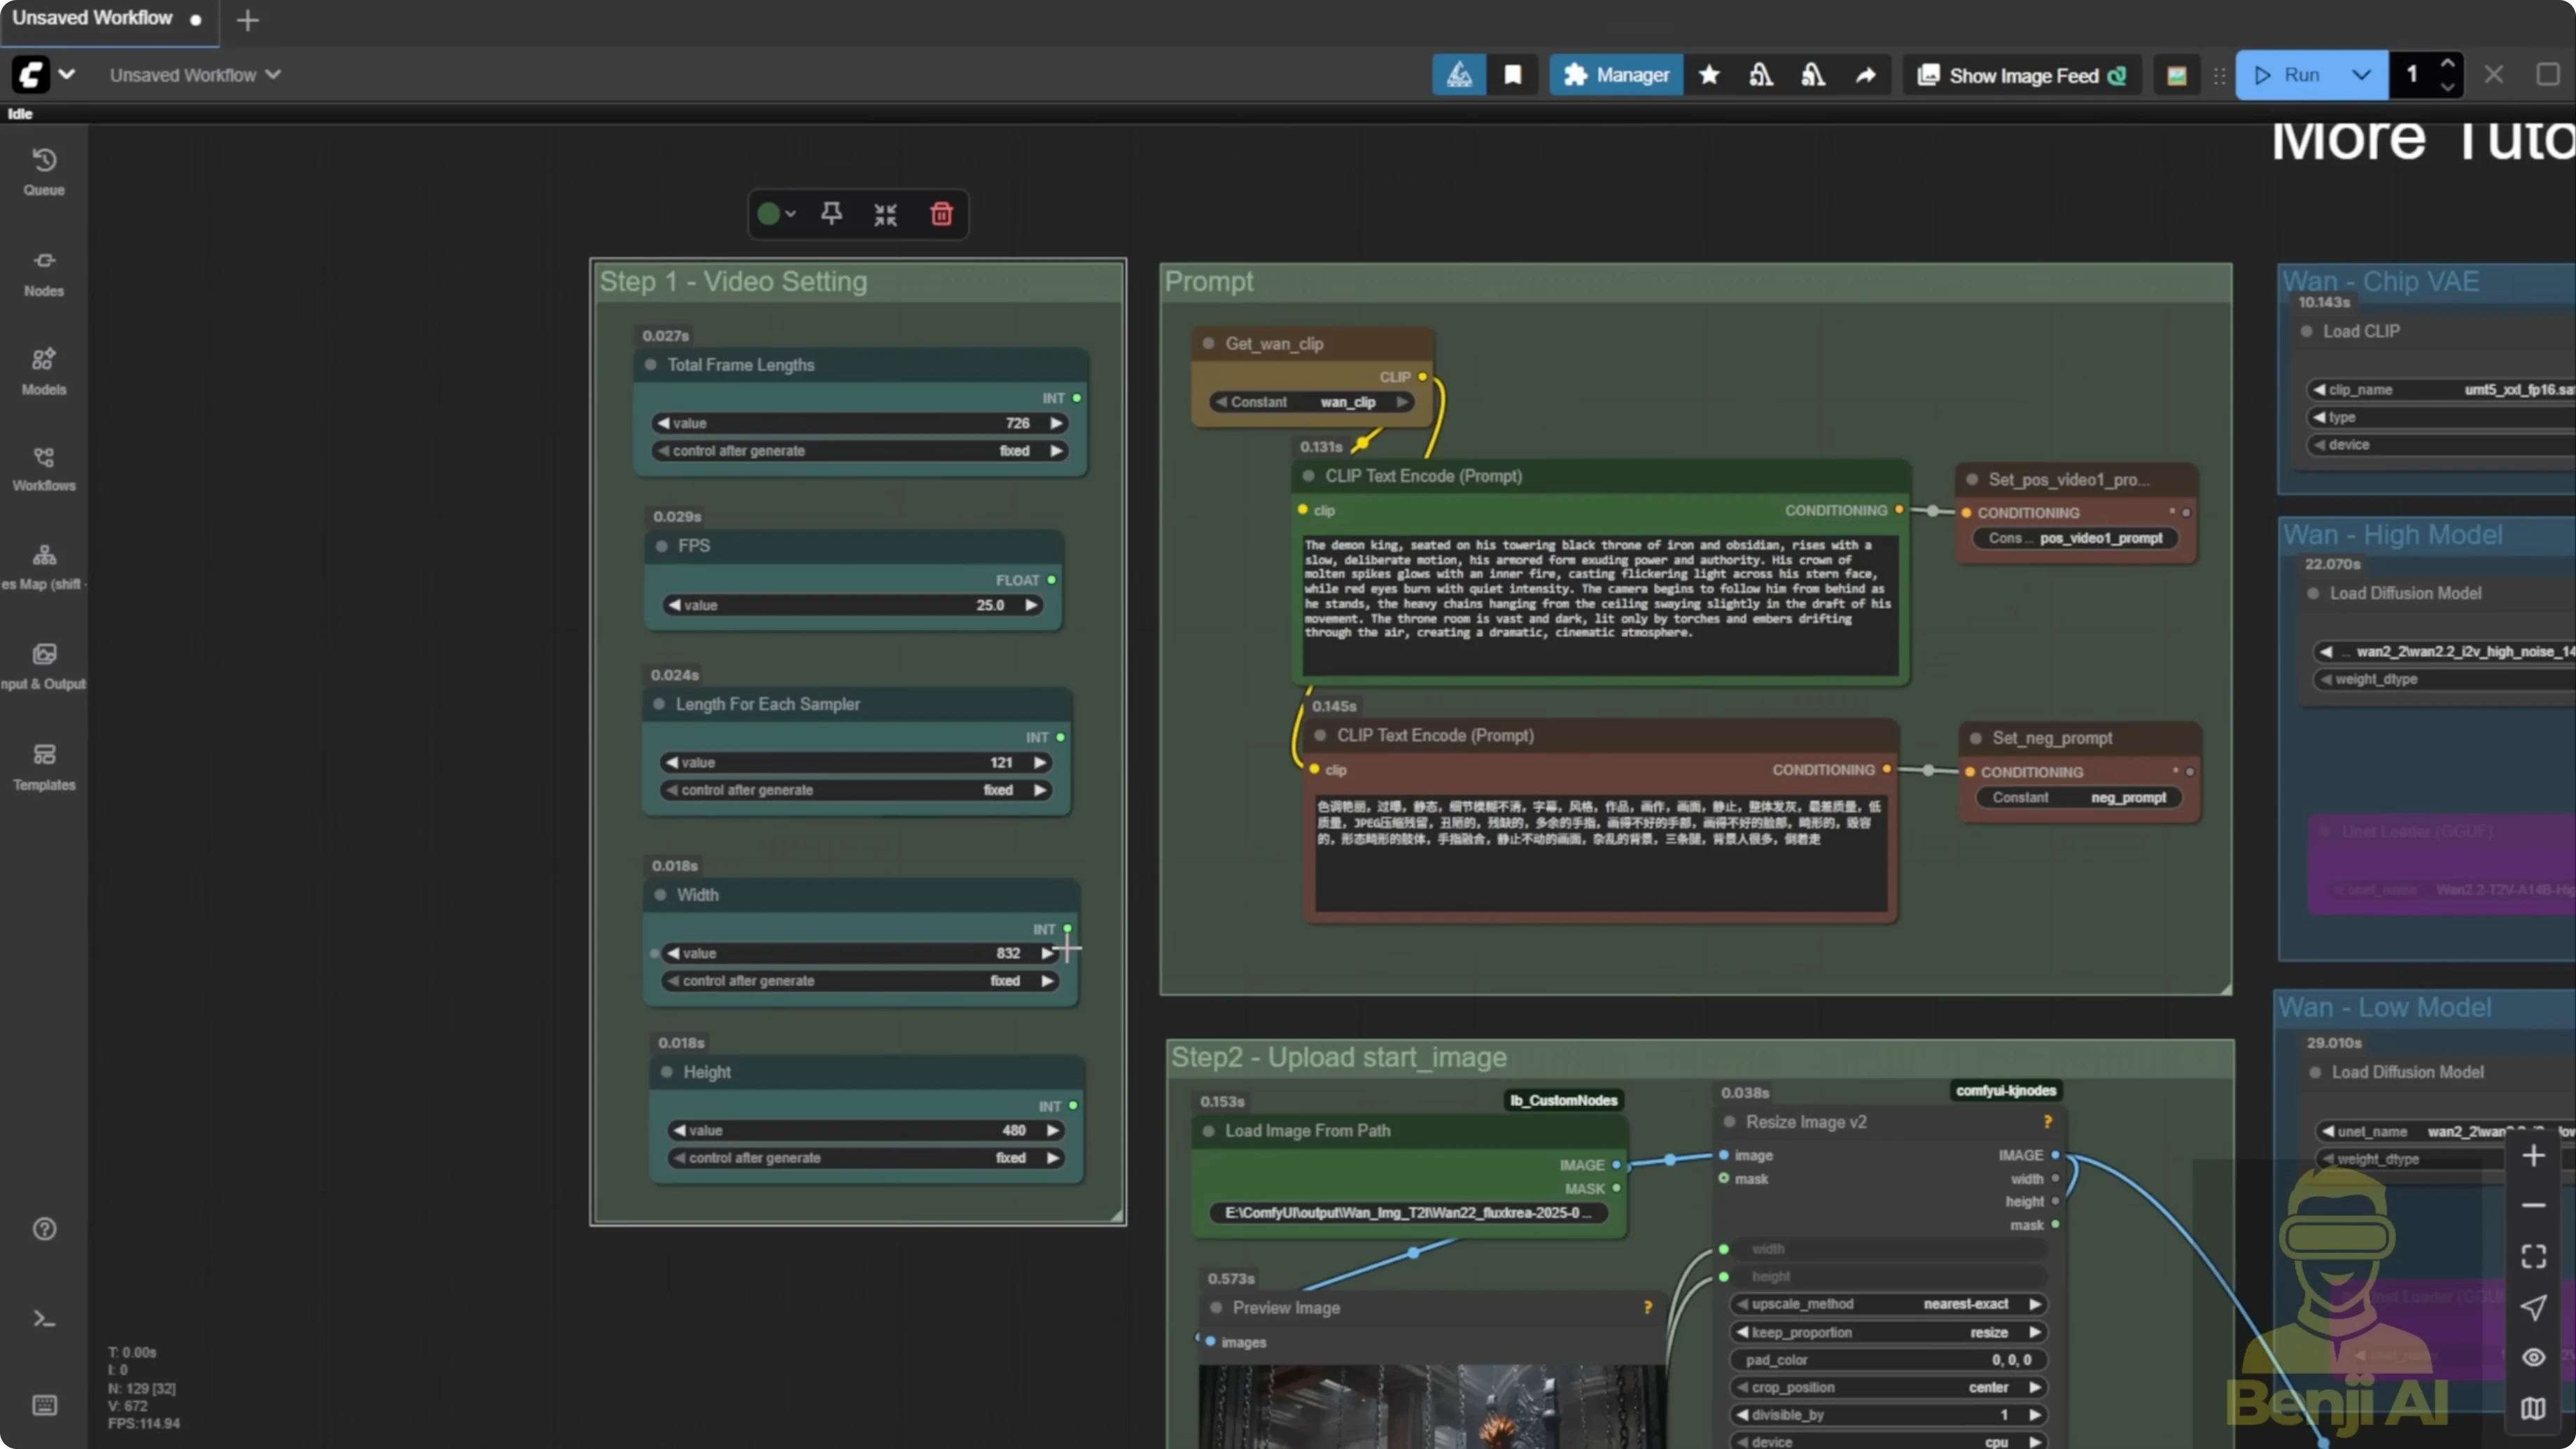
Configure core video settings
Frame math and FPS
- Total frames determine the final duration. For example, I targeted about 28 seconds and set total frames to 726. At 25 fps, 726 divided by 25 gives roughly 29 seconds.
- Length per sampler is 121 or 129 frames for each segment. This is a standard range for Img2Vid or Text2Vid with K-Sampler.
- You can run higher fps than 16. I often set 25 fps and sometimes 30. I’ll double the fps with interpolation at the end.
Resolution and memory reality check
- Set width and height based on hardware. Long videos consume both VRAM and system RAM as segments stack up.
- On an average up-to-date consumer PC, 480p is doable. With stronger hardware, 720p is fine.
- Be realistic about length and resolution to avoid out of memory errors as you push toward 30 to 60 seconds.
Set the initial frame and prompts
Step-by-step: Prepare the first segment
- Load the starting image. I use Load Image From Path to avoid duplicate uploads in ComfyUI input folders.
- Resize the image to match Wan 2.2’s expected dimensions.
- Set the first positive prompt. This defines the first segment’s action. Example: demon king sitting in his kingdom, then standing up.
- Set the negative prompt. A standard template works fine.
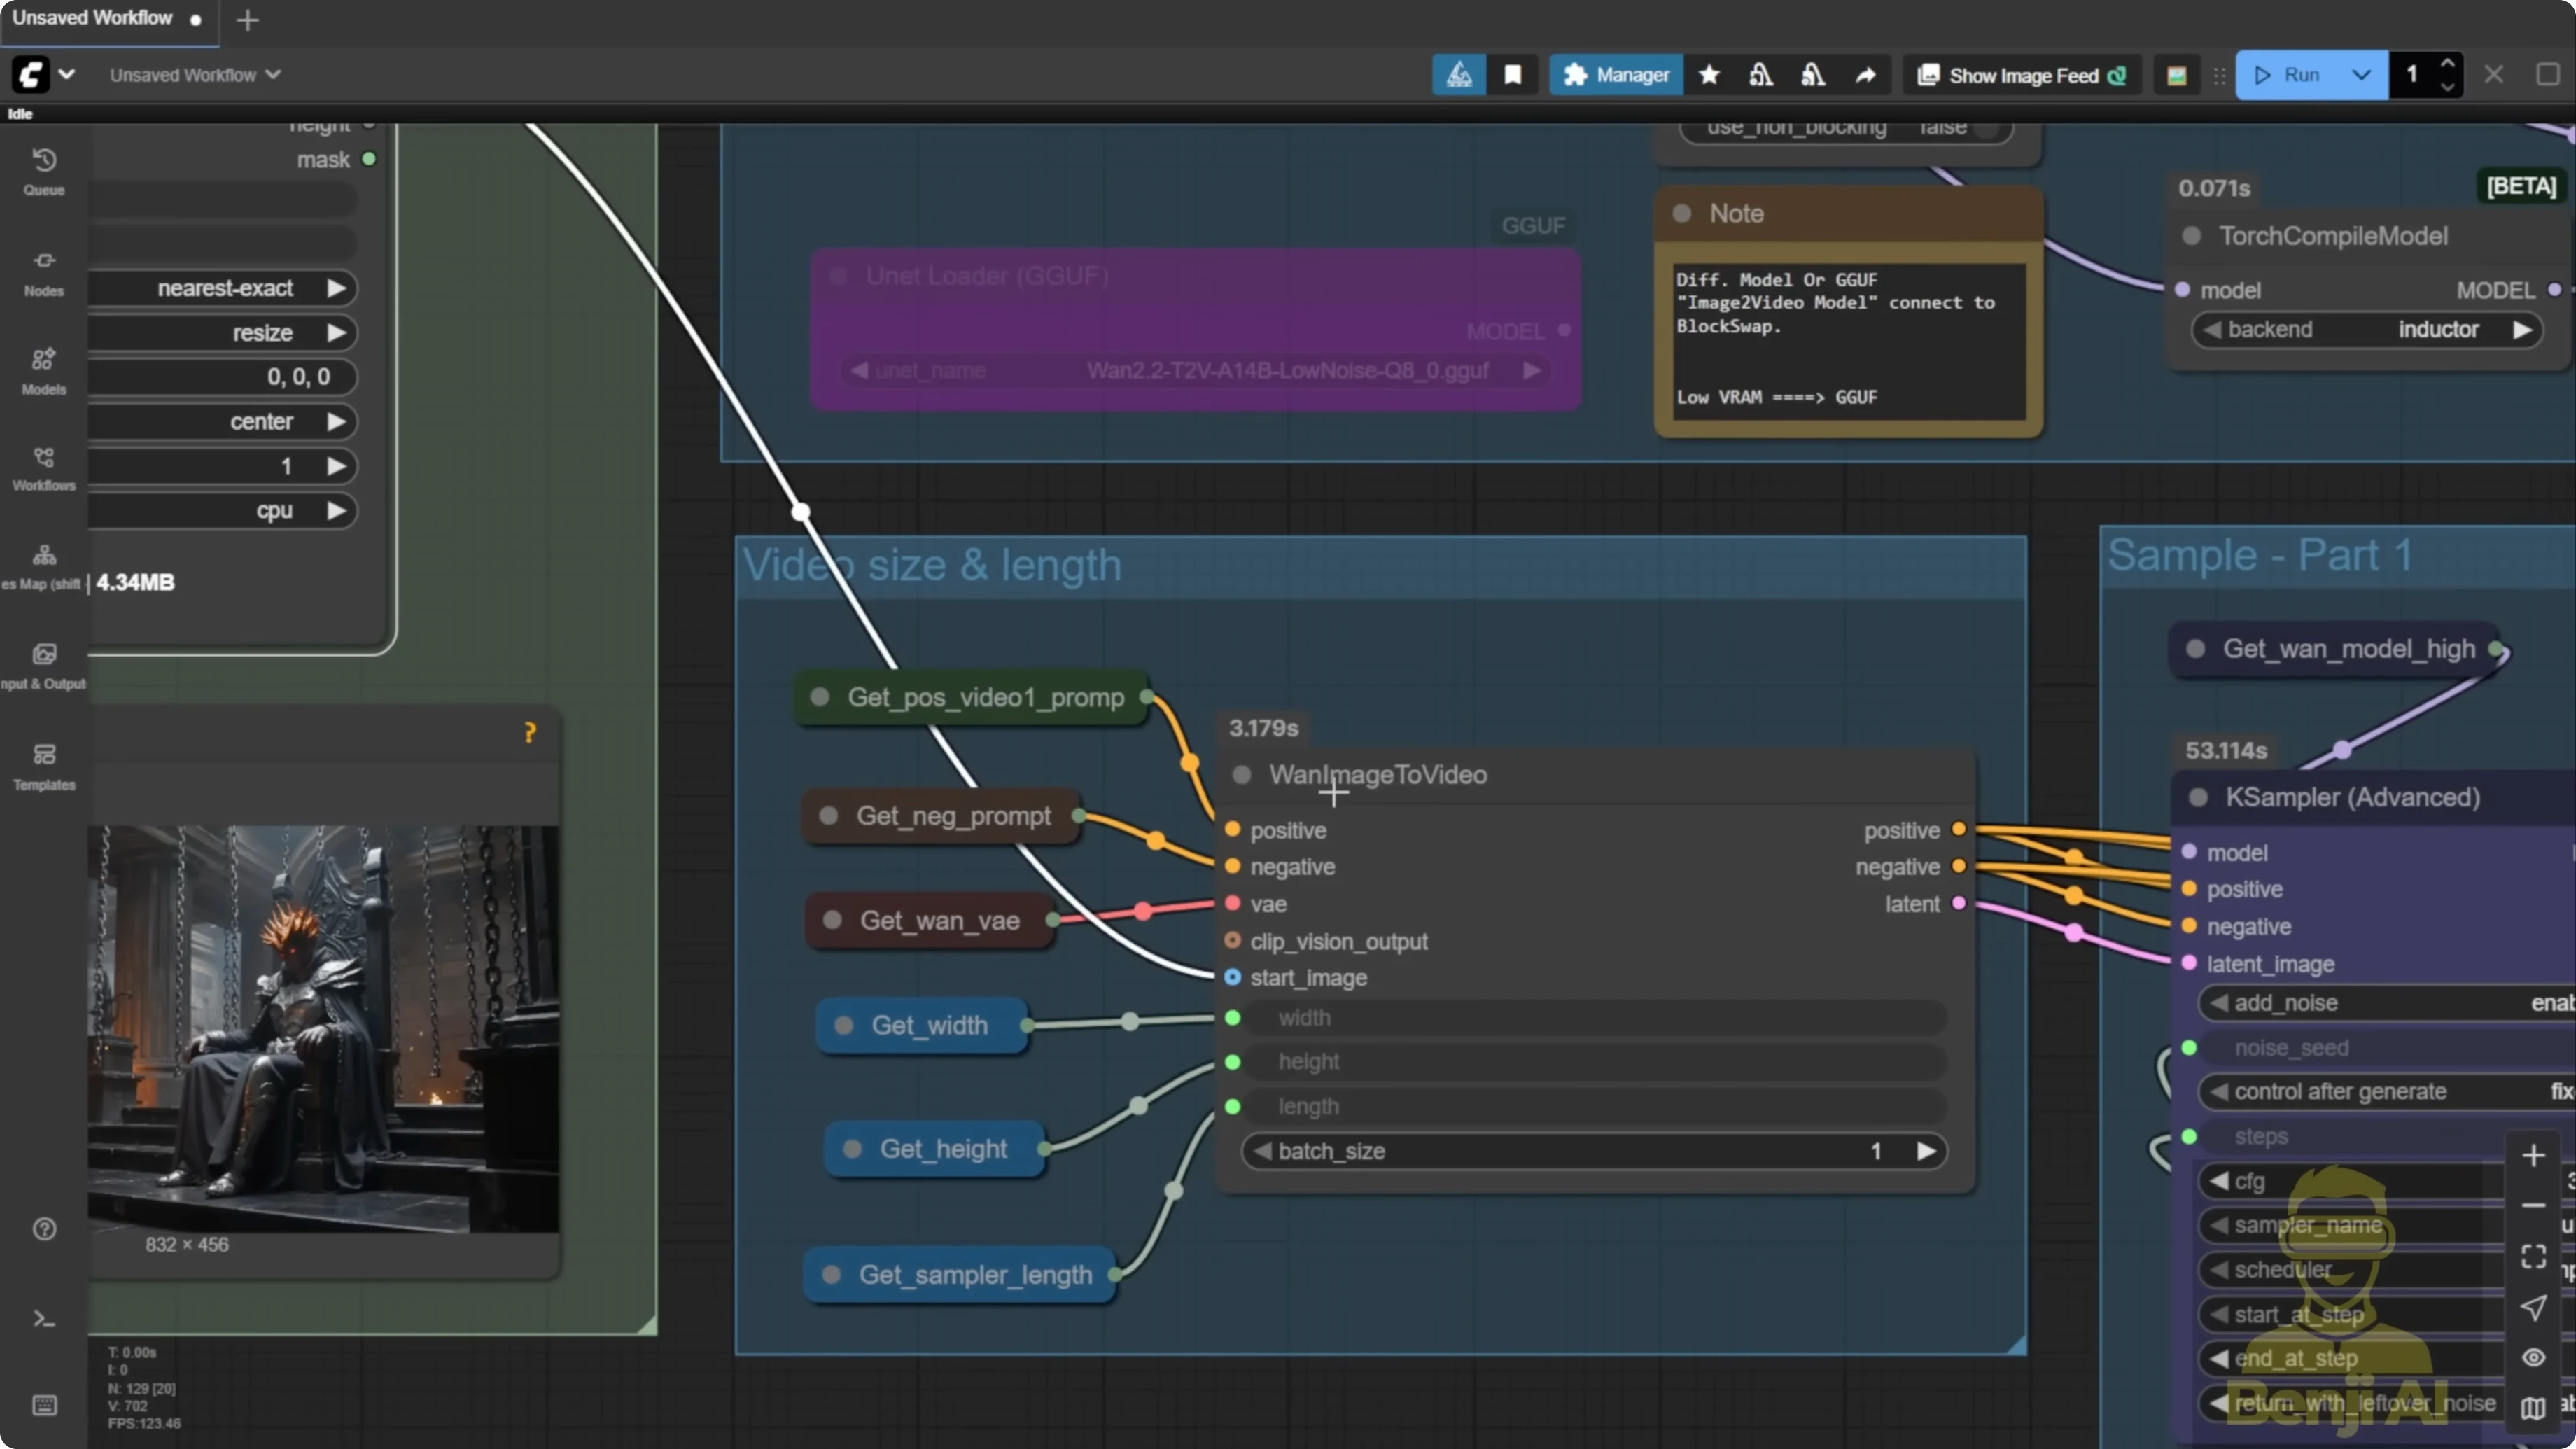
- Configure Img2Vid conditioning. Set width, height, and the number of frames per segment to match your sampler length.
- Use the native Img2Vid node. Looping works better with the native node than wrappers.
Model and sampling method
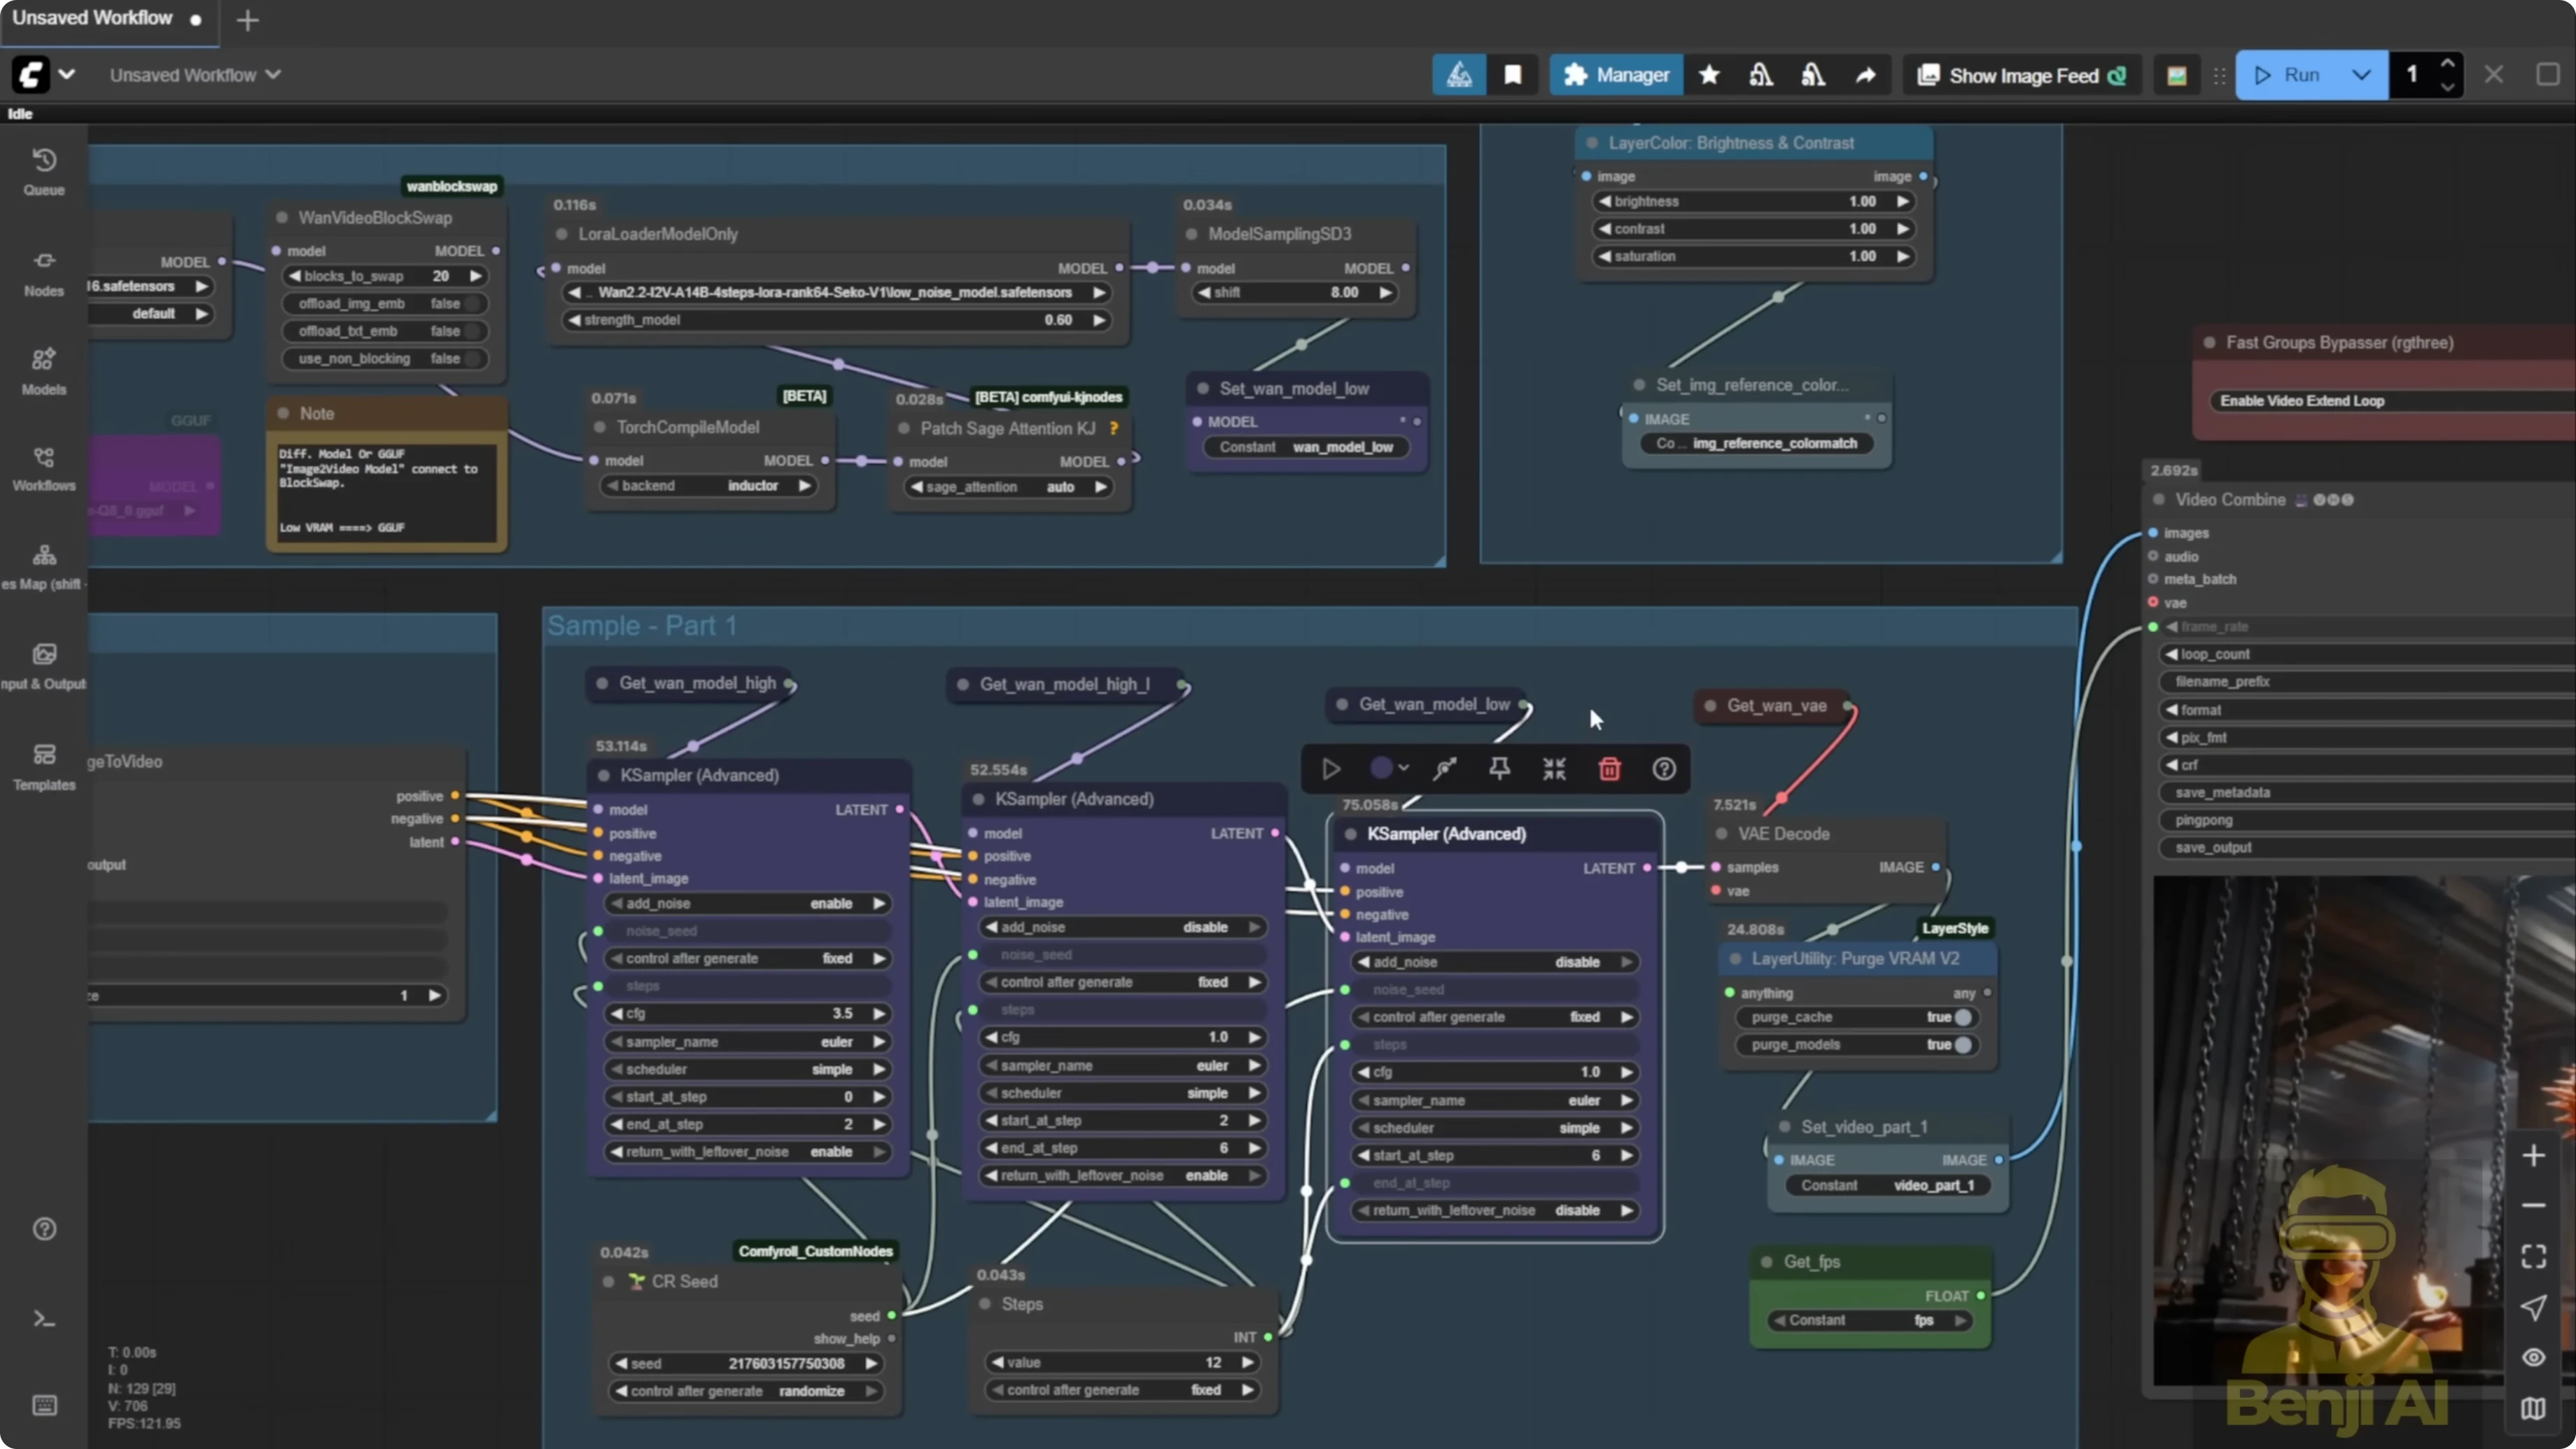
Three-sampler approach
I’m using a three-sampler setup for better prompt adherence and motion:
- High-noise model.
- High-noise model with Light X2V LORA attached.
- Low-noise model to refine into clean, high-quality frames.
Precision and variants
- I run FP16 for Wan 2.2 Img2Vid high-noise. If VRAM is tight, try FP8 or GGUF quantized models.
- I’m using safetensors for Img2Vid. I only have the Text2Vid GGUF downloaded right now.
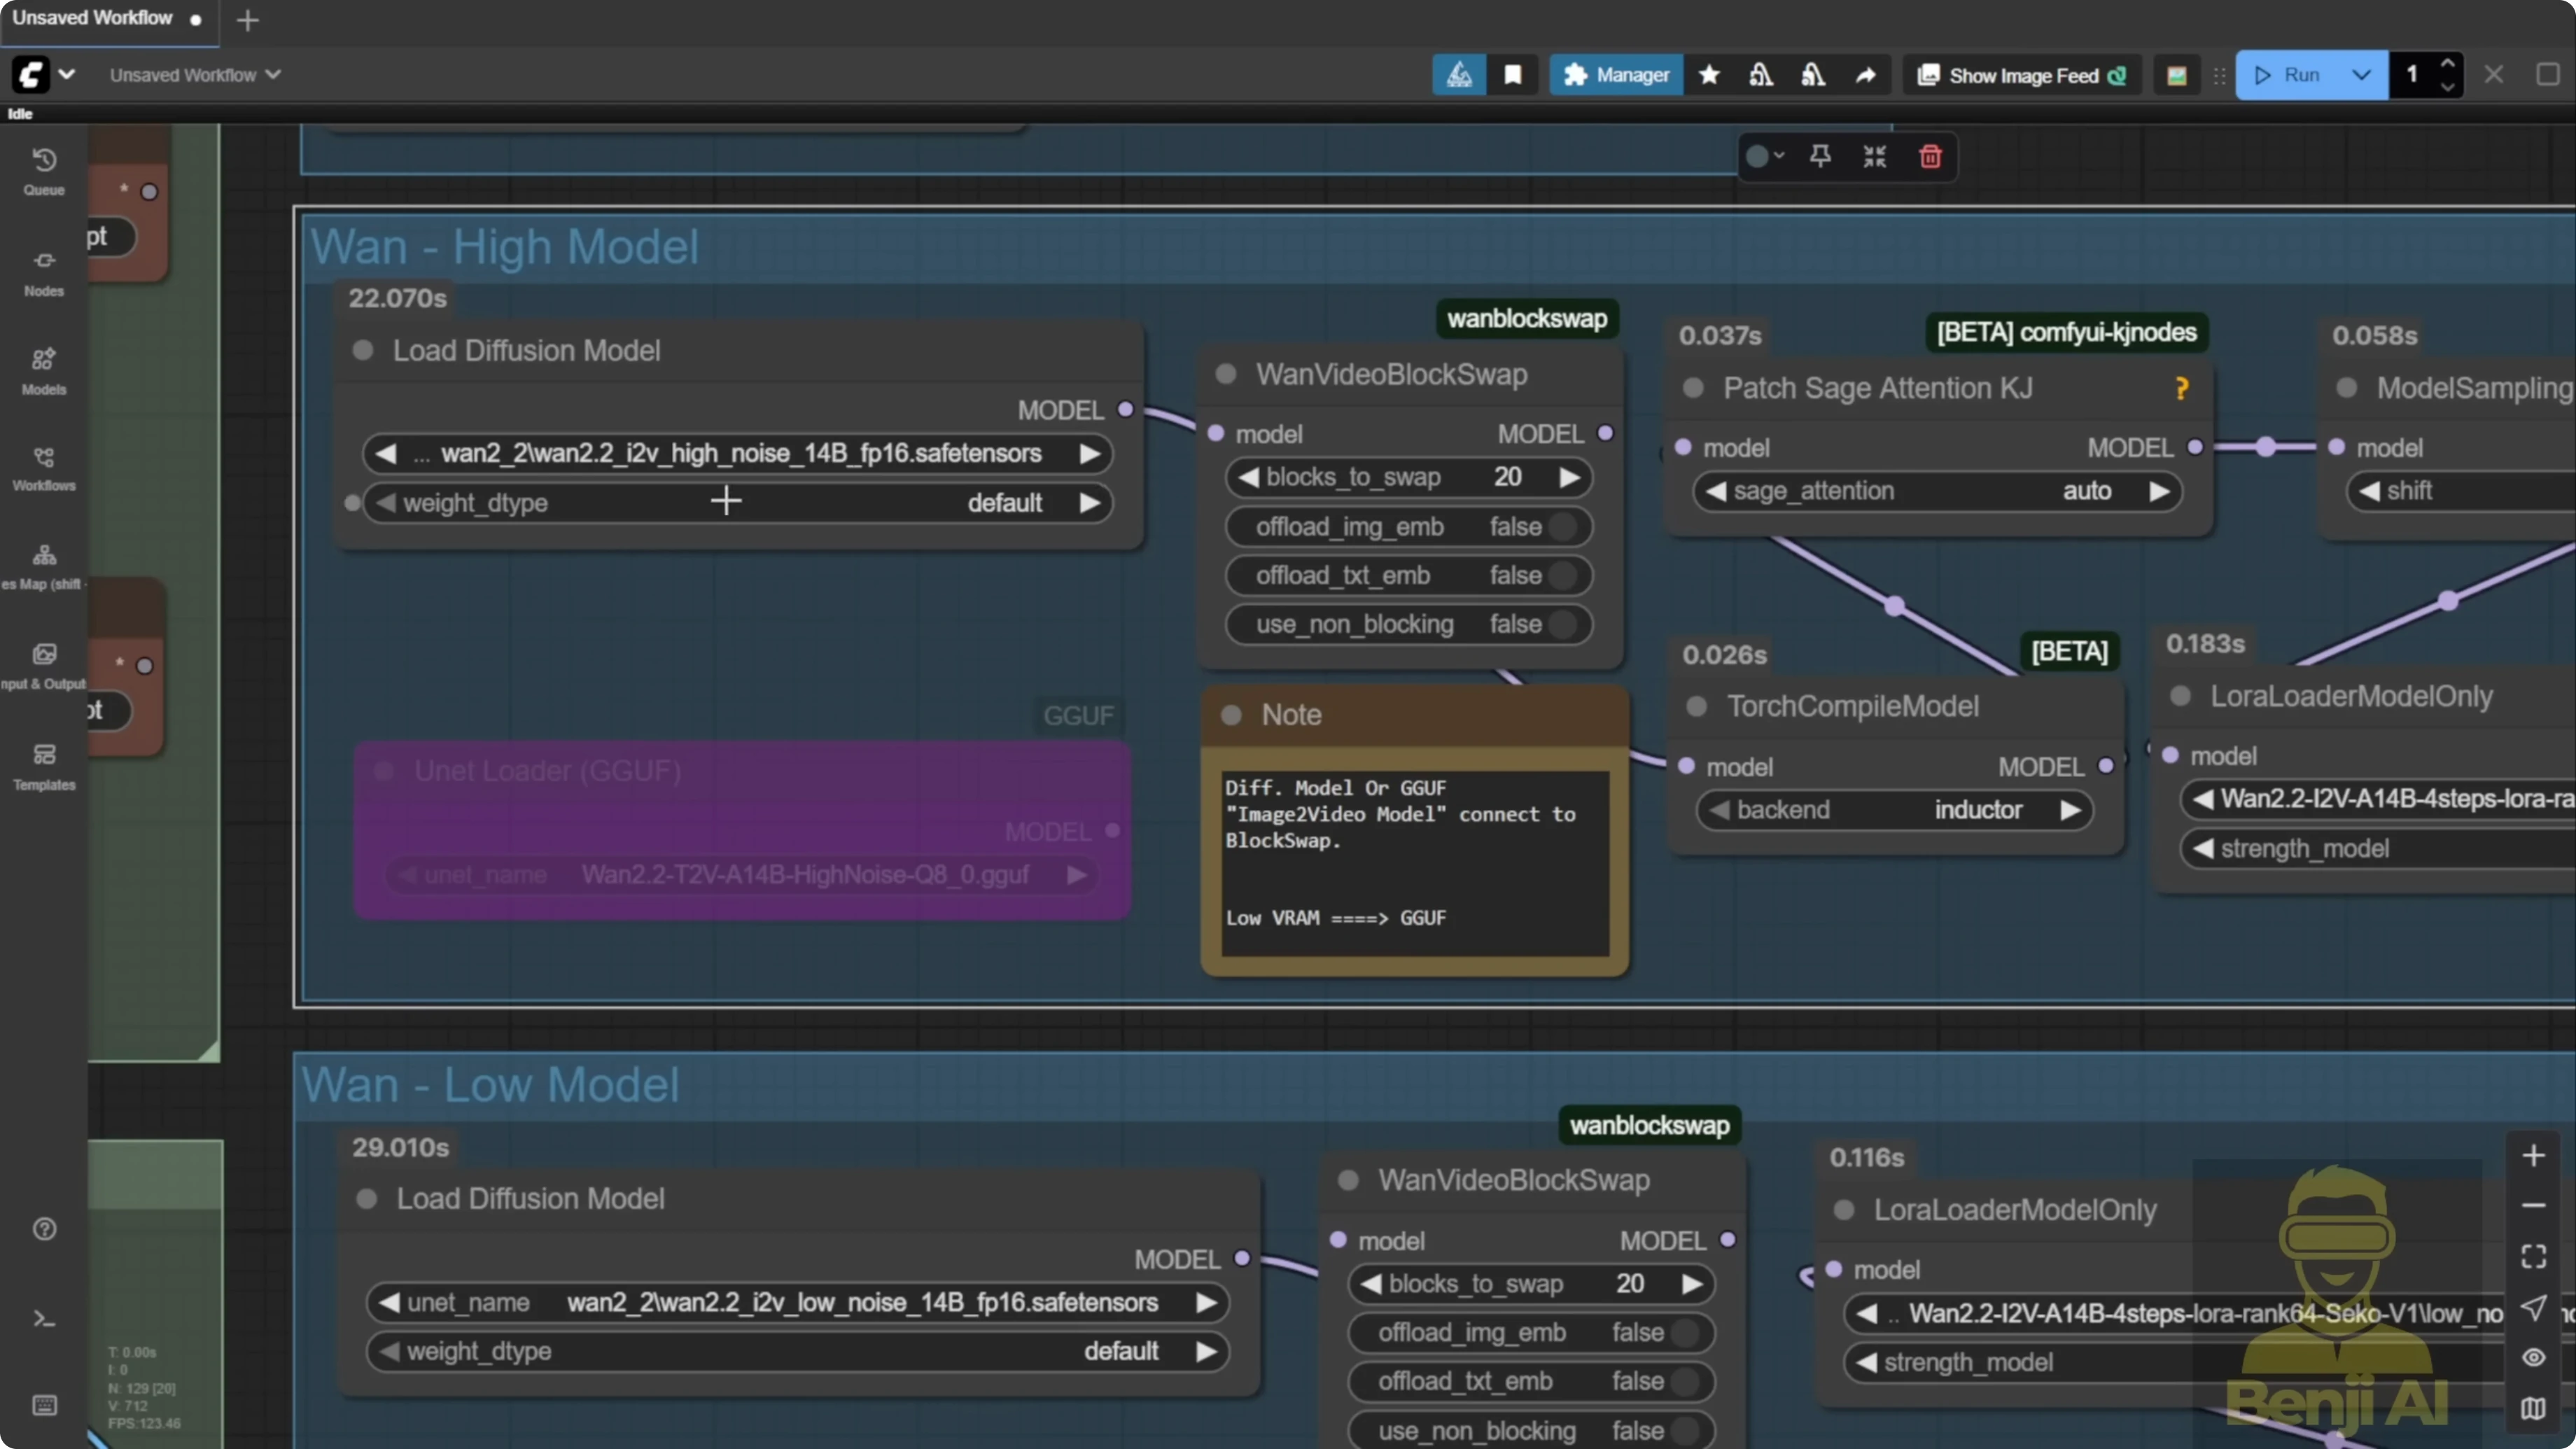
Dependencies that matter
- Torch compile requires the Visual Studio C++ libraries installed.
- For Sage Attention, make sure your Triton, CUDA, PyTorch, and Python versions align with your ComfyUI setup, then install via pip.
Keep colors consistent across long videos
Step-by-step: Color reference
- Generate the first 5-second segment.
- Capture the last frame of that segment as a color reference.
- Reuse this reference during all extensions to keep tones consistent across the entire video. This helps if the Light X2V LORA introduces slight shifts.
Looping mechanism for long-length generation
Why loops instead of chained groups
- Loops are dynamic and scalable. You’re not locked into four fixed groups for a 20-second clip.
- The same image-to-video samplers run repeatedly, segment by segment.
Step-by-step: Configure the loop
- Enable the loop. I keep the loop enabled with a fan switch bypass so video extension runs automatically.
- Use loop begin and loop end nodes. This is how the whole generation cycles through segments.
- Change math from round to ceil. Using ceil avoids missing the last few frames when your loop count is fractional.
- Check loop counters. The number of extend loops shows how many segments are needed. The current loop shows the iteration index. The final pass outputs the complete video.
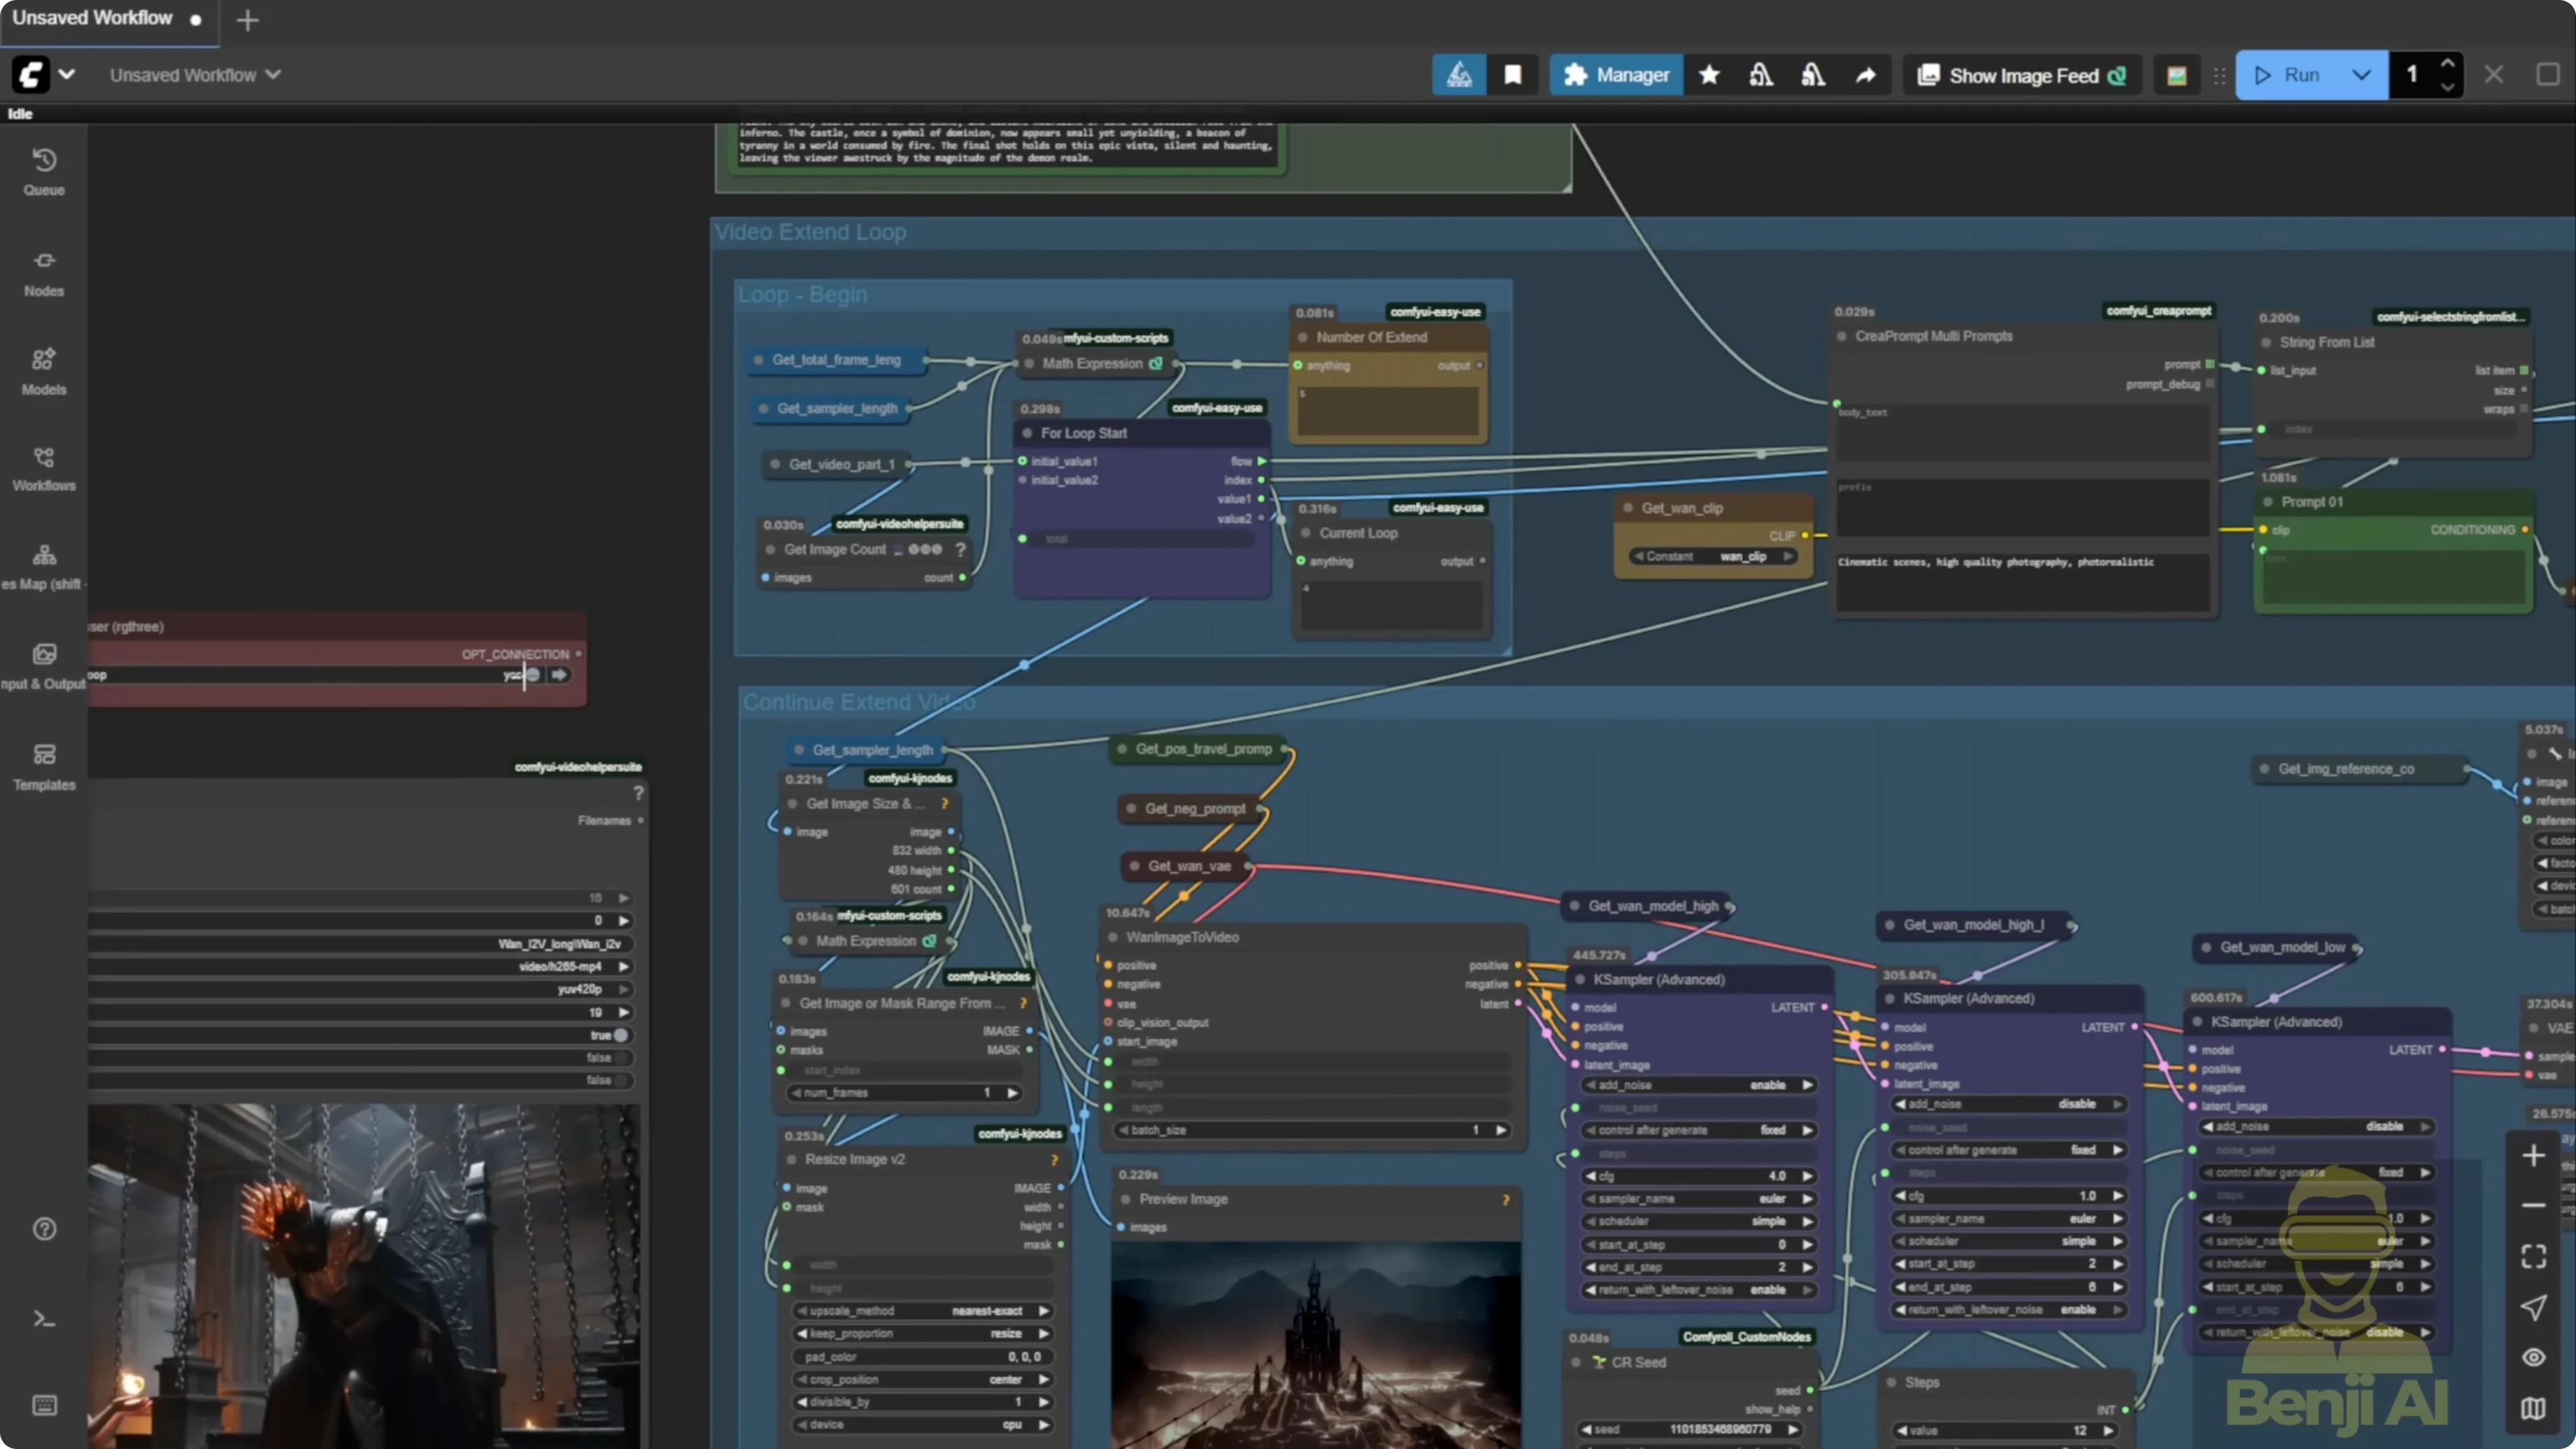
Evolving prompts across segments
Step-by-step: Travel prompts with a string list
- Create a text box with one prompt per line. Each new line is a prompt for the next loop.
- Match counts. If you plan five loops, write five prompts on separate lines.
- Let the string list split on newline. Each loop pulls the prompt that corresponds to its index, so story beats sync to the timeline.
Output strategy and stitching
No overlap frames needed with Img2Vid
- The native node doesn’t support overlap frames like the old Wan 2.1 approach that used start-to-end frame ranges.
- I use the last frame of each segment as the start for the next, remove the duplicate, and stitch the segments. This still looks smooth in practice.
Step-by-step: Stitch without choppiness
- Start each new segment from the previous segment’s last frame.
- Remove the duplicate frame at the junction.
- Stitch segments in order. The transitions stay clean across 5, 10, 15-second marks and beyond.
Frame interpolation to double fps

Step-by-step: Interpolate for extra smooth motion
- Generate at a base of 25 or 30 fps.
- Interpolate the final video to 50 or 60 fps.
- Compare results. Camera moves and character motion look noticeably smoother after interpolation.
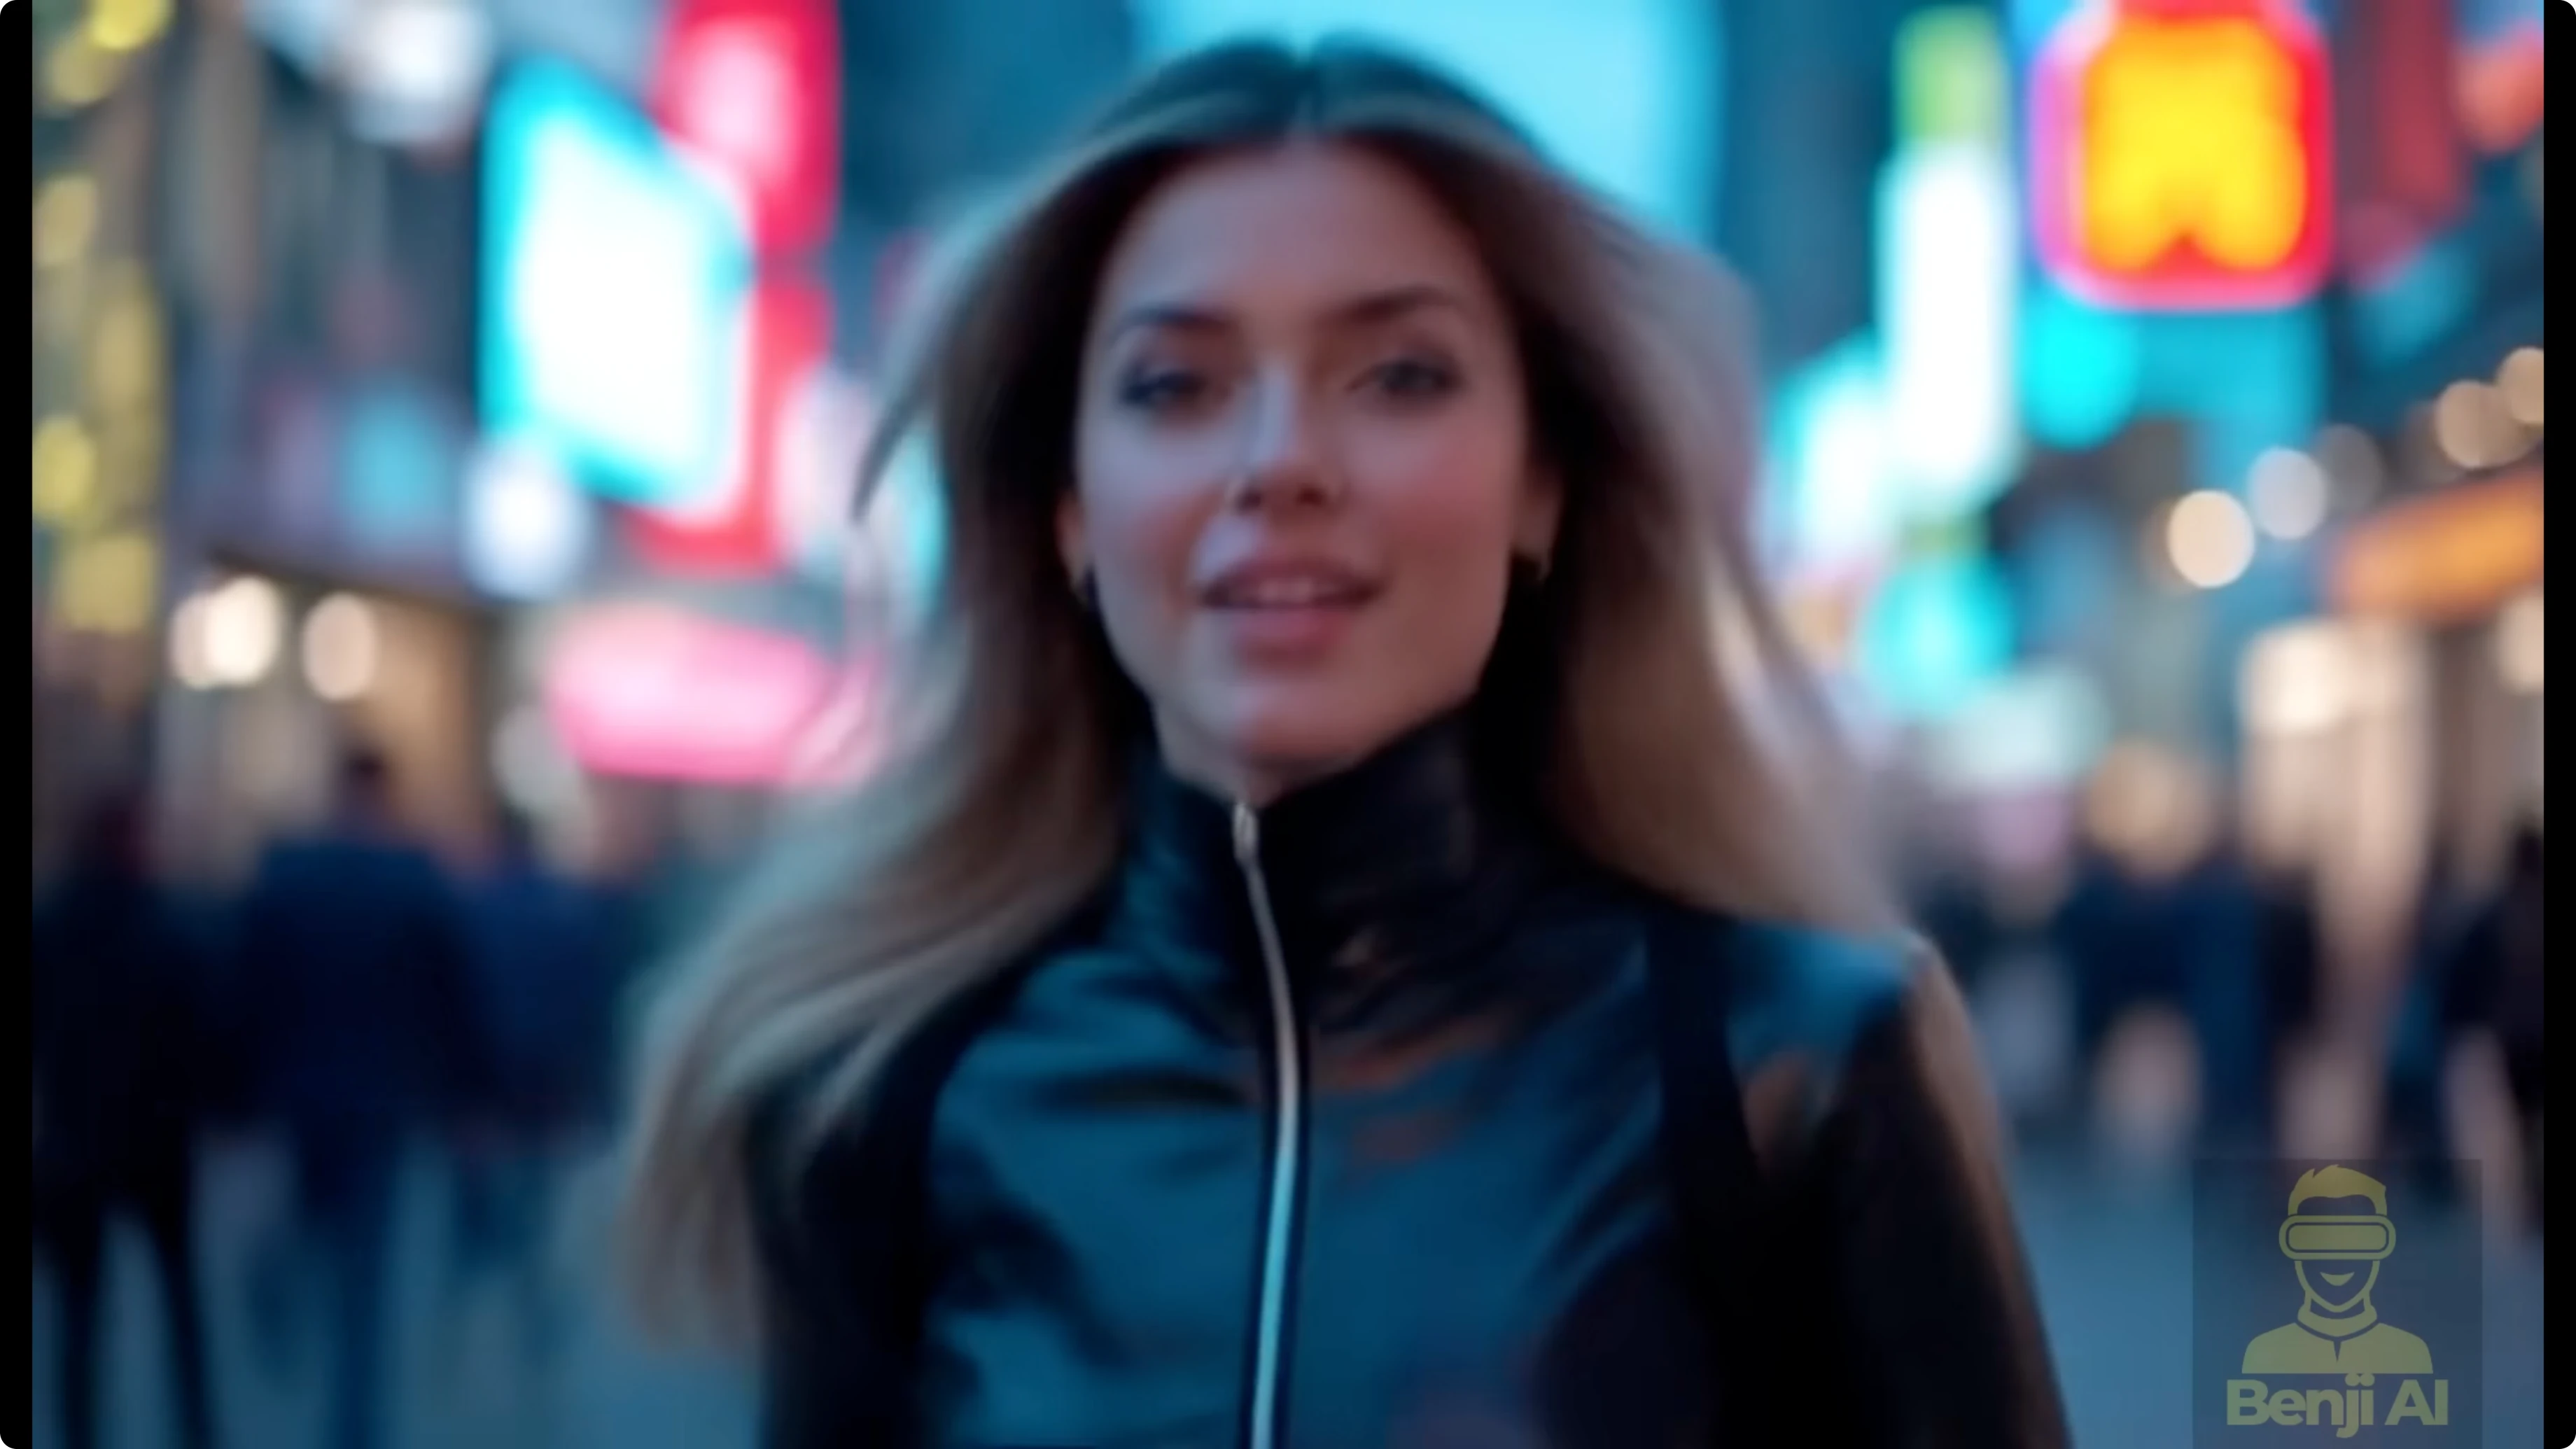
Example outcomes
- In a cyberpunk city scene with a sports car, the car drifts into a corner, a drone rises, switches to first person, flies, lands, and enters a tunnel without jarring transitions.
- I also tested a clip that starts slow with a young lady looking confused, then an explosion behind her, a fast camera zoom, and mixed speed changes in one clip. Wan 2.2 handled it well, with better motion quality than 2.1.
Performance notes
- Three-sampler setup times on a 5-second clip:
- First two steps on high-noise models: about 35 seconds.
- Next four steps on high-noise models: about 37 seconds.
- Low-noise model: six steps total, still under a minute.
Step-by-step quick start guide
- Load the Wan 2.2 Img2Vid models. Include the VAE, text encoder, diffusion model, and Light X2V LORA. Choose GGUF quantized models if VRAM is limited.
- Set total frames. Calculate duration by dividing total frames by fps.
- Set fps. Use 25 or 30 if you plan to interpolate to 50 or 60 later.
- Choose resolution. Match width and height to your hardware limits to avoid memory errors on long runs.
- Prepare your starting image. Load from path and resize to the expected dimensions.
- Write the first positive prompt and a standard negative prompt. This defines the initial action and look.
- Configure Img2Vid conditioning. Set width, height, and frames per segment equal to your sampler length.
- Select the native Img2Vid node. It plays nicer with the looping approach.
- Configure the three samplers. High noise, high noise with Light X2V LORA, and low noise for refinement.
- Set precision and dependencies. Use FP16 if possible. Install Visual Studio C++ for torch compile. Align Triton, CUDA, PyTorch, and Python, then pip install Sage Attention.
- Generate the first segment. Aim for about 5 seconds with a sampler length around 121 to 129 frames.
- Capture the last frame as a color reference. Keep this for all later extensions.
- Enable the loop. Use the fan switch bypass to activate looping with loop begin and loop end nodes.
- Use ceil in loop math. Prevent truncating the final segment by rounding up the loop count.
- Create travel prompts. Enter one prompt per line in a text box and ensure the number of lines equals the loop count.
- Extend segment by segment. Start each new segment from the last frame of the previous one, remove the duplicate, and continue.
- Stitch the segments. Verify transitions are clean across all junctions.
- Interpolate the final video. Double 25 to 50 fps or 30 to 60 fps for smoother motion.
Final Thoughts
Looping with Wan 2.2 Img2Vid makes long videos practical, consistent, and flexible. Prompts evolve across segments, color stays stable with a single reference, and clean stitching avoids choppy joins. I prefer this over chained sampler groups because it scales to any length without hard coding. Experiment with fps, resolution, and the three-sampler setup, and extend videos as long as your hardware allows.
Recent Posts
How Wan 2.2 AI Boosts Video with 14B Generation & 5B Upscaling?
How Wan 2.2 AI Boosts Video with 14B Generation & 5B Upscaling?
Can Wan 2.2 Img2Vid Handle Long-Length Video Testing?
Can Wan 2.2 Img2Vid Handle Long-Length Video Testing?
Exploring Wan 2.2’s Final Frame and Local AI Video Highlights
Exploring Wan 2.2’s Final Frame and Local AI Video Highlights