How to Animate Wan 2.2 in ComfyUI with WanVideoWrapper?
We can finally use WAN 2.2 Animate in Comfy UI. Right now, I’m focusing on all the different features of WAN 2.2 Animate, how to do everything they show off on the model’s website. Stuff like creating character animations, swapping out a human for an animated character, using different camera motions, and even replacing the character entirely. A lot of these features use the same types of inputs. There’s also consistent light and color tone replication, but that needs separate LORA model files to run.
Animate Wan 2.2 in ComfyUI with WanVideoWrapper?
If you’re already a Comfy UI user, you’ve probably downloaded the one video wrapper and maybe even played around with one video a bit. Make sure you grab the latest version that supports WAN 2.2 Animate. Once you’ve got the custom nodes downloaded and set up, make sure everything’s working. You should see a message when you start loading Comfy UI saying the custom node was imported successfully. If you see one video wrapper in that message, you’re good to go.
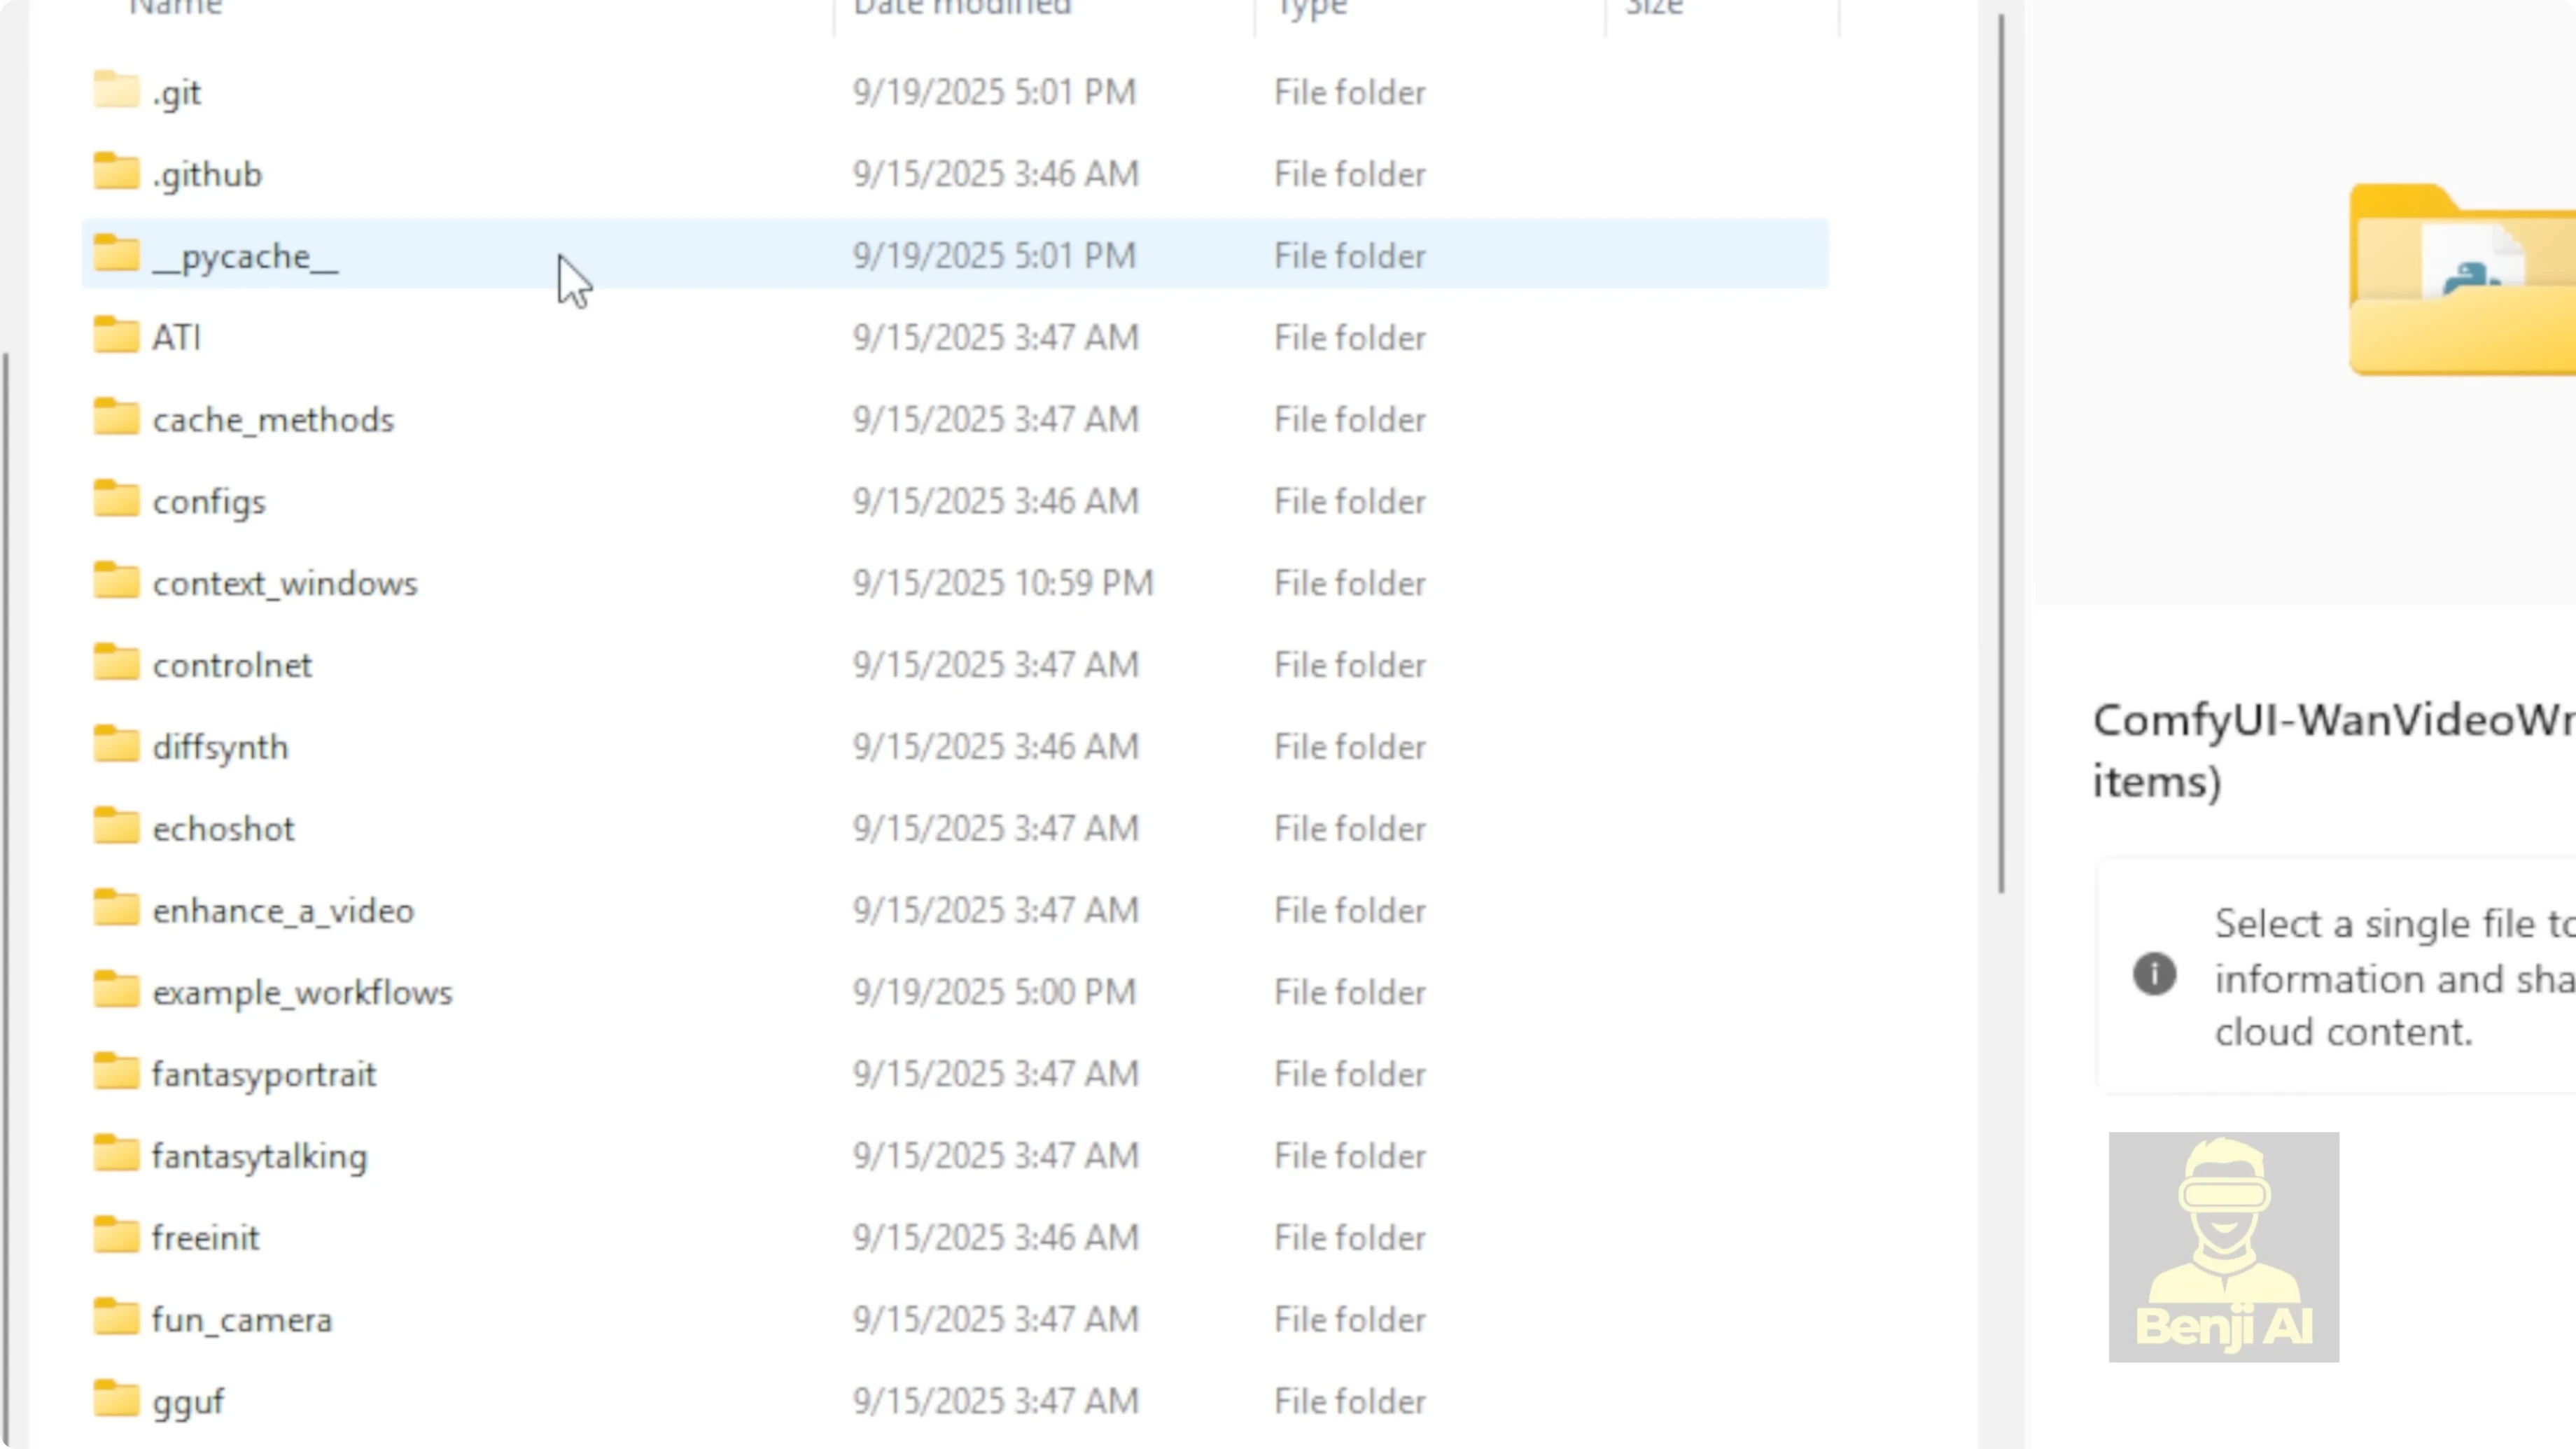
Install and update WanVideoWrapper for ComfyUI
- Download the latest one video wrapper that supports WAN 2.2 Animate.
- Pop that folder into your Comfy UI custom nodes folder.
- Run pip install -r requirements.txt to download all the Python dependencies so these custom nodes work properly.
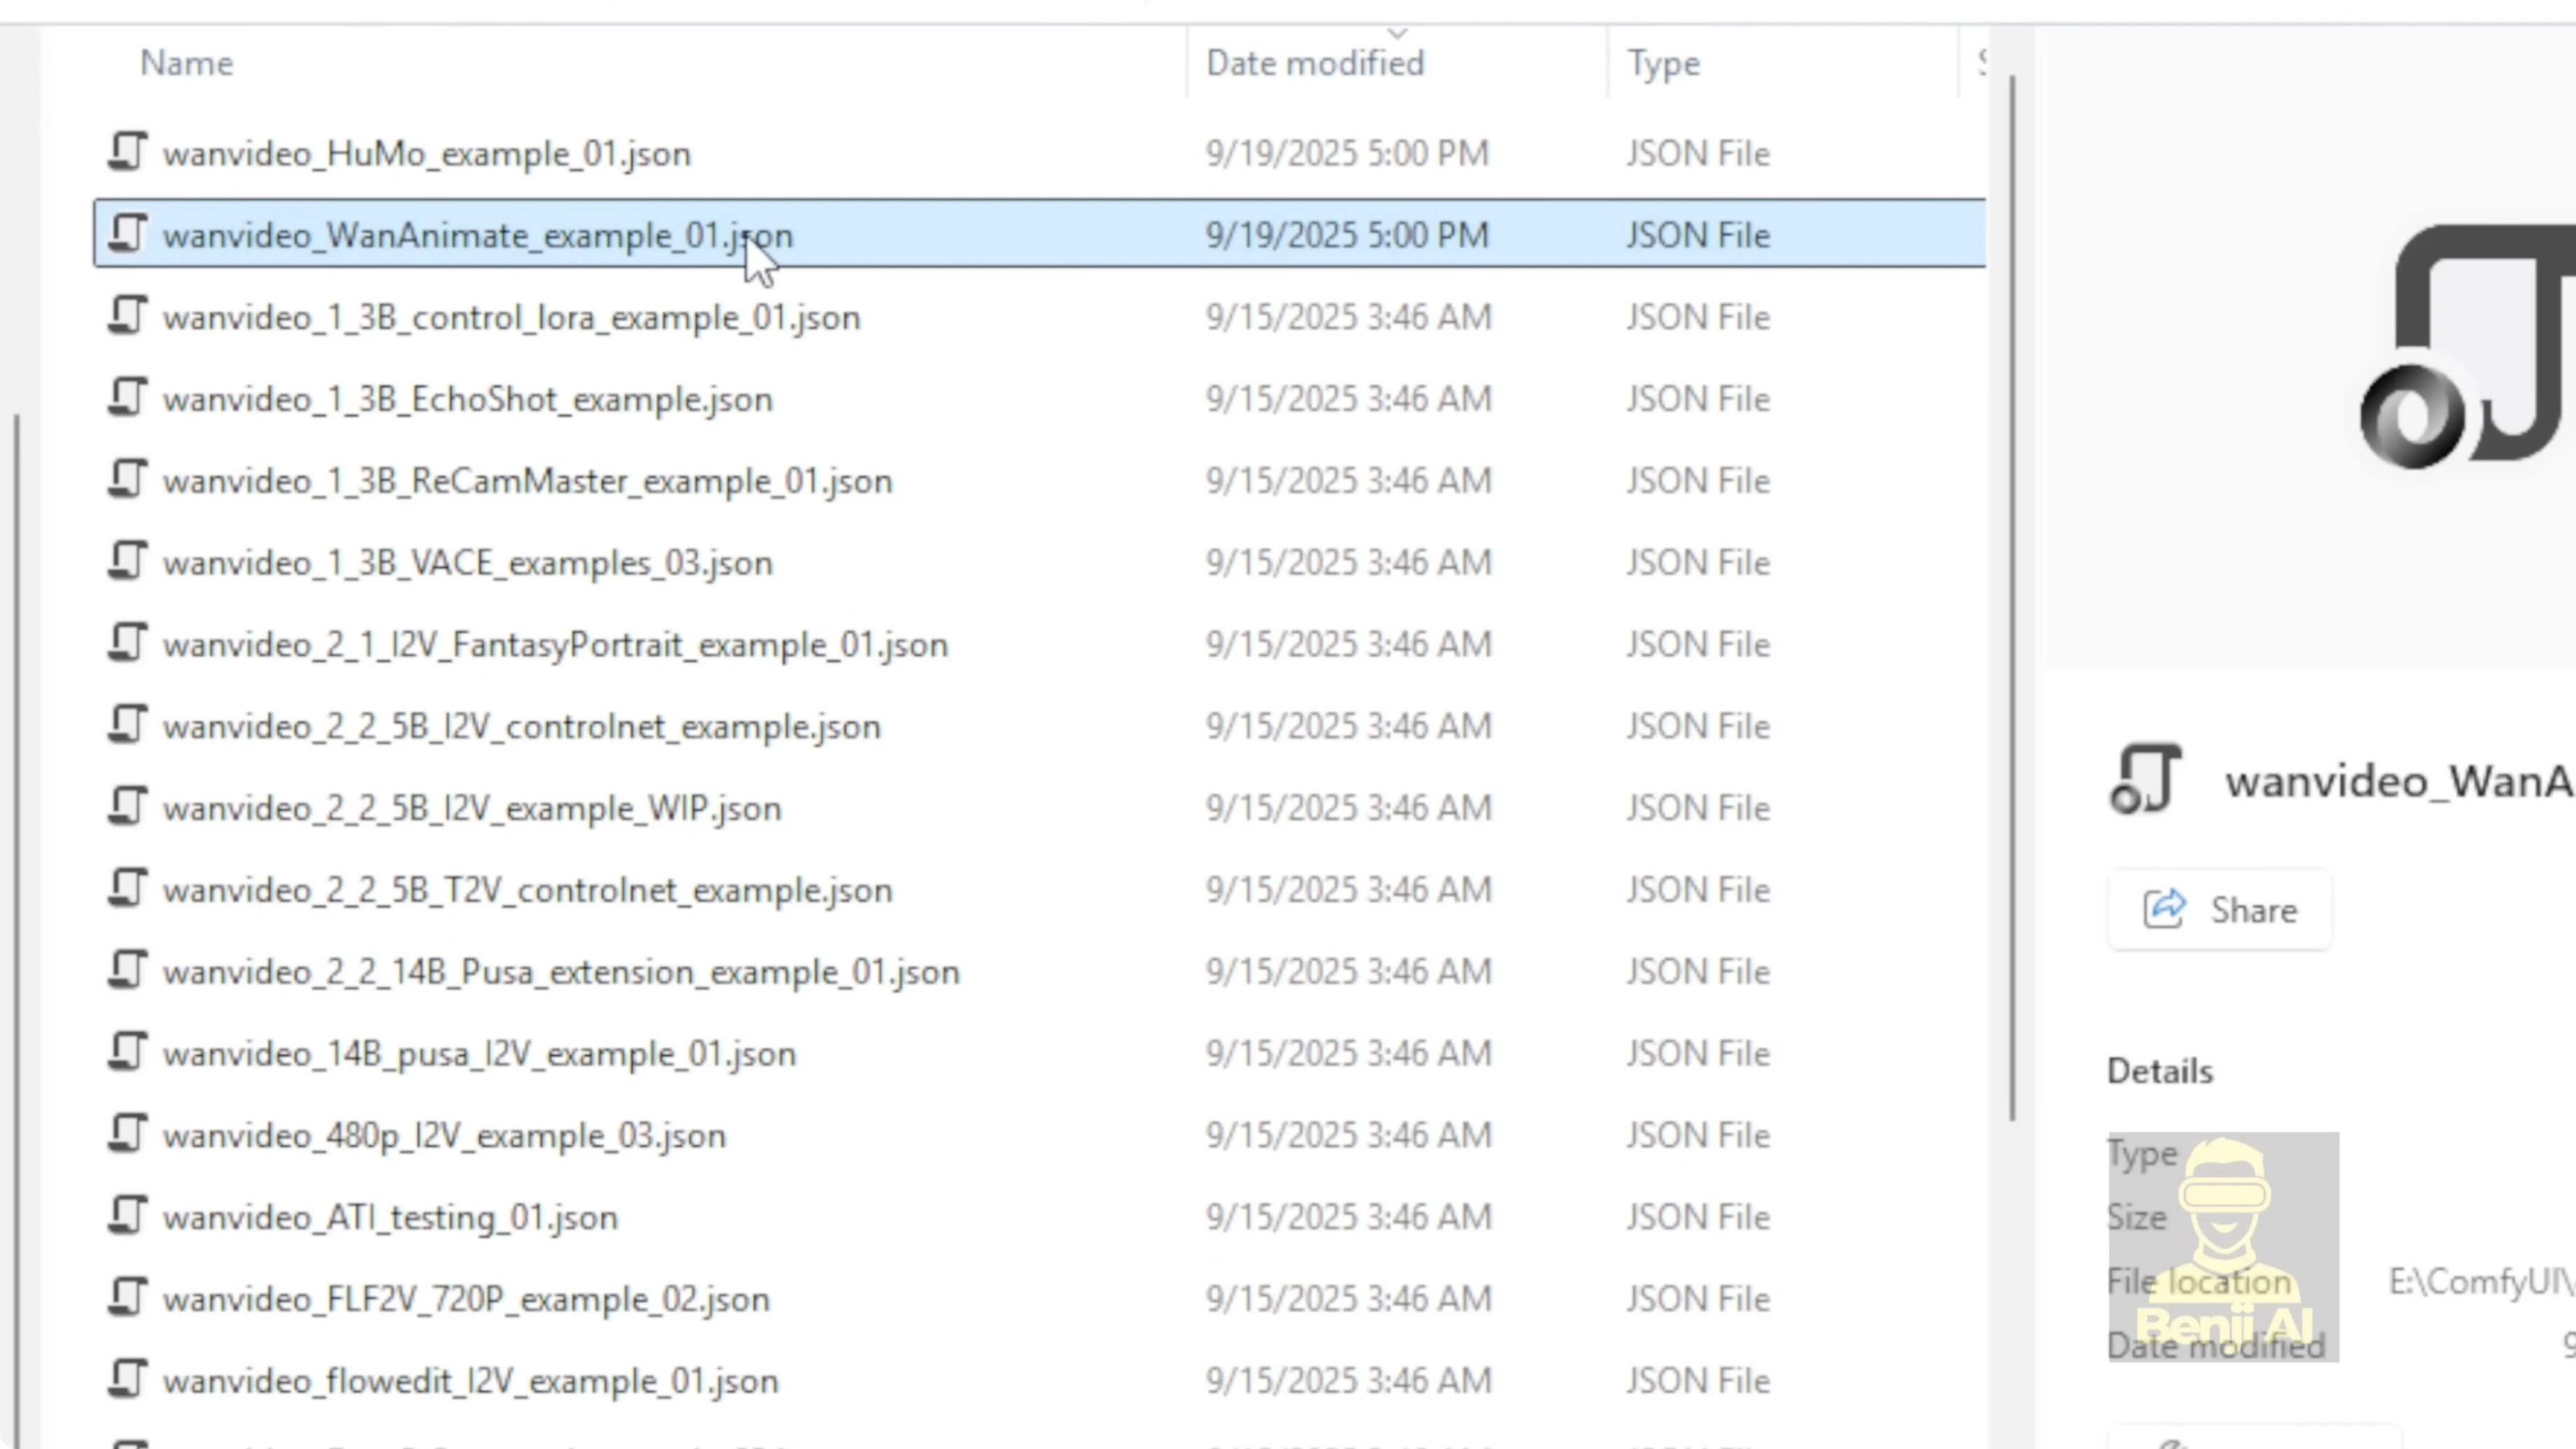
- Open the examples folder in the wrapper. There’s a file called one animate examples one. That’s the one to start with.
Load the WAN 2.2 Animate model
In this example workflow, a few things are set up by default. First, the model loader. We’re going to load the WAN 2.2 Animate 14B model.
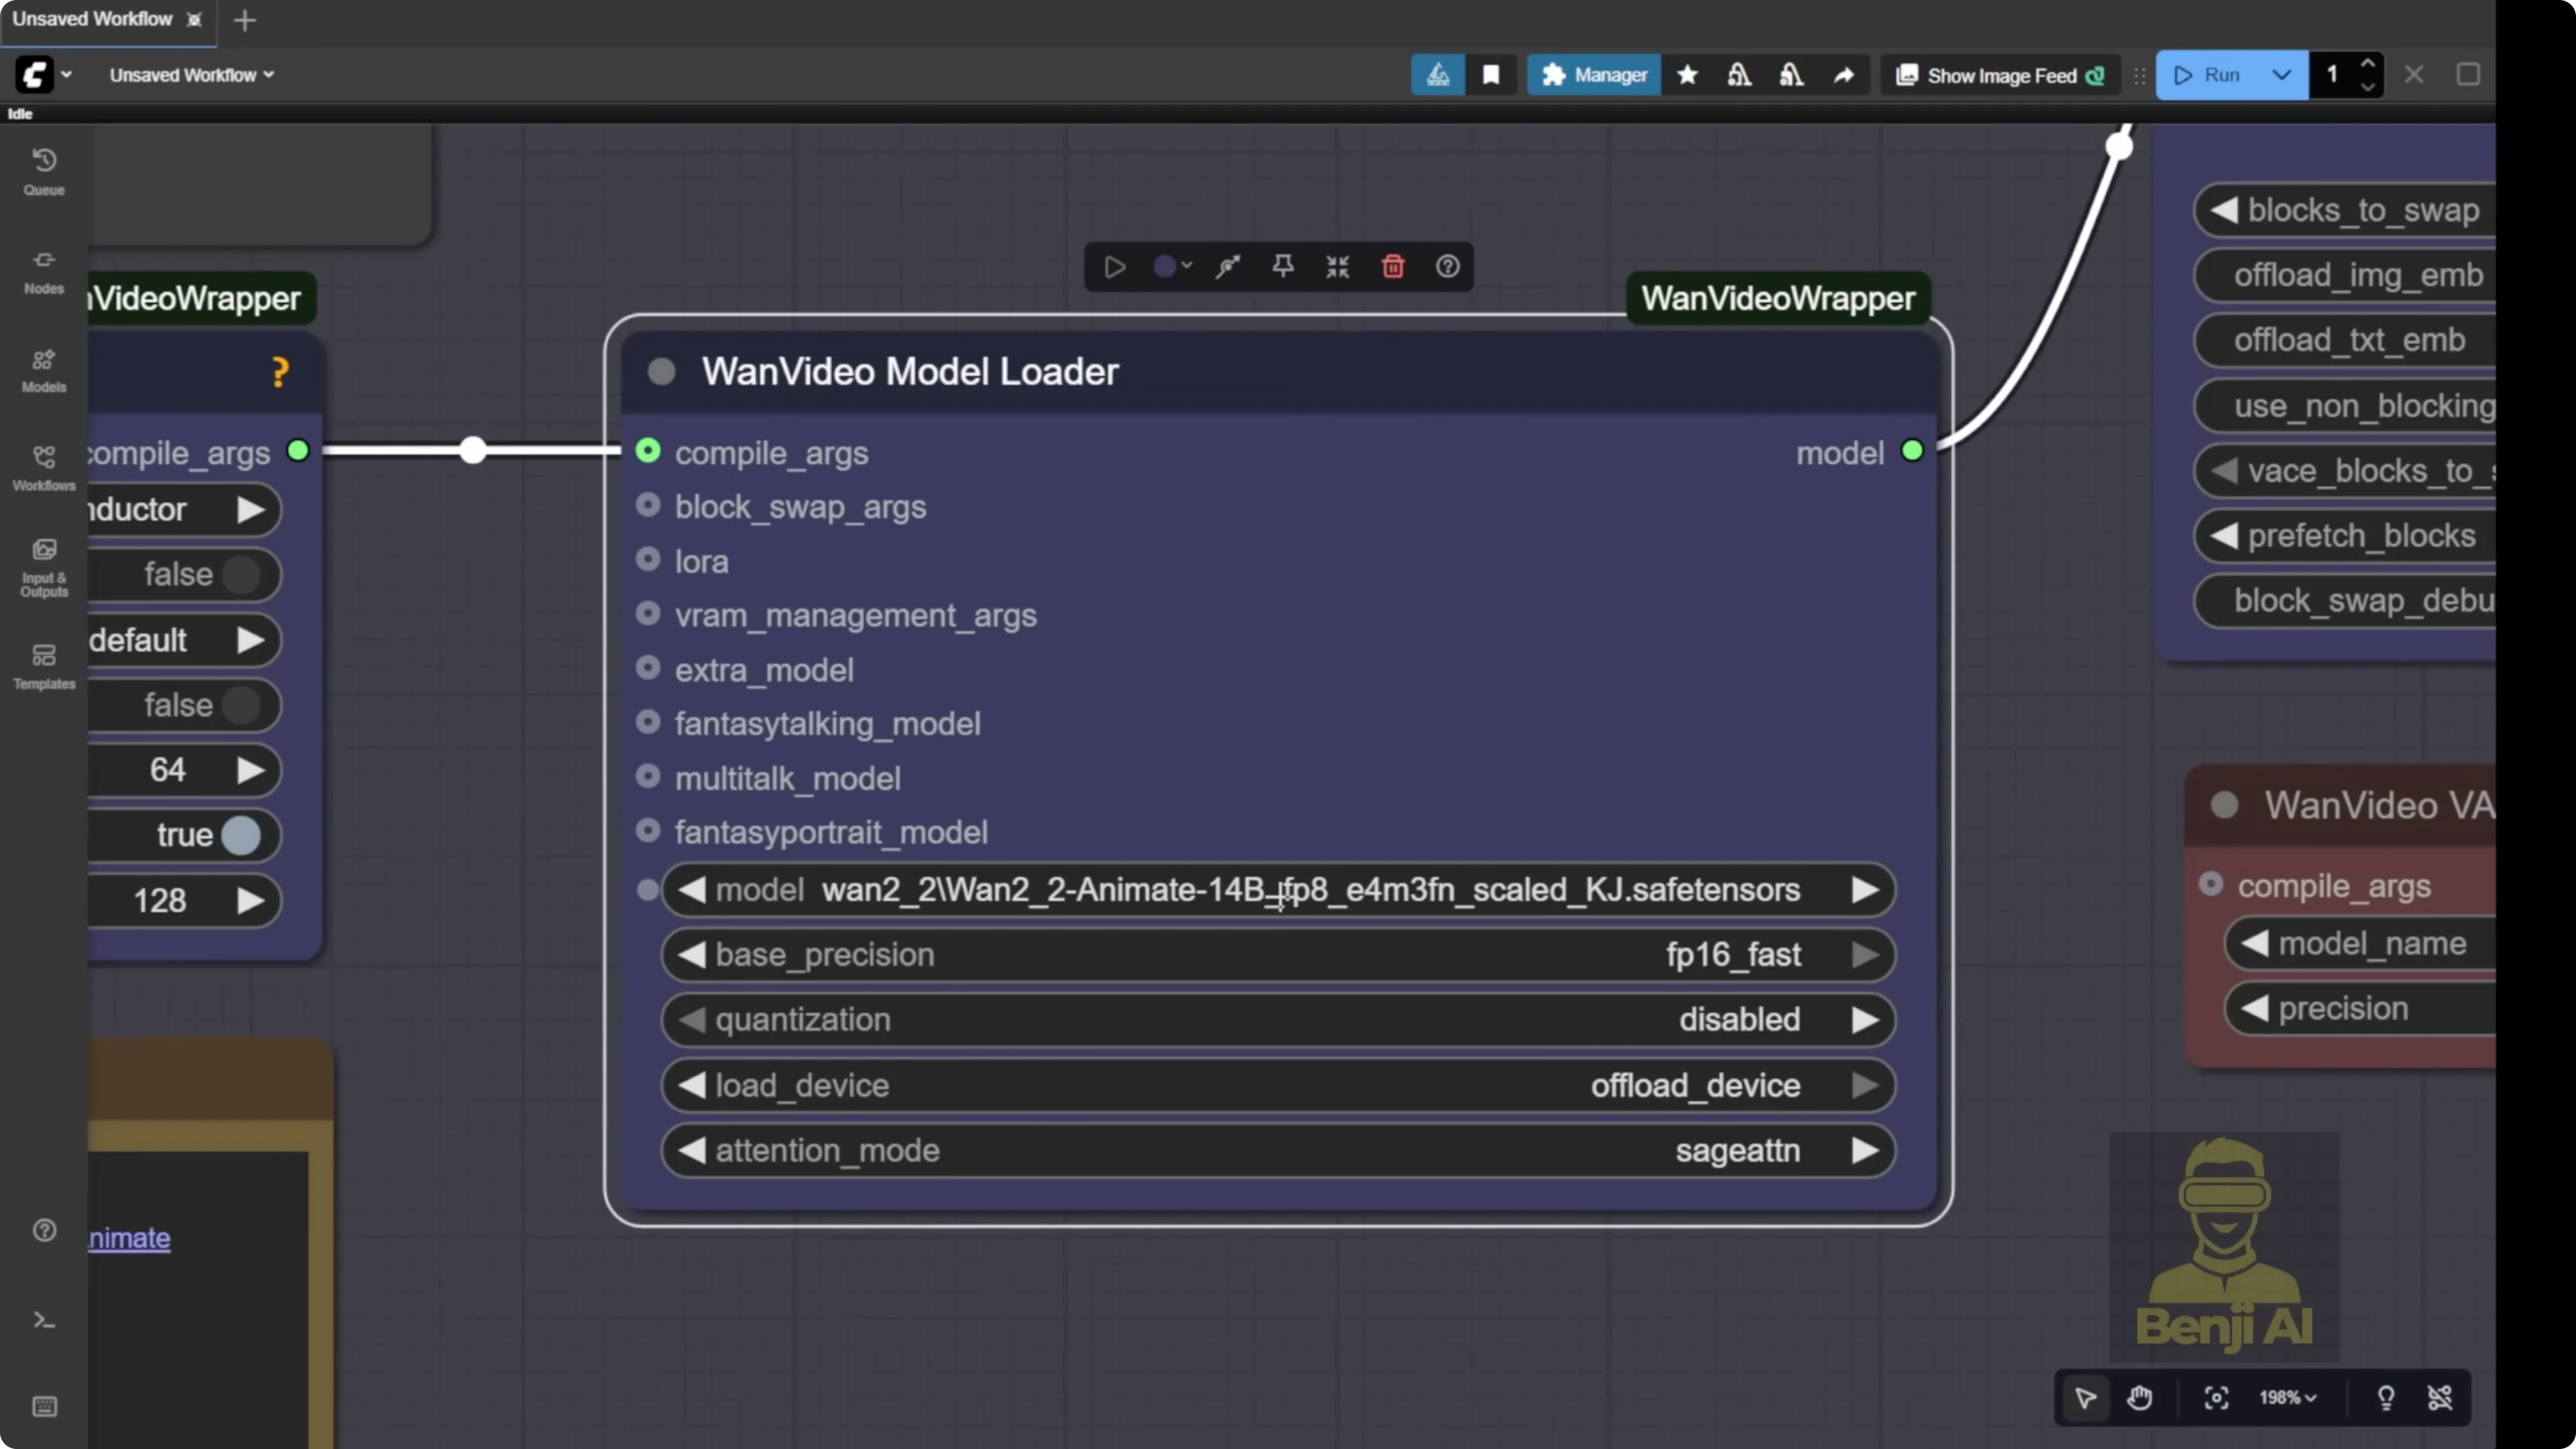
- You can find it in the WAN Videos Comfy FP8 scaled Hugging Face repo.
- Inside that, look for the folder called WAN 2.2 to animate.
- You’ll see two types of FP8 models:
- FP8E4M3FN for newer GPUs that handle FP8.
- E5 version that’s better for older GPUs like some Nvidia 30 series cards to run smoothly.
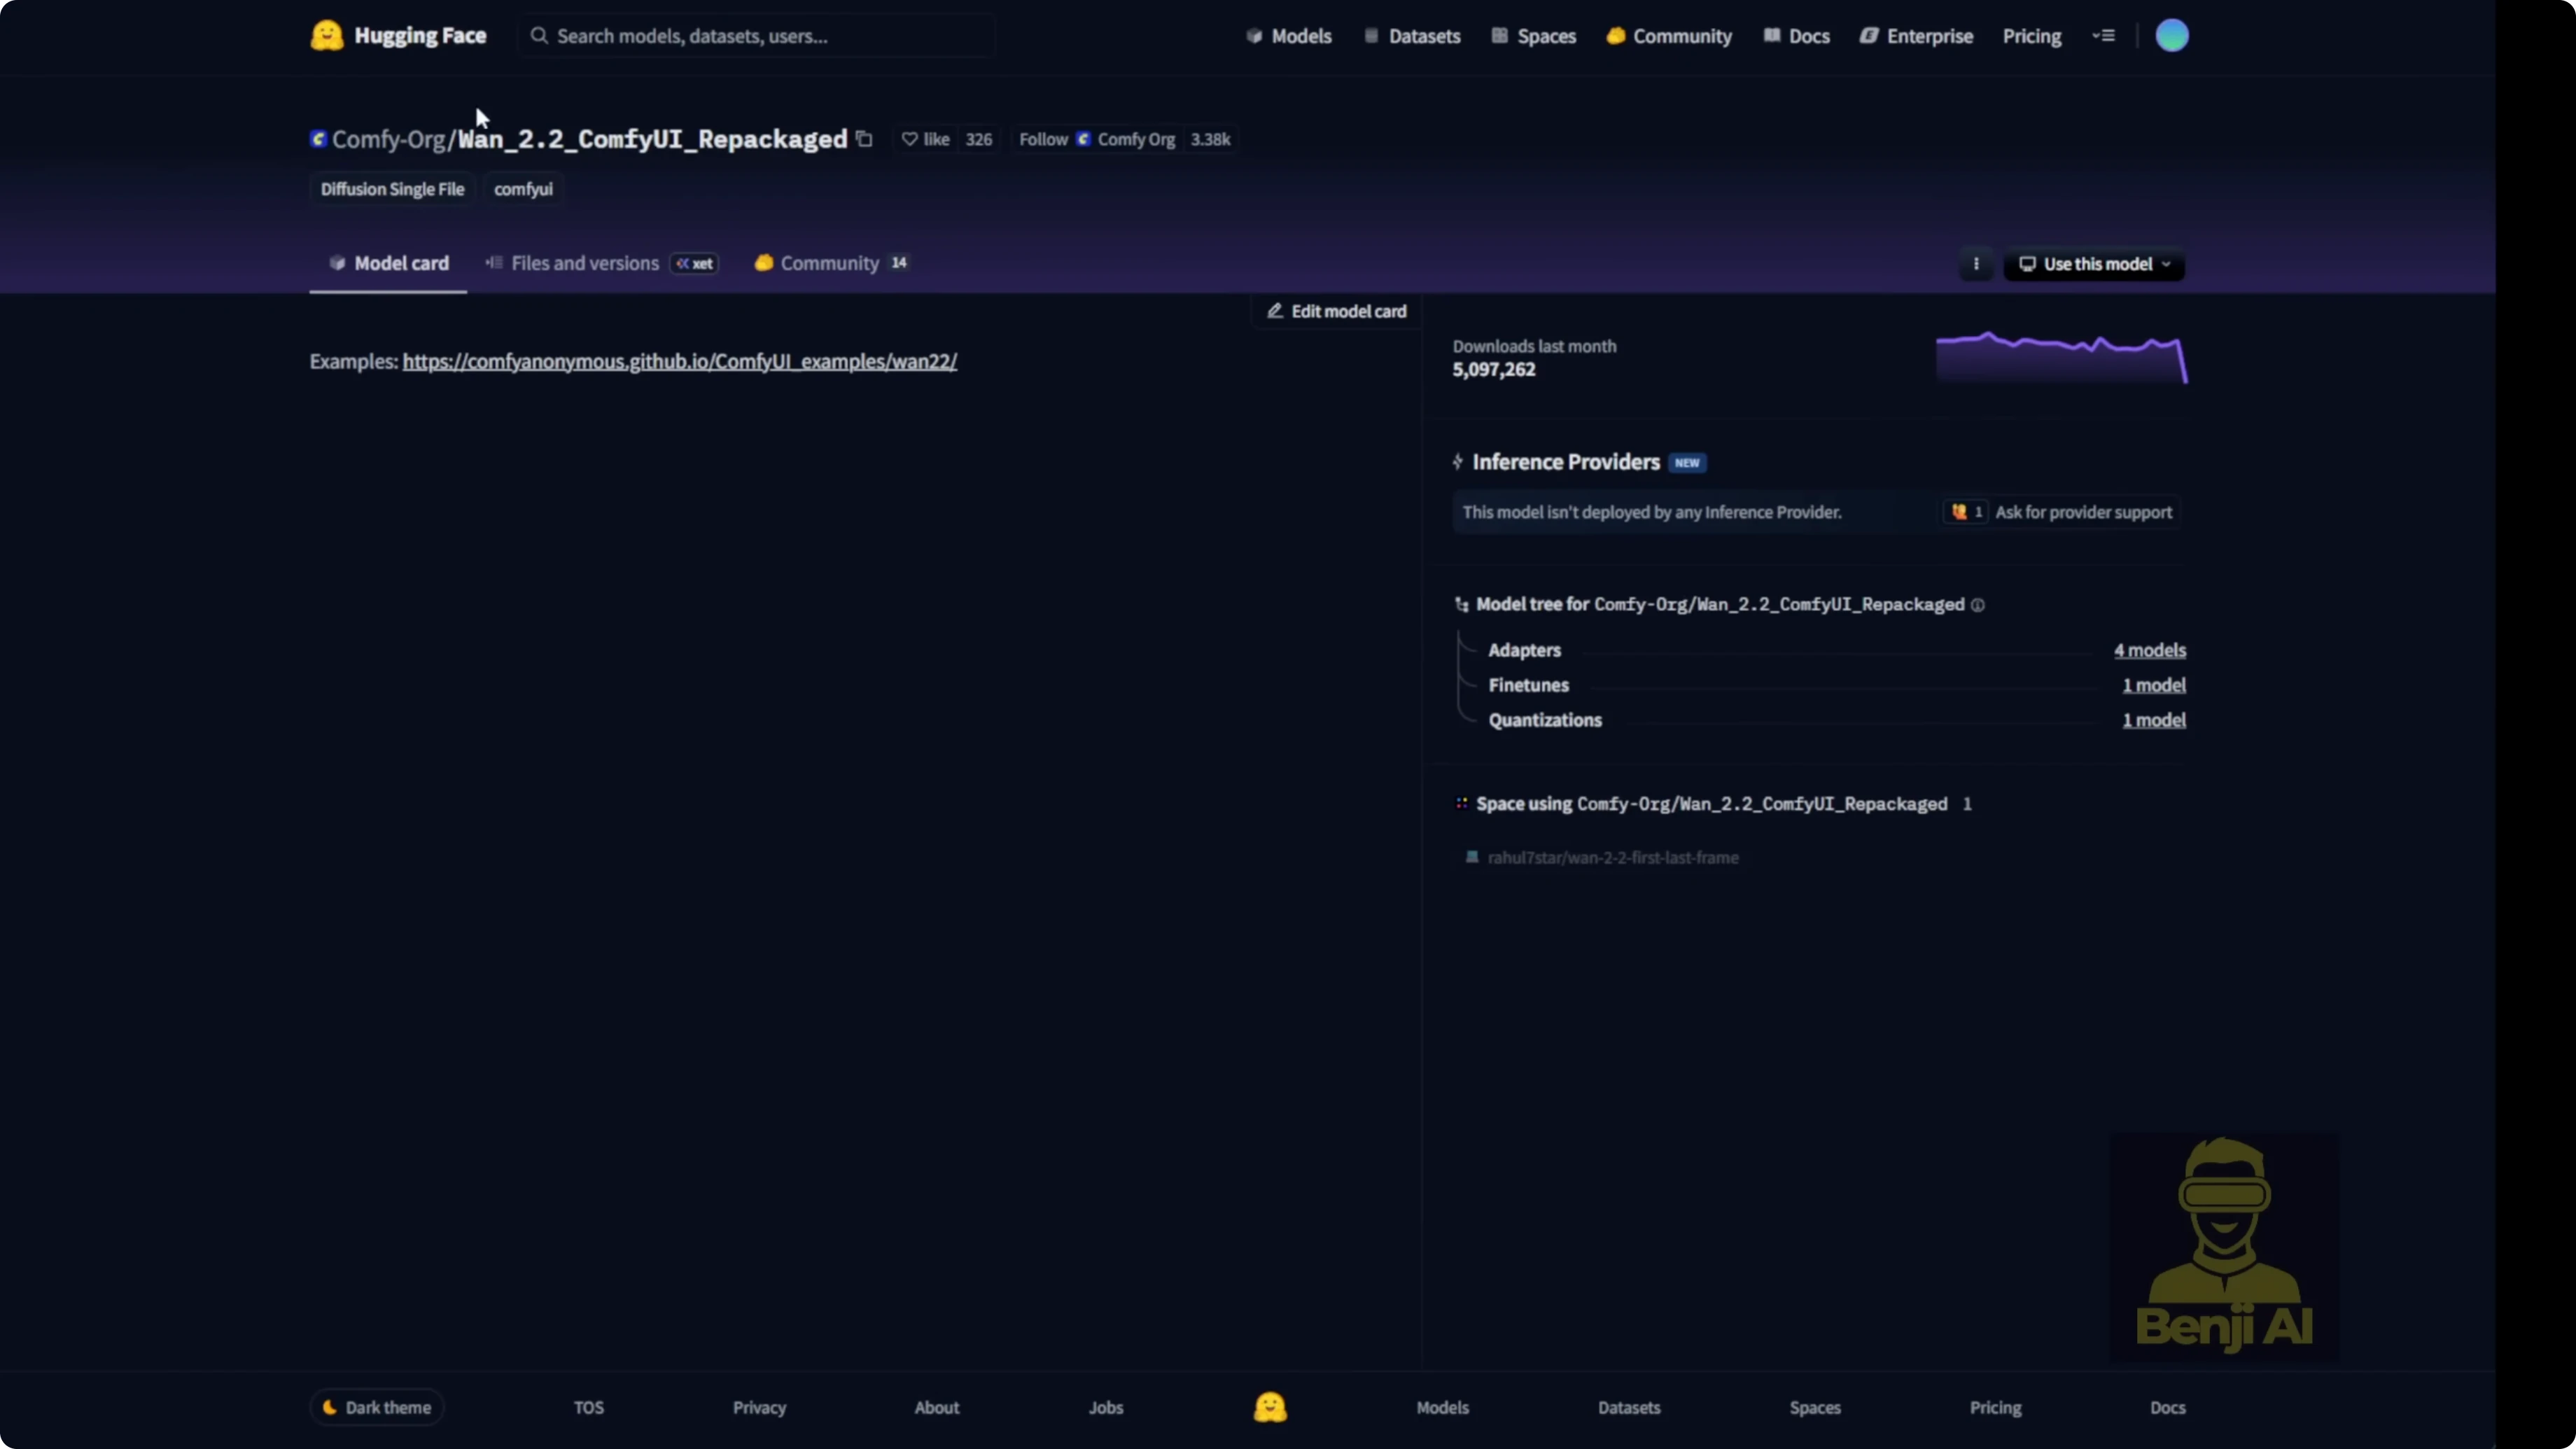
- Another option is the Comfy UI Hugging Face repackaged repo for one 2.2 2.
- Go to the files tab. They tell you exactly where to put your files in your local models folder.
- Everything is named to match your Comfy UI models folder structure. Diffusion models, LORAs, VAES, text encoders, all of it. Just follow the folder names and file names exactly.
There’s a safe tensor file for 2.2 Animate. I’m guessing the native Comfy UI nodes will eventually get updated to support one 2.2 Animate and we might cover that later. For now, these model files also work with the KJ1 videos wrapper. I’ve got both downloaded. The 2.2 Animate 14B BF16 file type needs a ton more VRAM to process, so I’d suggest most folks just go for the FP8 version.
There’s also a GGUF quantization available for 2.2 Animate. You can download them if you want. They’re available in the KJ hugging face wrapper under WAN Videos Comfy GGUF, with Q8 and Q4 options. The Q8 models give you quality very close to the FP8 safe tensors files. Either one works fine and runs in the one videos wrapper. You can select the GGUF quantized model right in the one videos wrapper.
Prompting and the sampling group
One 2.2 Animate is built on an image to video model. It uses one video’s clip vision to process the first frame of your image and turn it into a video animation. In the sampling group you’ll see one video’s clip vision. Its job is to help the AI understand your reference image. I also tweaked the join strength part and added multiple inputs in case I only want to change the character’s outfit. Then I can just specify what action the character is doing in the video animation.
The simpler way is to use the one video’s text encoder. Select the correct text encoder for one videos and then type your prompts like usual. Just describe what your character looks like, what they’re doing, the scene, the character, the action. Those are the three basic elements you need in your prompt for the one videos wrapper.
Build the inputs with WanVideos Animate
There’s a new node in the updated one videos wrapper custom nodes called one videos animate. This is the key feature that lets you customize the video, do video editing, and swap characters based on your reference image. That’s the core of the one 2.2 animate AI model.
It has inputs for:
- Reference image
- Pose image
- Face image
- Background image
- Mask for the objects you want to swap
They’re all labeled as images because it will input all the image frames from your video.
Step-by-step: Set up a character swap with a reference video
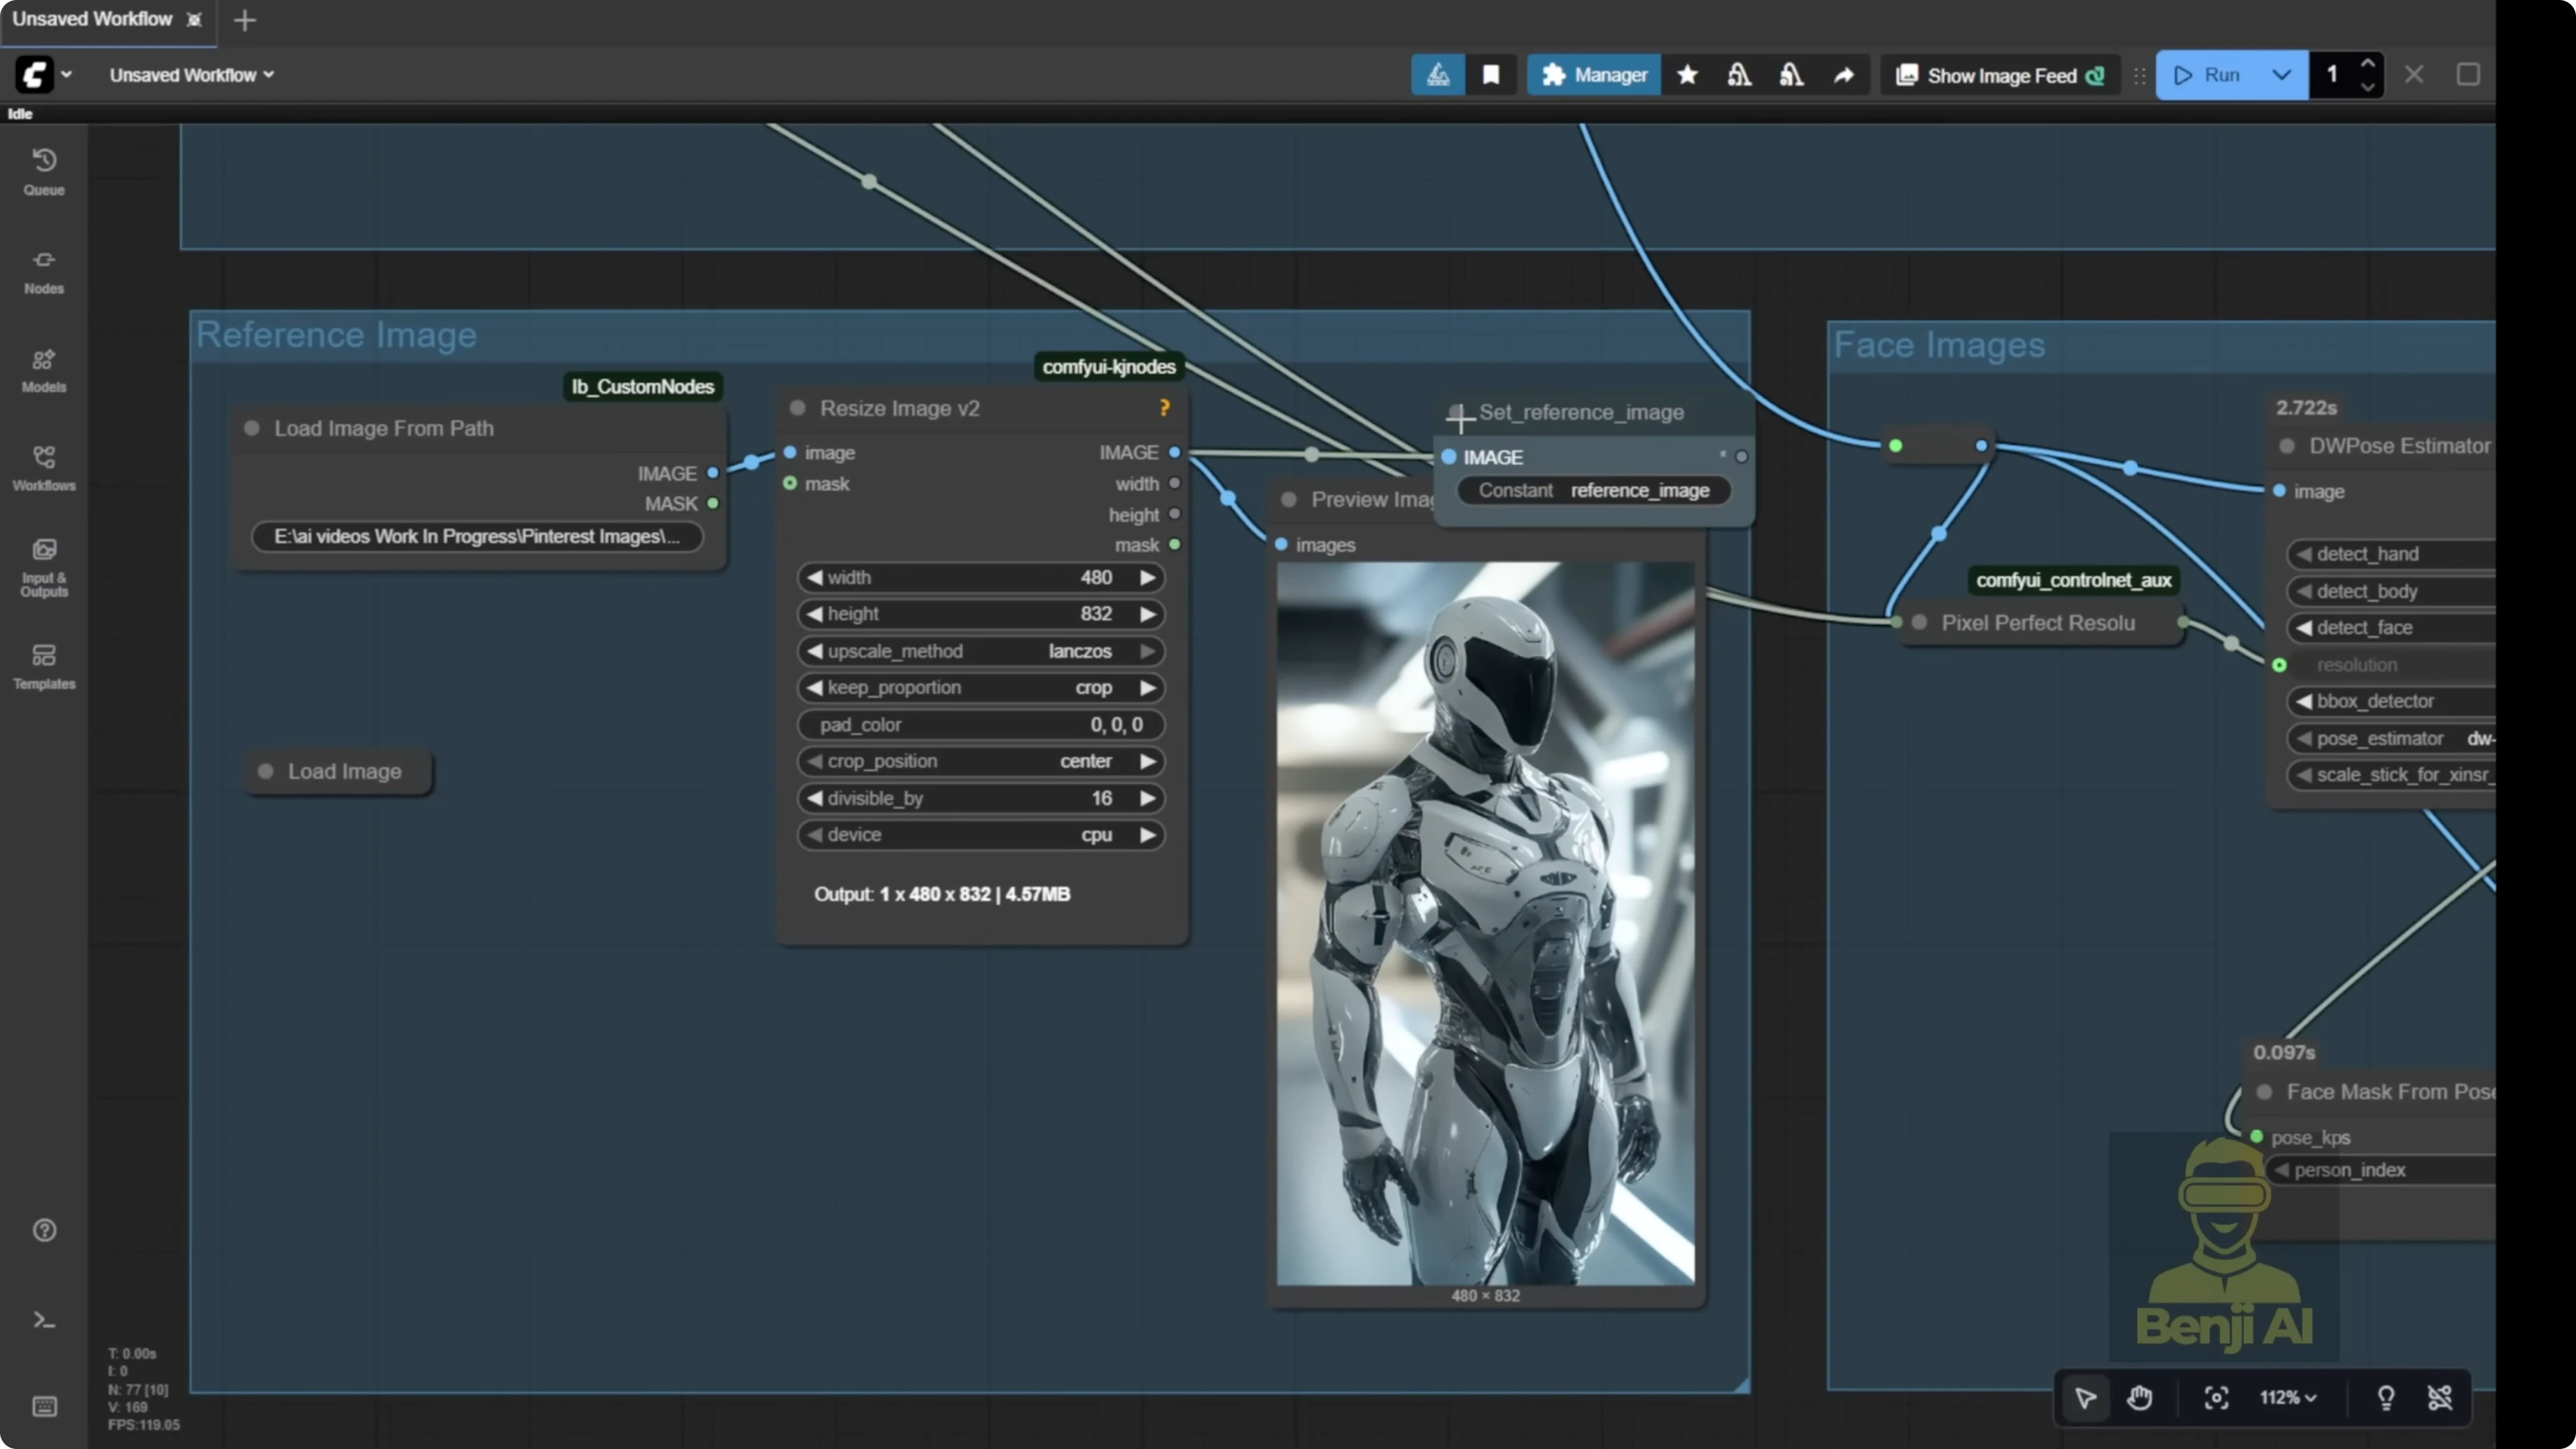
- Load a reference image
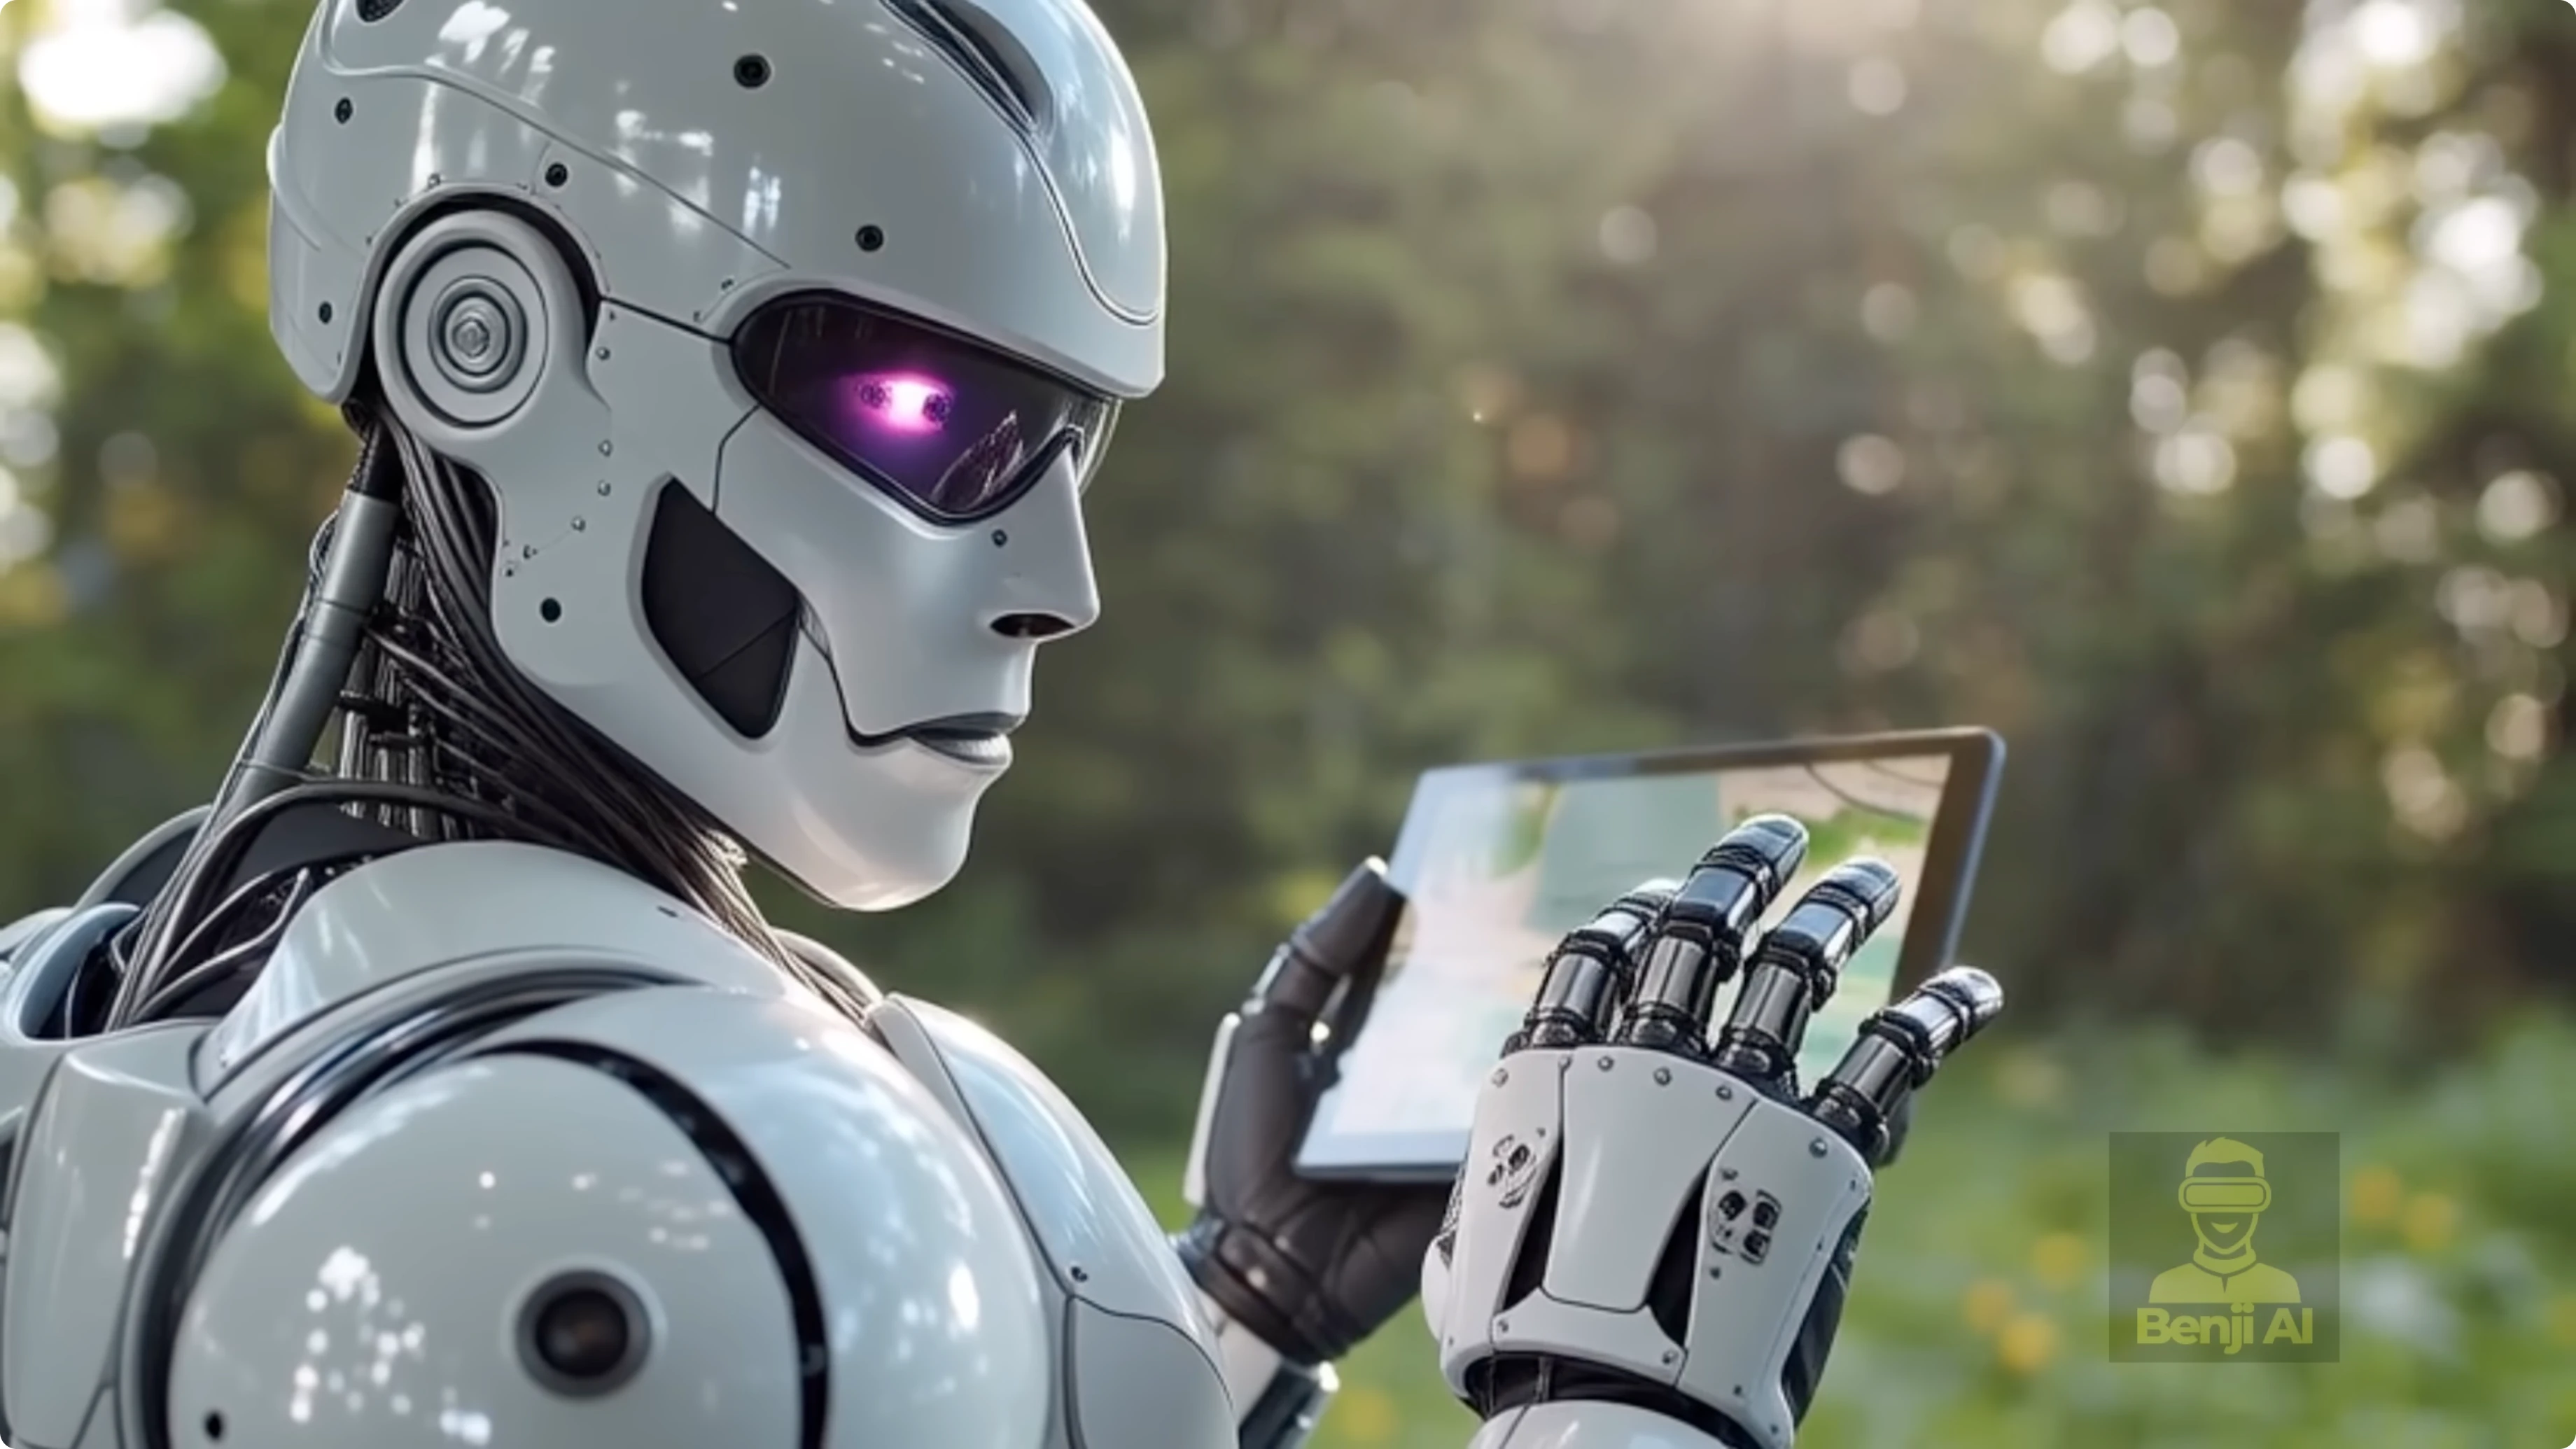
- Load your reference image at the top of the group. I used a futuristic robot.
- Use Load image folder from path or drag and drop the image.
- Connect it to the reference image input.
- Load a reference video
- Use a simple scene that has the motion you want. I used someone looking at a map on a digital device.
- The system converts the video to image frames and a frame count.
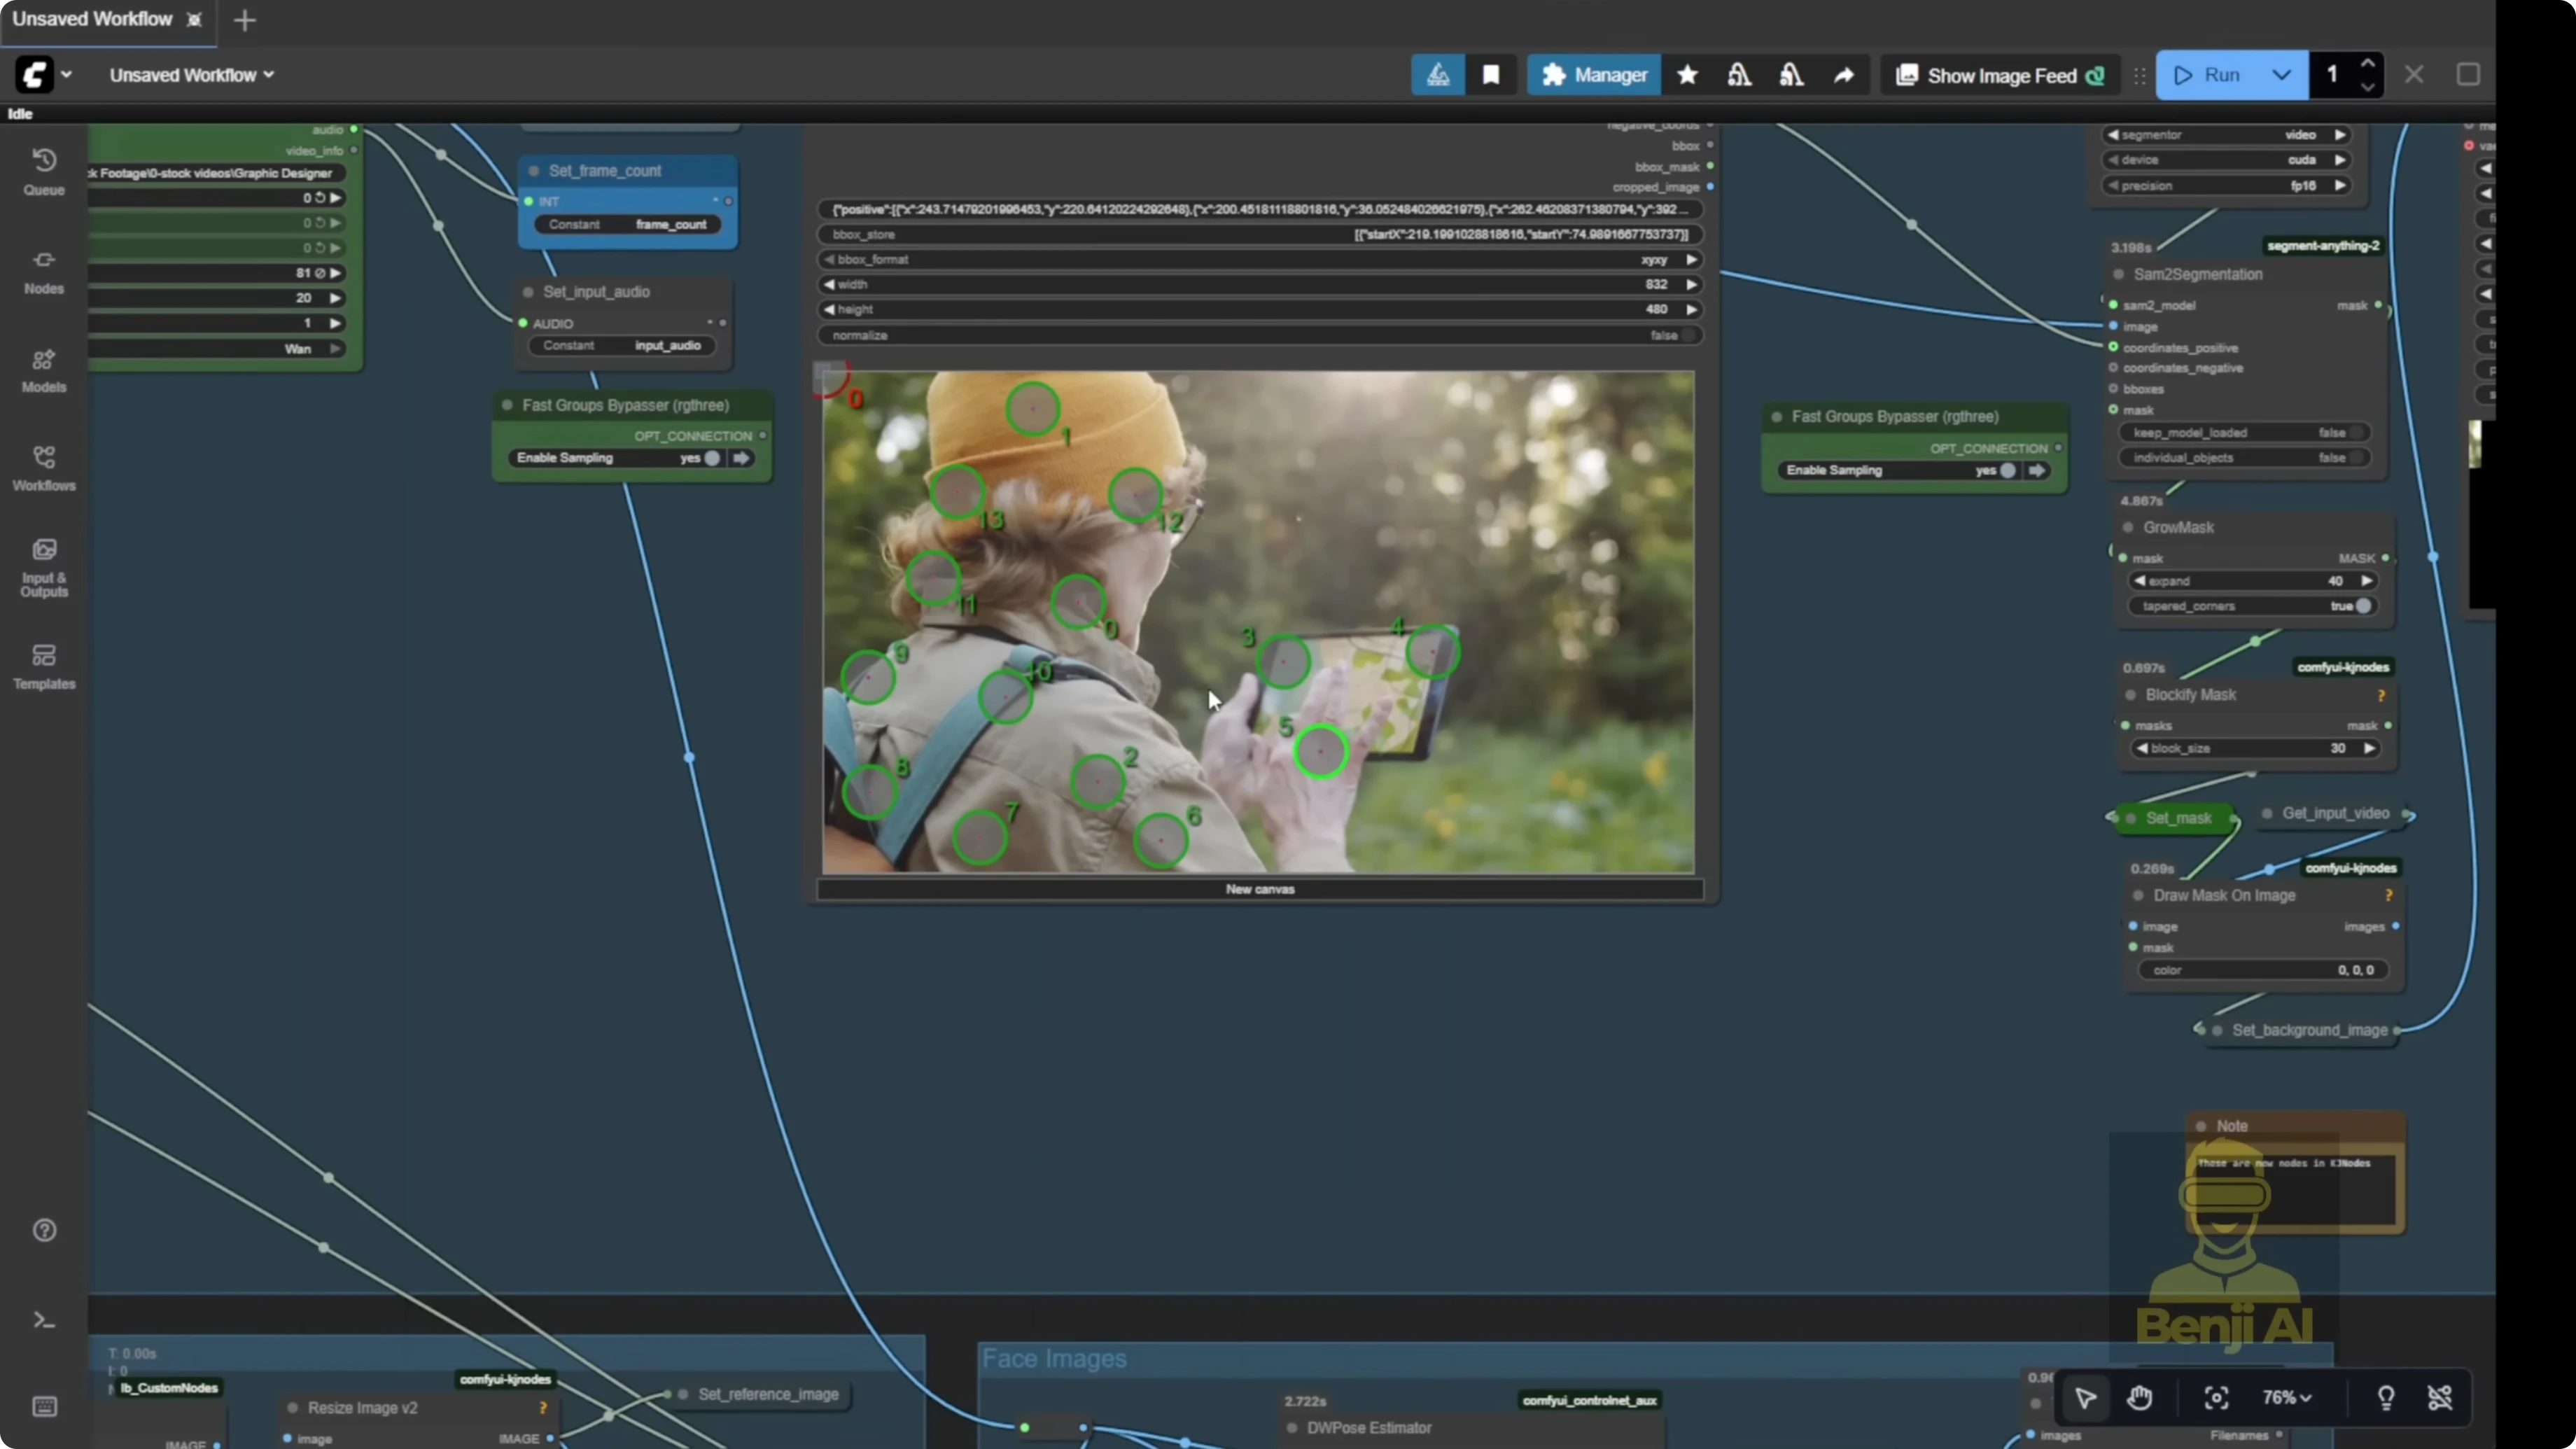
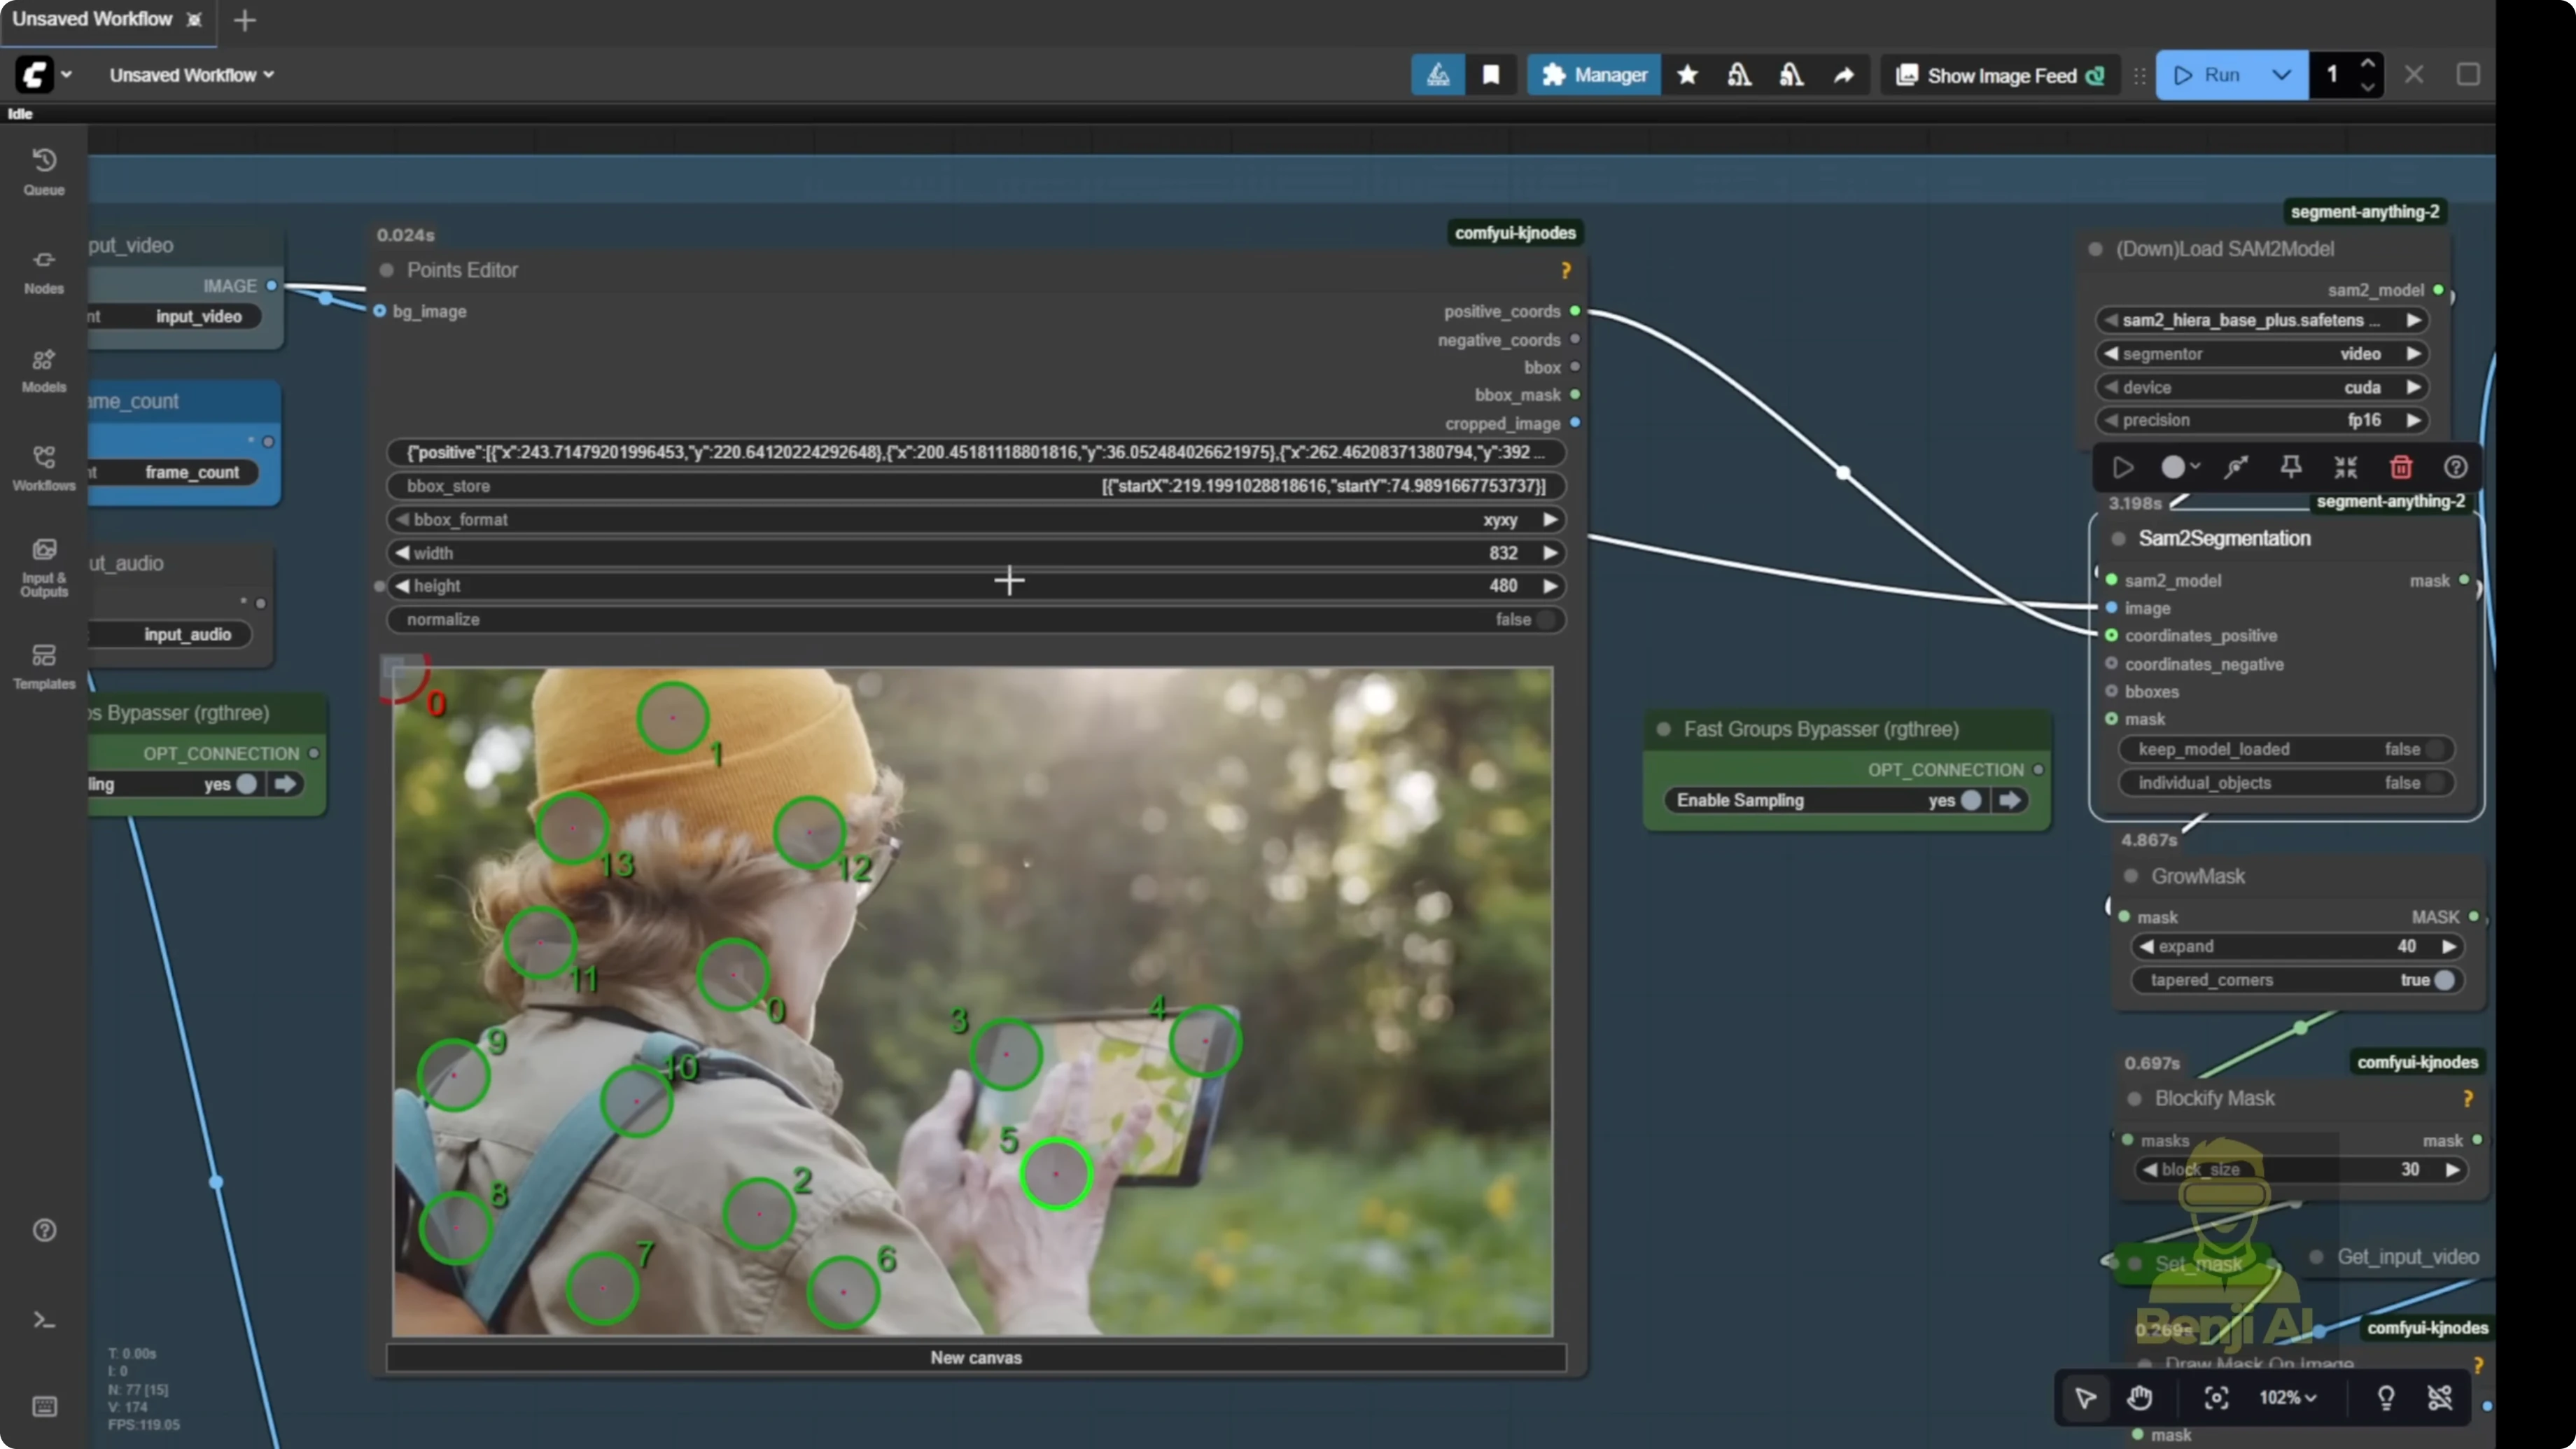
- Segment the subject with the point editor
- Send the image frames to the segmentation group. The default template uses the point editor.
- Add positive green dots on the character or object you want to mask.
- Add negative red dots on areas you do not want segmented.
- Grow the mask a bit so it’s not a tight cut on the edge. Give it breathing room.
- Keep the mask in a blocky pixel squared style to help the model recognize which part to swap or modify.
- Set the background image and finalize the mask
- Once your mask and background image are set, you’re ready to swap.
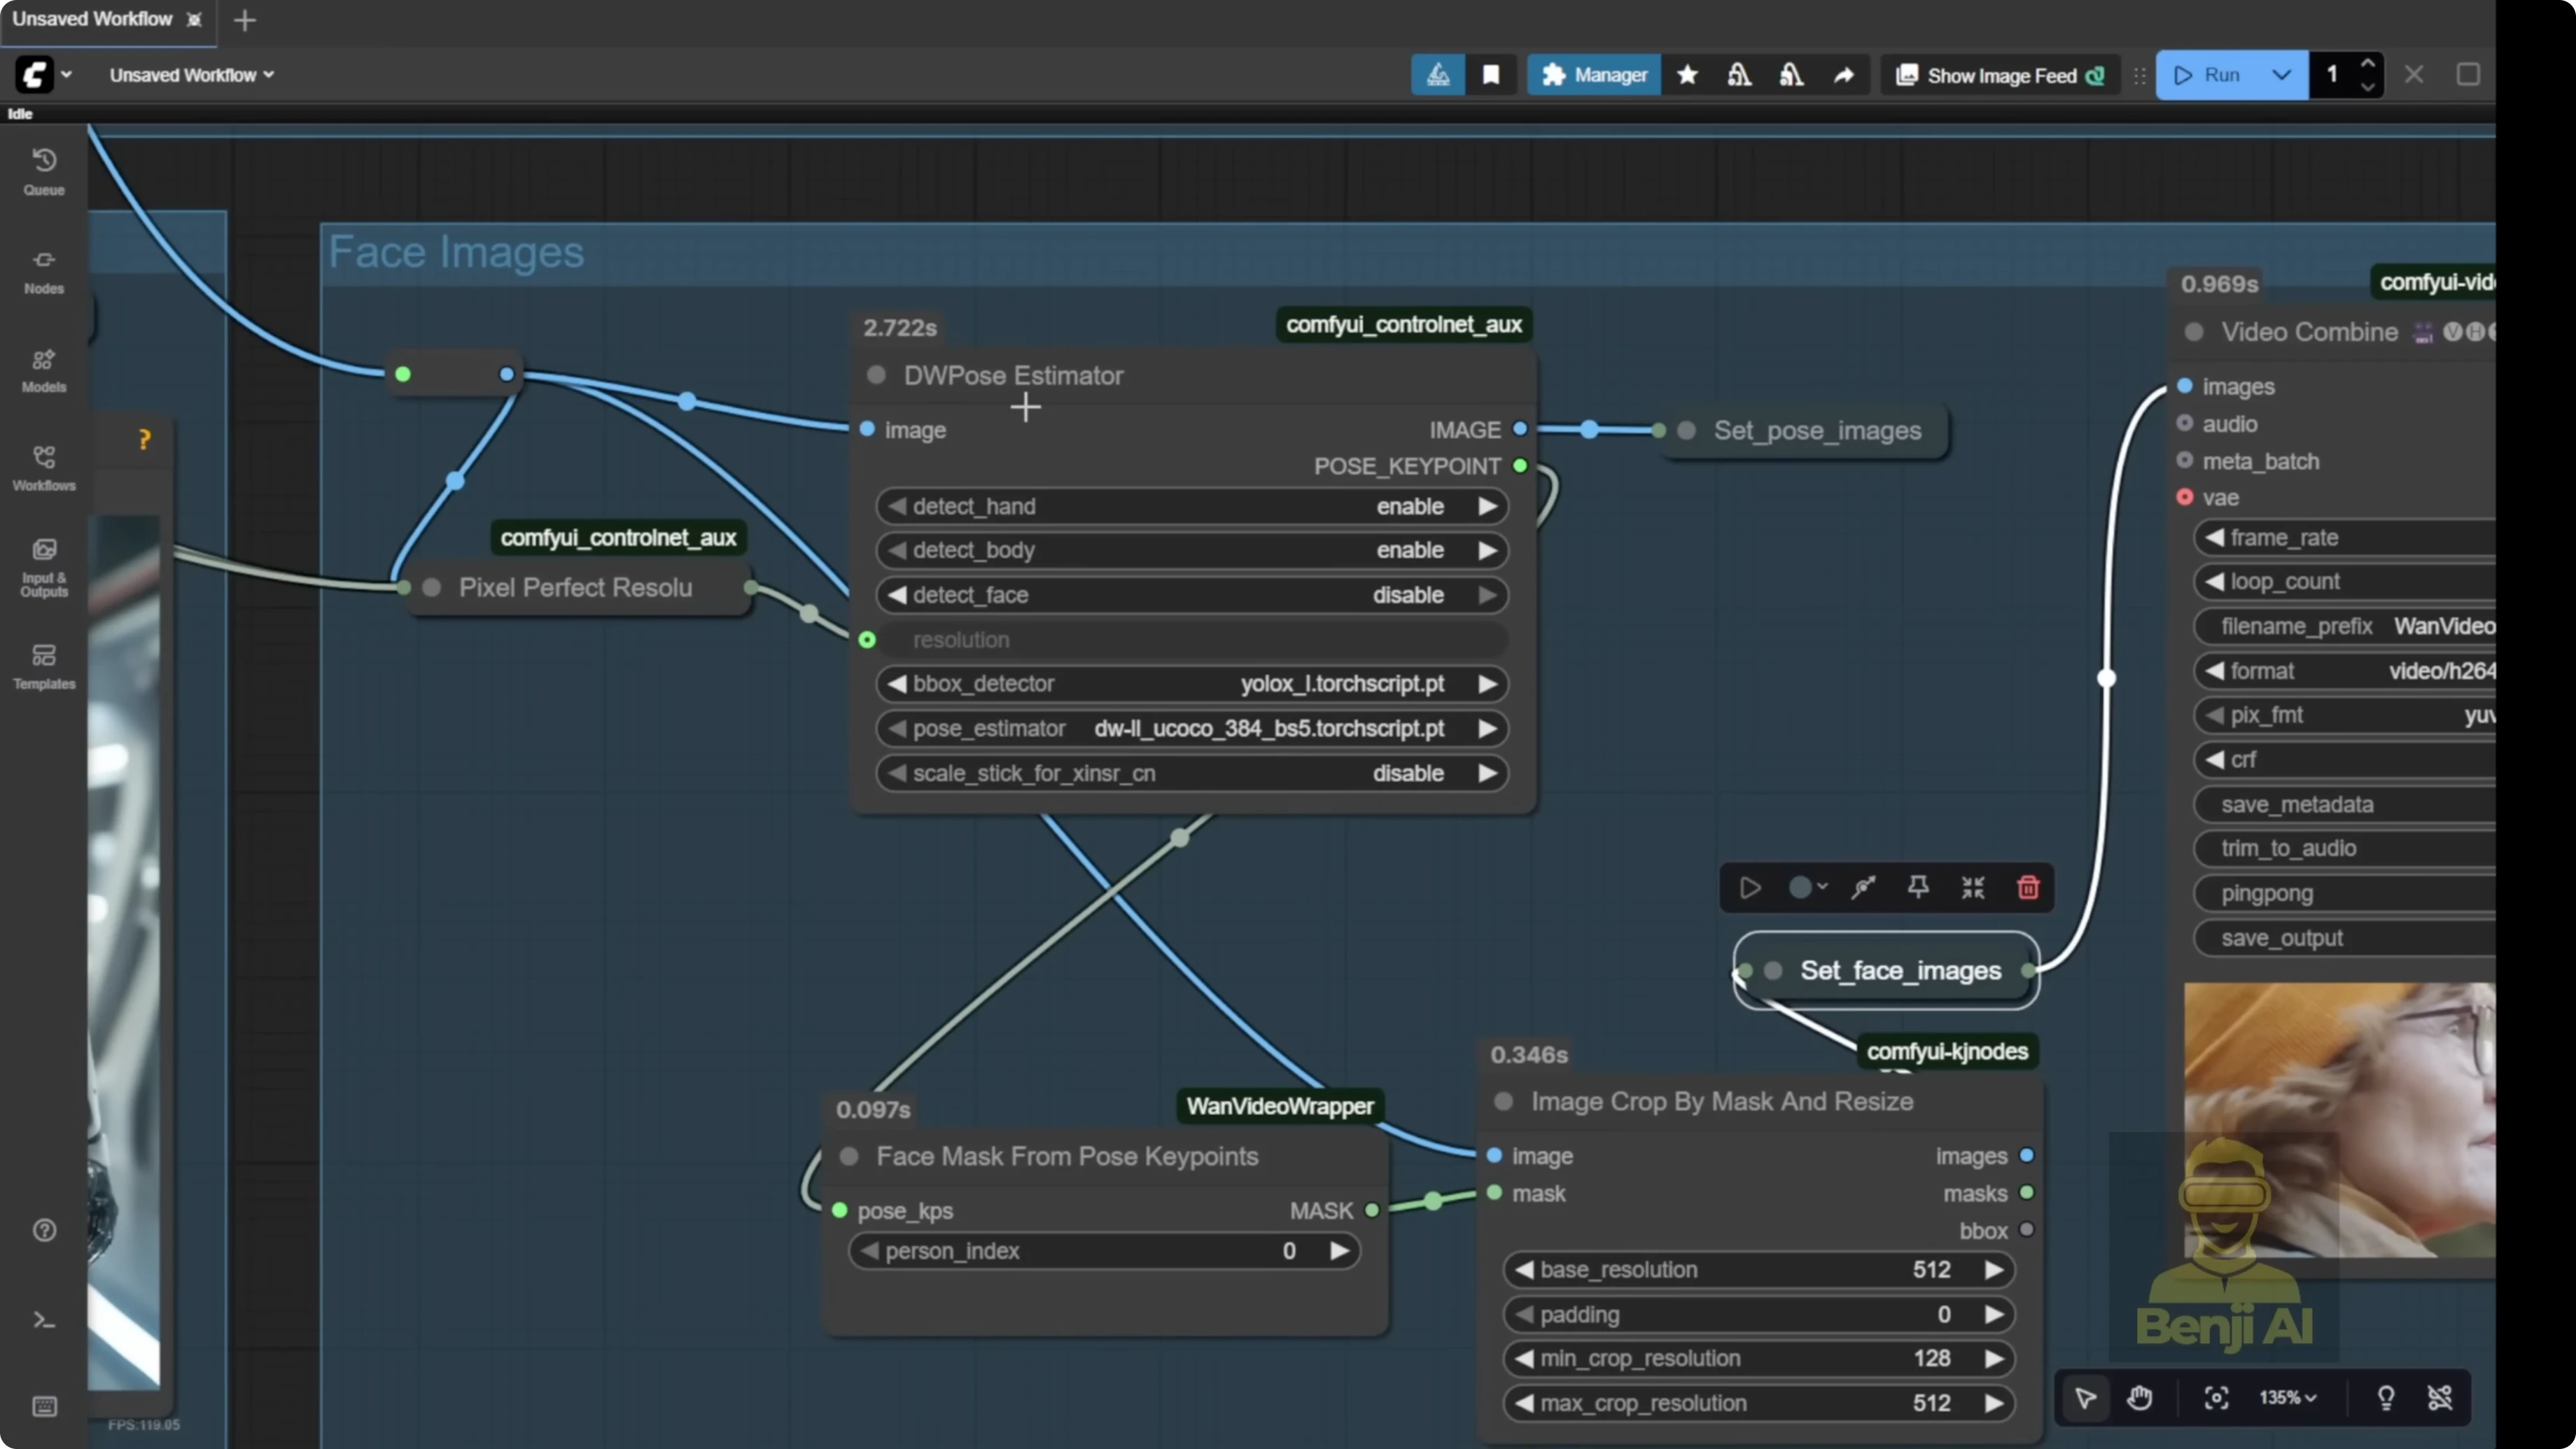
- Extract and set the face image
- Send frames to the face image group to get a close-up of the character’s face.
- A close-up helps the AI animate the face at higher quality.
- Extract and set the pose image
- By default, set pose image uses DW pose.
- Pass in the video frames and enable detect body. Hands are optional.
- Connect everything to the one videos animate node
- Pass reference image, pose image, face image, background image, and mask into one videos animate.
- Optionally enable color match
- The node has a color match option. You don’t need a separate color match node.
- Turn it on or off. If on, you can switch to a different color match model.
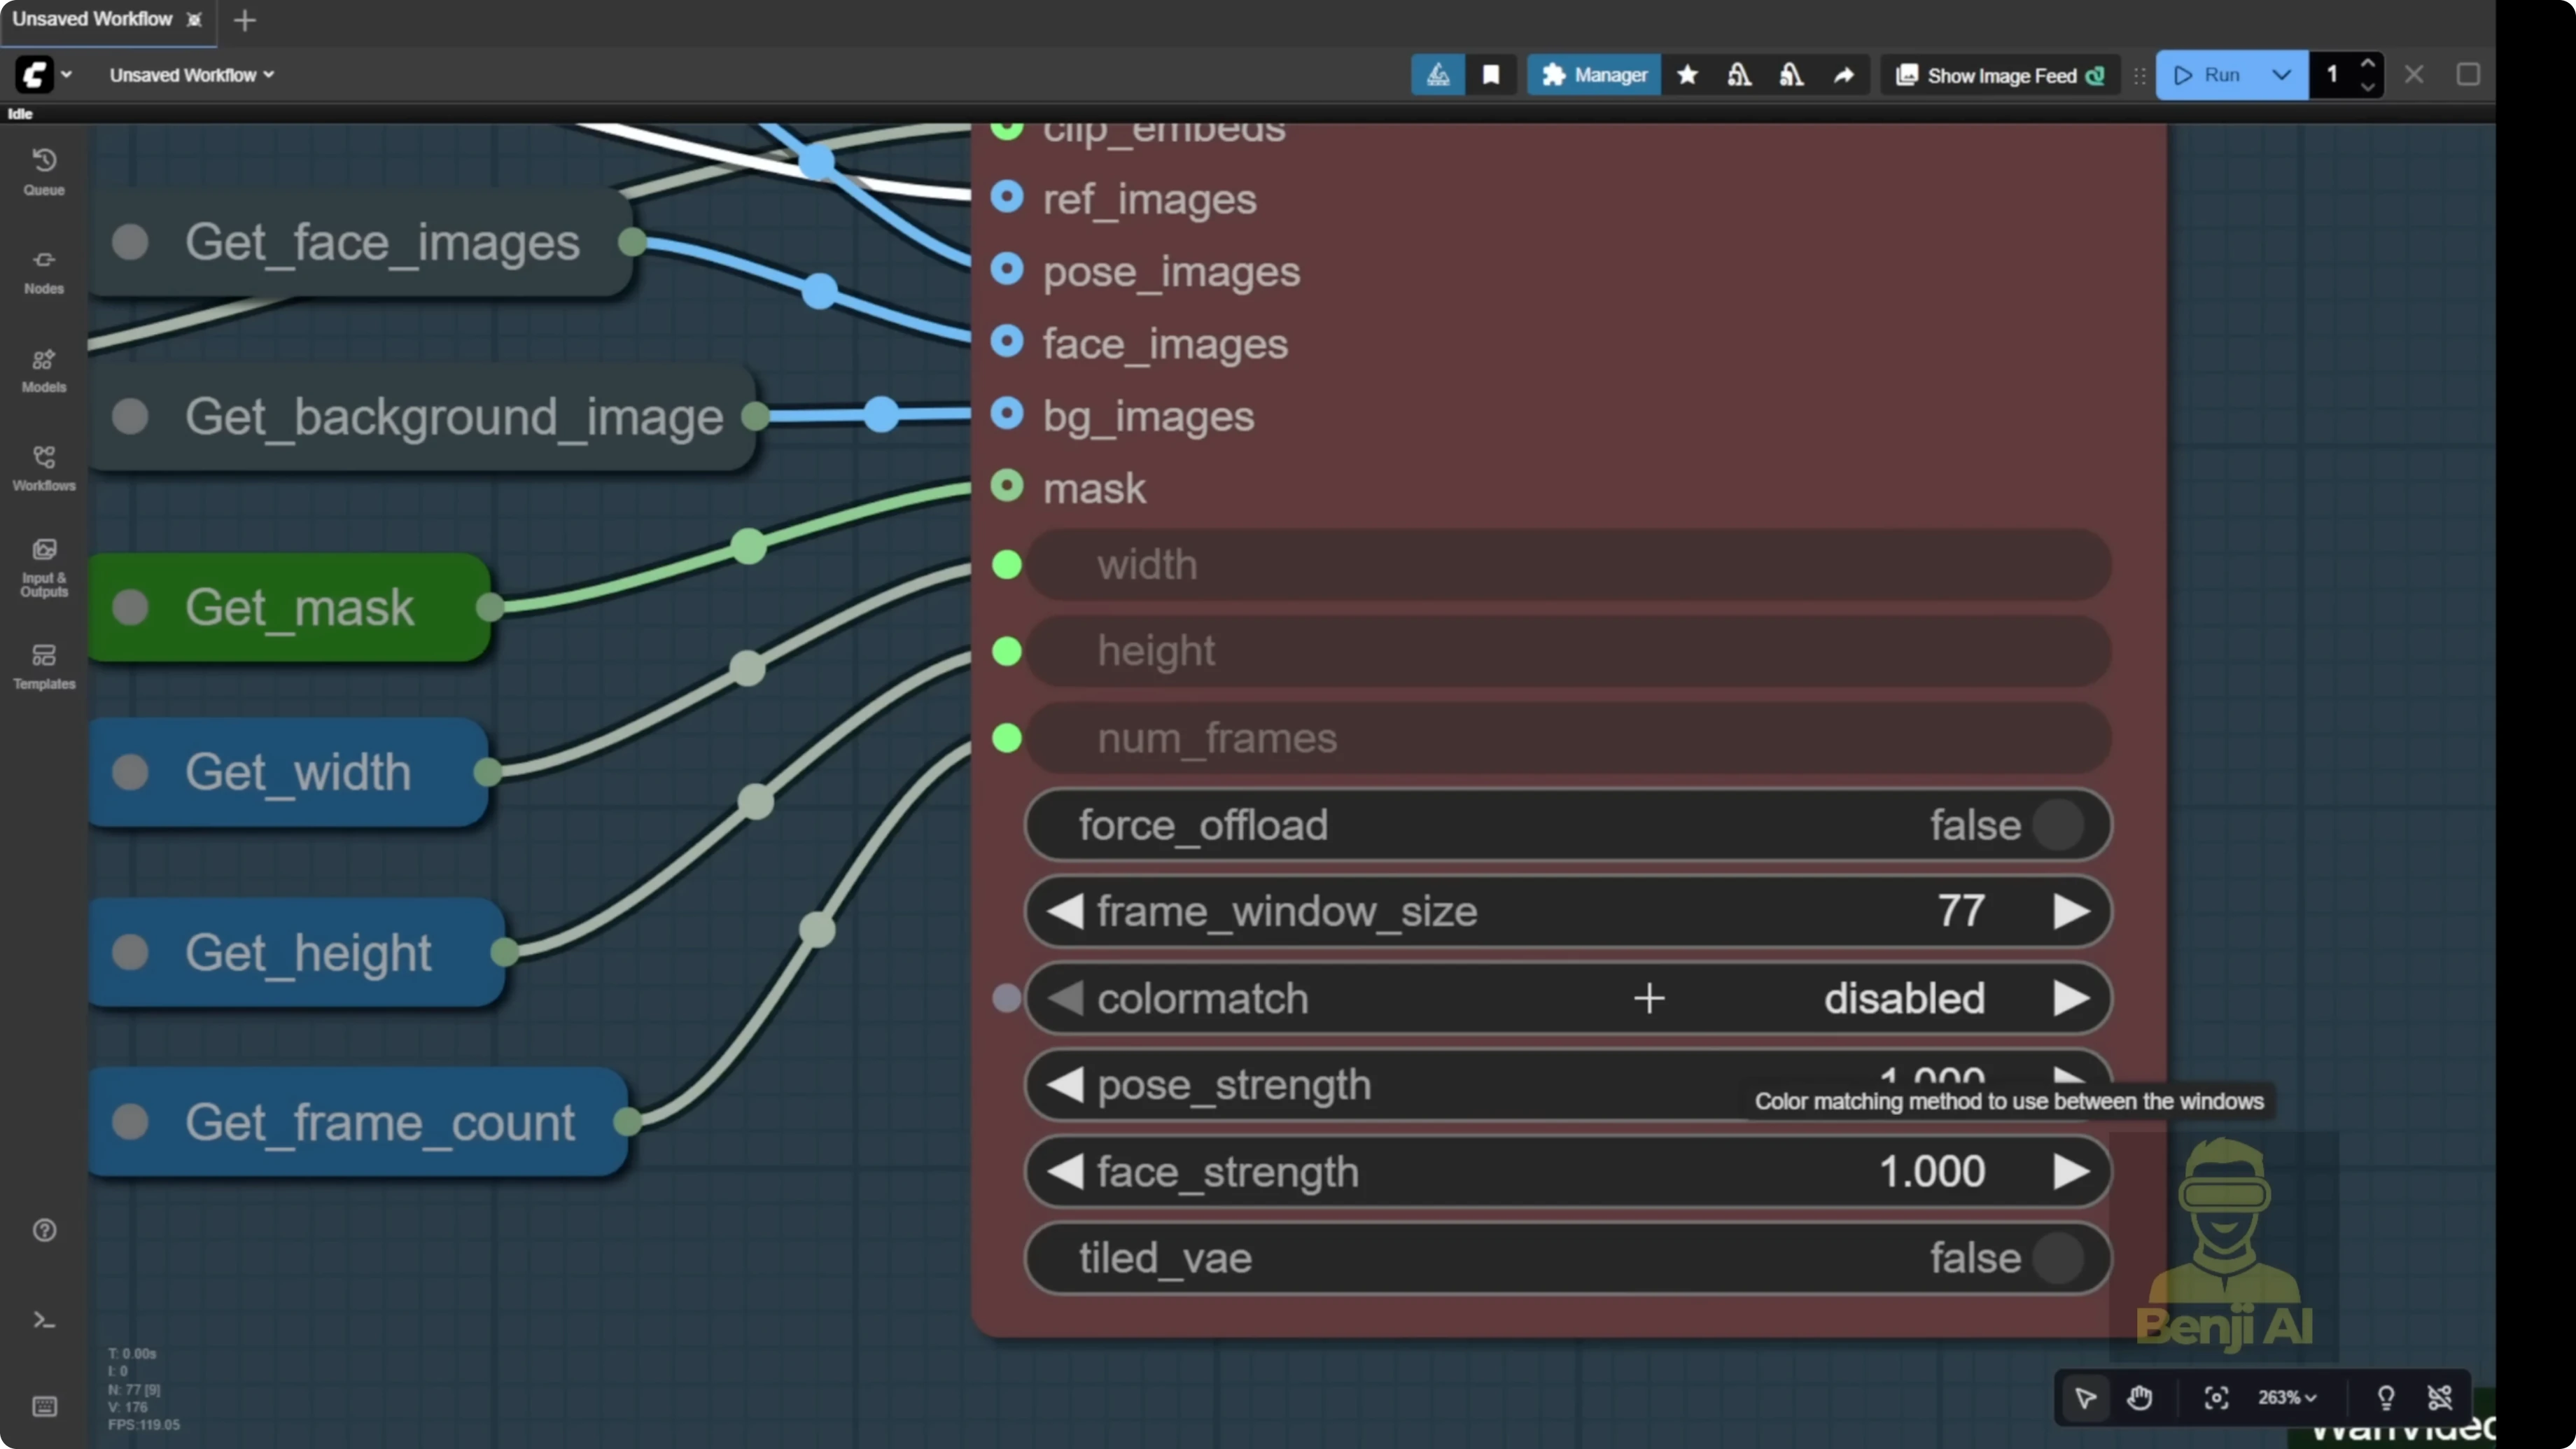
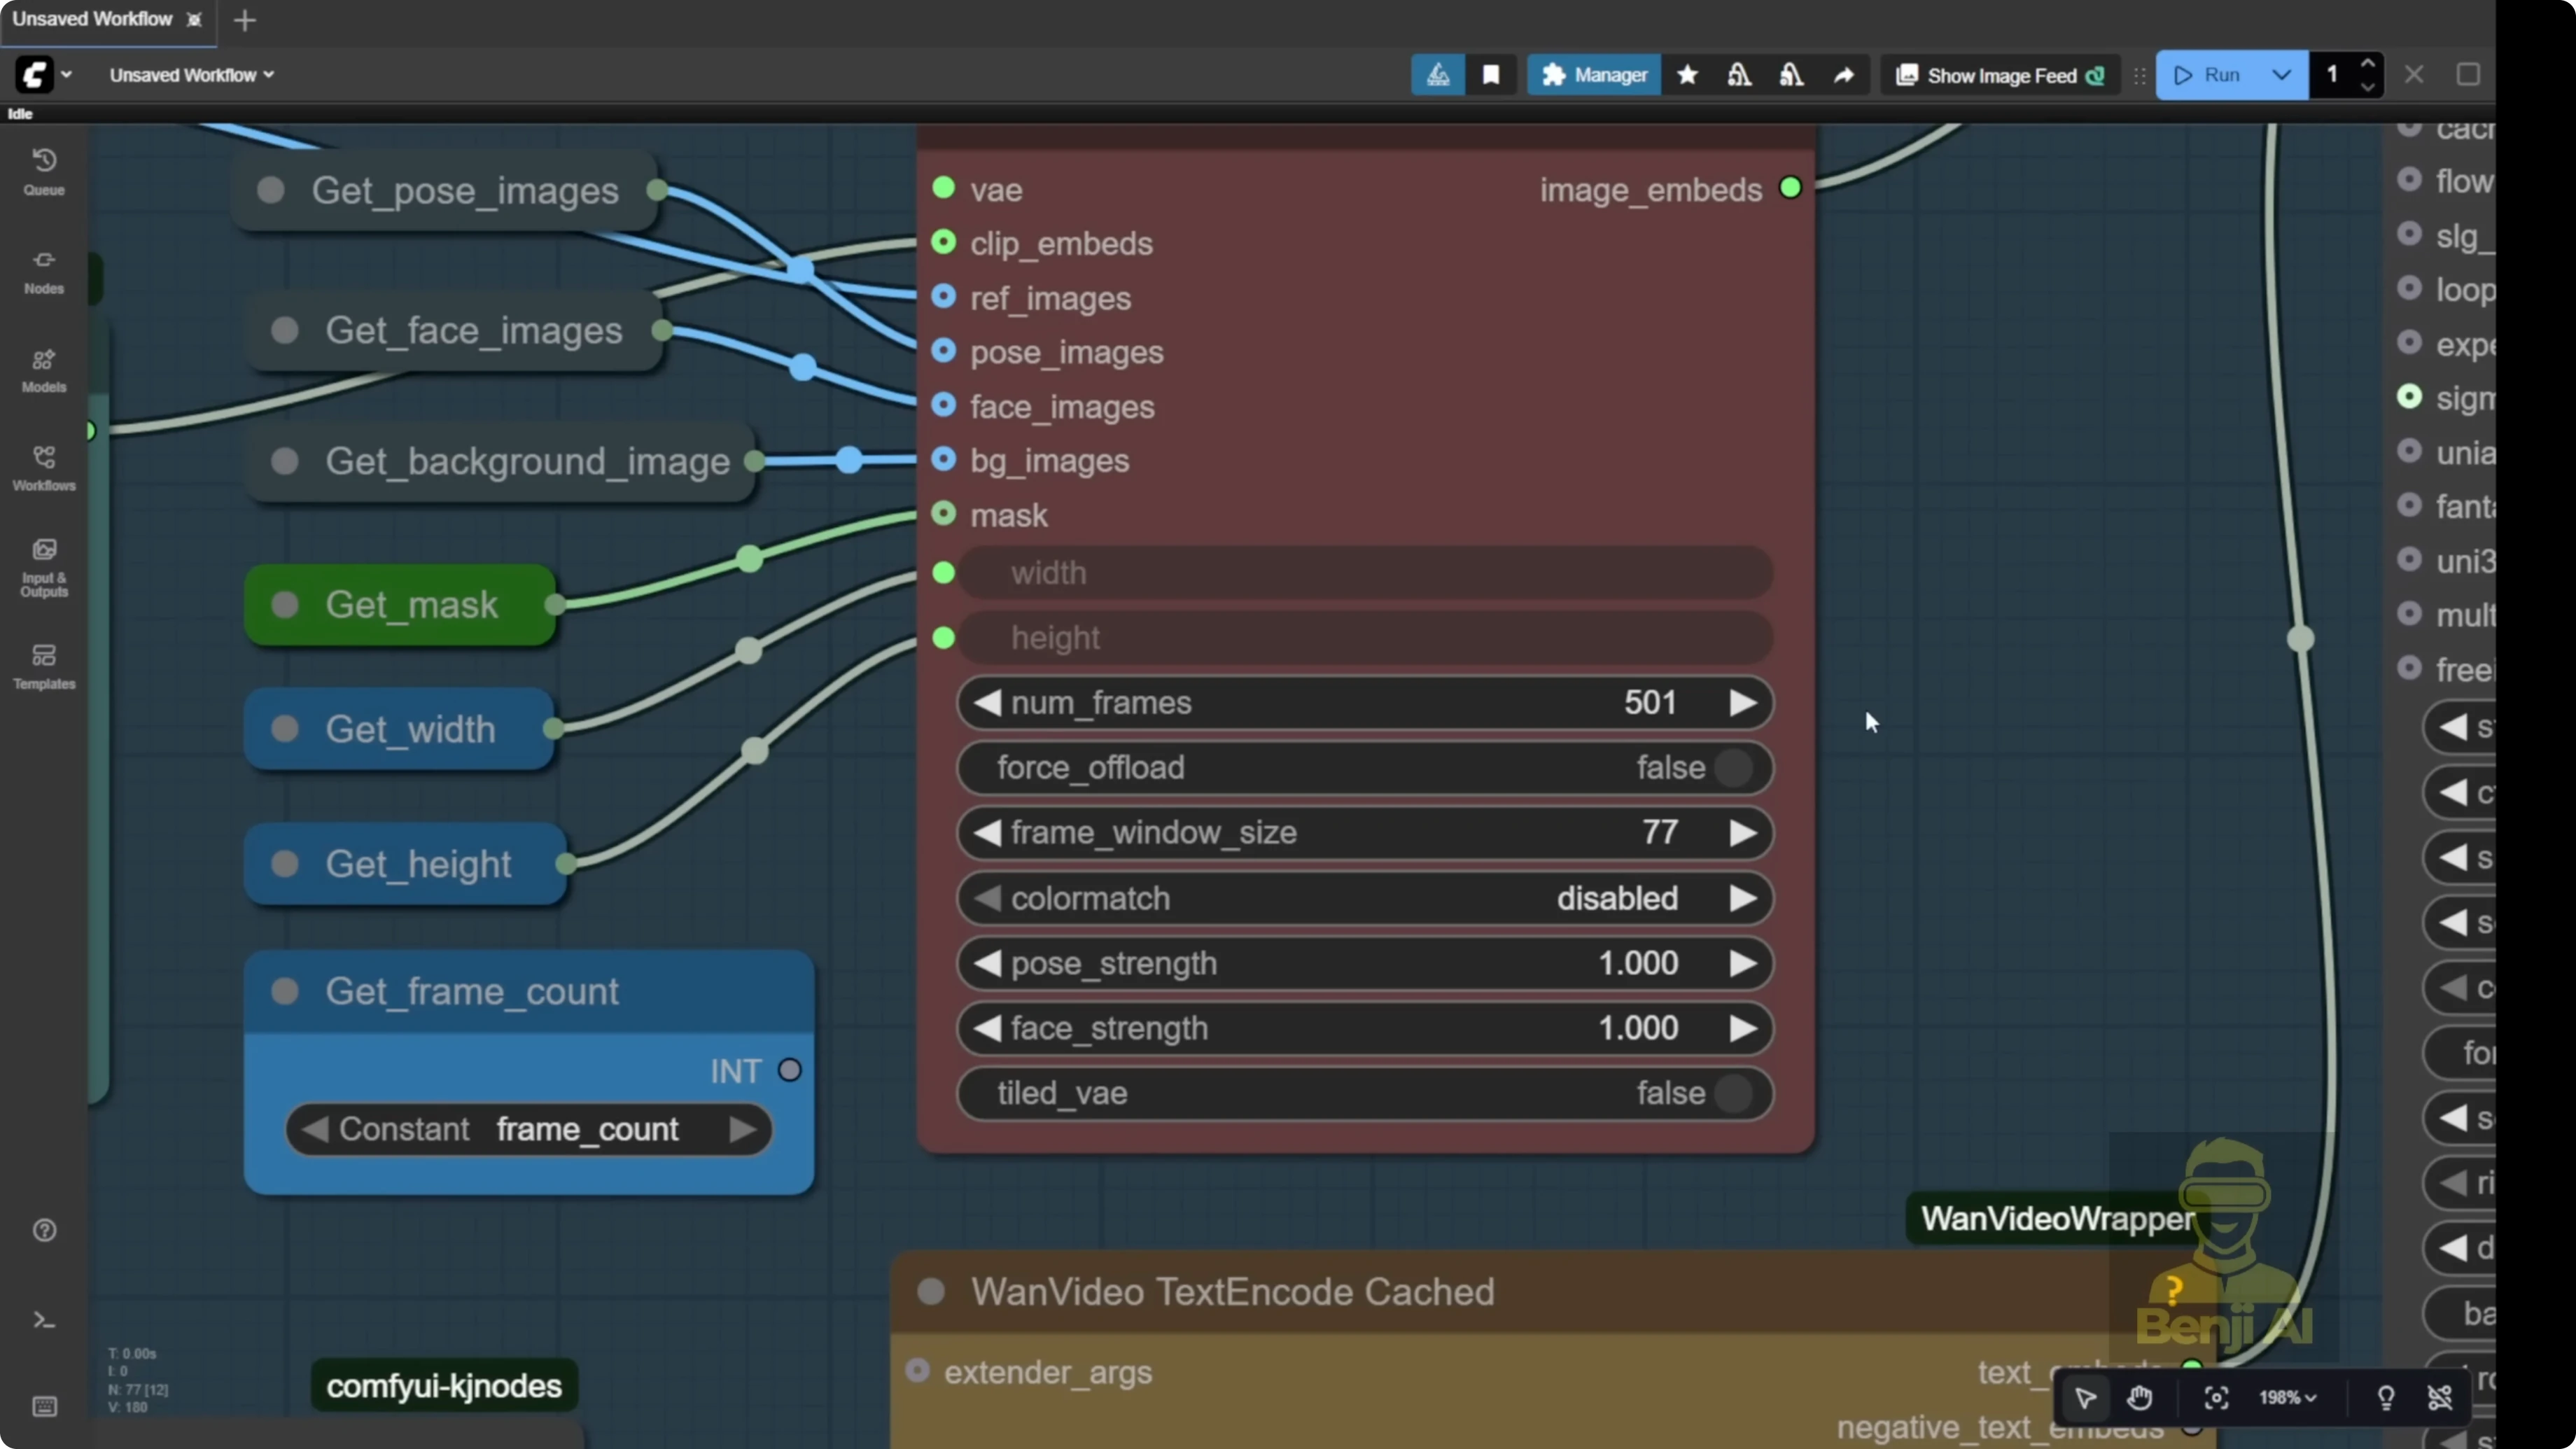
Frame window size and batches
Frame window size depends on your hardware. If you have lots of RAM and a powerful GPU, you can crank it up. The template note is clear: the number of frames and frame window size should be the same number.
- You can set frame window size to match your total frame count, or use 77 or 81 by default. That’s what many long videos render per batch.
- Example: number of frames is 500. The system chops into chunks. If window size is 77, it processes frames 0-77, then 77-154, and so on.
- I generated 81 frames with window size 77. The first batch processed frames 0-77. The second batch started at 77 even though only 4 frames were left, so it added extra frames to fill the batch. That can add a bit of unexpected motion at the end.
- Match the frame count to your reference video. If your system can handle 81 frames per batch, set it to 81.
Reloading, refining masks, and running
Sometimes the point editor might still show the first frames from your previous video, or it might be blank if you just started Comfy UI. I use a fast group bypass node tagged for the sampling group like a toggle to turn off the sampling group. You could also turn off the model loader.
Step-by-step: Reload a new video and refine the segmentation
- Toggle off the sampling group
- Use the fast group bypass node for the sampling group, or turn off the model loader.
- Run once to load the new video
- Click run once. It will load your new video and pass the first frame to the point editor.
- Add segmentation points
- Add green dots with Shift + left click for positive selections.
- Add red dots with Shift + right click for negative selections.
- Click the question mark icon to see all the instructions.
- Delete a dot by right clicking on it.
- Apply the updated mask
- Run again to reload frames and apply your updated segmentation.
- Check the reference and face detection
- Confirm the mask hits the hands and body cleanly.
- Check that face detection is clear so the eyes and head motion look natural.
Using LORAs with one 2.2 animate
These LORA models can collaborate with one 2.2 animate. I’m using the light x2v image to video LORA model to run with low sampling steps in this workflow. One 2.2 animate is based on an image to video model, so once you load the 2.2 animate file, you can also choose any LORA that’s compatible with one 2.2 2 image to video.
Step-by-step: Add LORAs and improve character consistency
- Load the 2.2 Animate model
- Make sure the 2.2 Animate file is selected in the model loader.
- Select a compatible image to video LORA
- Pick a LORA like light x2v that works with 2.2 image to video.
- Use low sampling steps if that’s how your workflow is set up.
- Add a character LORA if needed
- If you need stronger character identity consistency, add a character LORA in the model section. It will lock in the character’s identity better than a single reference image.
- Run and review
- Generate your frames and check identity, hairstyle, and motion match.
Generalized character animation with pose, face, and reference image only
Another way to use one video’s animate is with just the pose and reference image. If you’ve got a face, definitely use the face image. The background and mask are optional. This is great for generalized arbitrary character animations, like when you have totally different scenes than your motion control video.
I tried a close-up shot with another reference image that had a similar ratio and camera distance. It worked out great. The facial motions from the reference video mimicked the reference image perfectly, creating the final video.
- The background is not from the reference video. We didn’t use the mask or the reference video’s background at all.
- Every frame is pulled from the reference image.
- The character looks just like they do in the reference image, including hairstyle and clothing.
- It even handles accessories like a necklace from different angles, matching a new front-facing view and different camera motions.
- You can switch to 3D or 2D characters. You can transfer expressions, for example from a talk show host to an anime character.
- In my run focused on facial expressions, the background also transfers to match the cartoon reference.
Step-by-step: Run without background and mask
- Load a pose source video
- Use a clip that has the facial and head motions you want.
- Load a close-up reference image
- Use a similar ratio and camera distance as your pose video for best results.
- Set the face image
- Provide a clean face image input so the model can lock onto expression and identity.
- Leave background and mask empty
- Skip the background image and mask inputs to avoid warping the original video background.
- Generate frames
- Render the animation. Identity, clothing, and accessories should follow the reference image while motion follows the pose video.
Final Thoughts
WAN 2.2 Animate in Comfy UI through the one videos wrapper lets you build character animations, swap subjects, and guide motion with pose and face inputs. The one videos animate node is the core, taking reference, pose, face, background, and mask images per frame, with optional color match. Keep an eye on frame window size so batching behaves the way you expect. If you need stronger identity, pair 2.2 Animate with a compatible character LORA. For broader animation use cases, skip background and mask and just drive motion from pose with a solid face and reference image.
Recent Posts
How Wan 2.2 AI Boosts Video with 14B Generation & 5B Upscaling?
How Wan 2.2 AI Boosts Video with 14B Generation & 5B Upscaling?
Can Wan 2.2 Img2Vid Handle Long-Length Video Testing?
Can Wan 2.2 Img2Vid Handle Long-Length Video Testing?
Exploring Wan 2.2’s Final Frame and Local AI Video Highlights
Exploring Wan 2.2’s Final Frame and Local AI Video Highlights