Wan 2.2 Animate: AI Character Swap & Lip‑Sync in ComfyUI
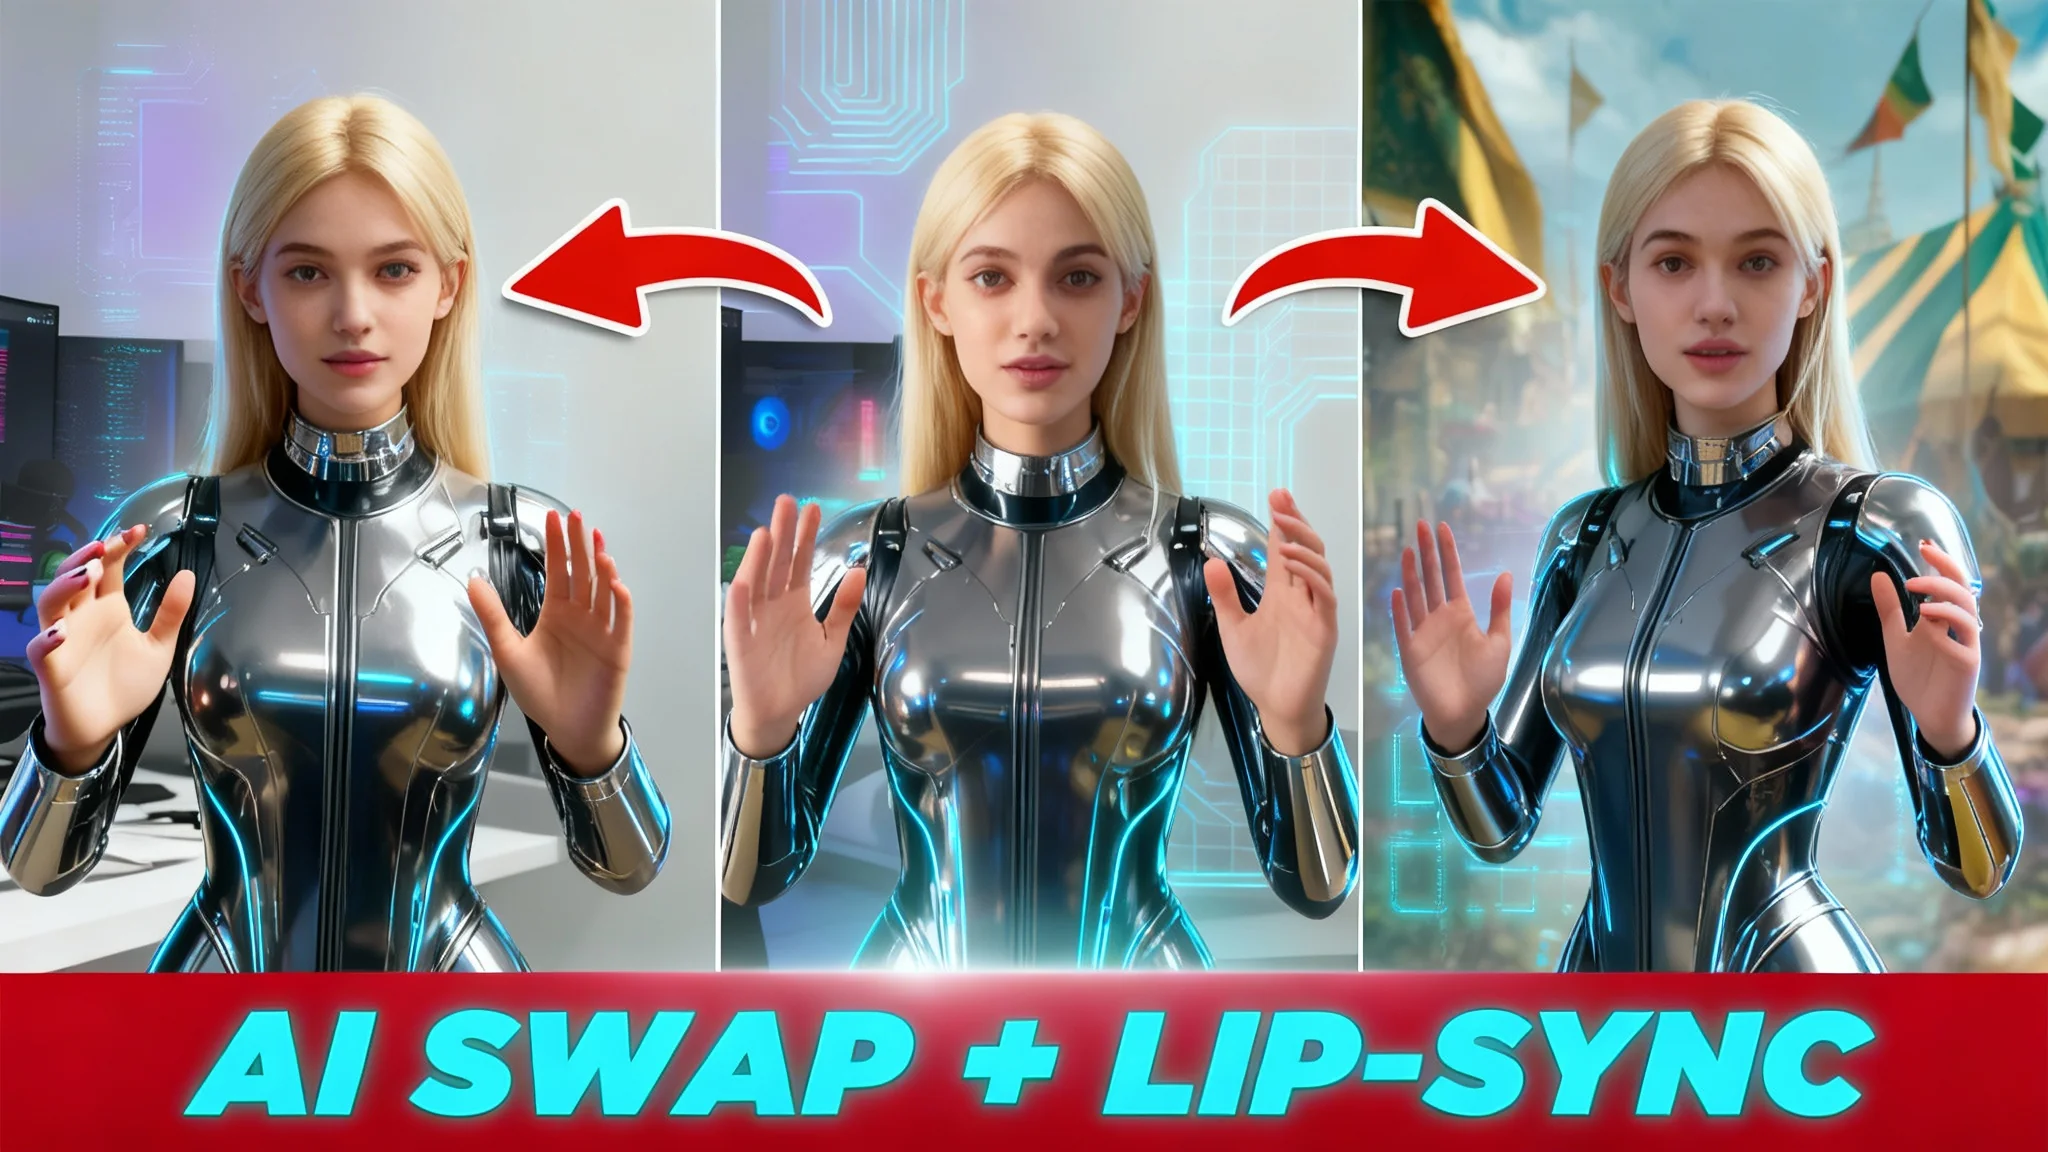
You can now replace a person in a video with a new character, keep the original speech, sync lip movements, and even restyle the entire clip—all for free—with Wan 2.2 Animate inside ComfyUI. In this guide, I’ll walk you through the full workflow I use to get stable results, improve consistency, and reduce common artifacts.
I previously noticed quality issues with Wan 2.2 Animate, so I tested alternate settings and structure. The workflow below produced better motion, stronger character consistency when turning or moving, and reliable subject detection, even when the person interacts with objects.
By the end, you’ll know how to set up ComfyUI, load the workflow, swap characters, sync lips, drive animation from another video, and upscale for cleaner final output.
What is Wan 2.2 Animate?
Wan 2.2 Animate is a free video generation model that can perform character replacement, maintain or transfer motion, and support lip-sync based on the original audio or mouth movement in your footage. In ComfyUI, it runs as a node-based workflow, giving you control over input frames, masking, motion source, and output settings.
It supports two main approaches:
- Character swap with the original background kept intact.
- Motion transfer from your source video onto a reference image, keeping the reference image’s background.
Overview
| Area | What It Covers | Key Actions |
|---|---|---|
| Setup | Install ComfyUI and required models | Install ComfyUI, download Wan 2.2 Animate models, load the workflow |
| Hardware | VRAM and performance | Aim for 24 GB GPU VRAM; consider cloud options if local hardware is limited |
| Inputs | Video and reference image | Upload your source video, set frame count and dimensions, add a replacement or stylized character image |
| Controls | Masking, prompts, frame rate | Adjust expand value, write a concise prompt, set fps |
| Motion/Background | Character swap vs. motion transfer | Keep original background or switch to the reference image’s background |
| Optional Speed | Torch compile with Sage Attention | Enable if configured on your system |
| Output | Generation preview and export | Review results; save video from ComfyUI output folder |
| Post | Upscaling and interpolation | Enhance resolution and motion with an external tool |
Key Features of Wan 2.2 Animate
- Character replacement while preserving the original video’s camera motion and background.
- Motion transfer to a reference image, retaining the reference background.
- Lip-sync that matches mouth movement to speech in the source.
- Strong physics and motion fidelity with good subject tracking across turns and movement.
- Flexible prompt control and frame rate matching.
Setup and Requirements
Install ComfyUI
- Download ComfyUI from the official site and run the installer for your operating system.
- Launch ComfyUI and confirm it opens in your browser.
ComfyUI is the environment where you will run the Wan 2.2 Animate workflow.
Hardware and VRAM
- Wan 2.2 Animate typically requires at least 24 GB of GPU VRAM for stable operation.
- More VRAM speeds up generations and allows longer clips or higher resolutions.
- If your local machine cannot meet this requirement, you can run ComfyUI on cloud services with higher-end GPUs.
Get Wan 2.2 Animate Models
- Download the Wan 2.2 Animate model files from the official sources.
- Place them in the correct ComfyUI folders as instructed by each model’s documentation.
- Keep your folder structure organized so the workflow can find the models automatically.
Load the Workflow and Install Missing Nodes
- Import the Wan 2.2 Animate workflow file by dragging it into ComfyUI.
- If a prompt appears listing missing custom nodes, open the Manager and install the required nodes one by one.
- Restart ComfyUI after installation. The workflow will then load properly.
Workflow Guide: Character Swap and Lip-sync
Prepare Your Source Video
- Click the video input to upload the clip containing the person you want to replace.
- Use 1080p or lower for faster processing while you test. Both vertical and horizontal formats work.
- Keep the subject clear and visible for better tracking.
Shorter clips are easier to iterate on while you dial in settings. Once you’re confident, you can increase length and resolution.
Select Frames to Process
- Set the number of frames you want to process.
- I’ve been able to process 300–400 frames reliably, but results vary by VRAM, resolution, and motion complexity.
- For a quick test, start with around 100–150 frames.
Longer clips require more VRAM and time. Consider cloud GPUs if you want to push beyond your local limits.
Set Output Dimensions
- Choose output dimensions that match your source aspect ratio.
- For vertical video, 576 × 1024 strikes a good balance between quality and speed on mid-range GPUs.
- Higher resolutions increase VRAM usage and processing time.
You can upscale later, so keep initial generation manageable for faster iterations.
Choose Your Replacement Character
You have two paths: a completely new character or a stylized version of the same person.
Option A: New Character Image
- Upload a clear image of the character you want to swap in.
- A medium shot or closer works well; full body isn’t required.
- Avoid images where the subject is tiny in frame.
The workflow will replace the subject in your video while preserving the original background.
Option B: Stylized Version of the Same Character
- Export a frame from your source video where the subject is most visible.
- Use an image-to-image tool to transform that frame into your target style (for example, anime, claymation, or 3D).
- Keep the face and key features recognizable so the swap remains consistent.
Step-by-step for image-to-image stylization:
- Open your chosen image-to-image tool.
- Upload the exported frame.
- Enter a clear style prompt (for example, “anime style,” “stop-motion clay look,” or “3D toon shading”).
- Pick a suitable model within the tool and generate.
- Save the stylized image and upload it as the reference image in ComfyUI.
This approach lets you restyle the entire video while keeping motion and lip-sync aligned to the original performance.
Optional Speed Setting: Torch Compile and Sage Attention
- In the One Video Torch Compile Settings node, you can un-bypass it and set Attention Mode to Sage Attention.
- This may speed up generation if Torch compile and the Sage components are installed correctly on your system.
- If you run into instability or see no improvement, keep it bypassed.
This optimization is optional and hardware-dependent.
Refine the Subject Mask
- Find the Grow Mask With Blur node and adjust the Expand value.
- Default is 10 pixels, which is fine if the replacement character is a similar size to the original.
- If your new character is larger, increase this value (for instance, 25) to give the model room to fit the subject without clipping.
Mask expansion helps reduce harsh edges and mismatches around the subject.
Choose Background and Motion Source
By default, the workflow performs a character swap:
- It keeps your original video’s background and inserts the new character into that scene.
To drive motion from your video onto the reference image while keeping the reference background:
- Disconnect the Background Image and Mask nodes from the One Video Animate Embeds node.
- This tells the workflow to use the reference image’s background and apply the motion from your source.
Decide which approach fits your goal before generating.
Prompt and Frame Rate
- In the prompt box, write a short, literal description of the action (for example, “female clown talking”).
- Wan 2.2 Animate defaults to 16 fps. If you want to match your source, set the frame rate in both Video Combine nodes.
- Keep prompts concise; this model responds well to direct descriptions.
Matching fps can help you avoid timing mismatches during editing.
Run the Workflow and Preview
- Click the run button to start generation.
- When processing completes, preview the output in the designated node.
- Check edges, lip movement, and overall motion fidelity.
Expect minor artifacts depending on the footage and reference. If needed, tweak mask expansion, frame count, or resolution, then regenerate.
Quality Optimization After Generation
Upscale and Enhance
If the generated video looks soft or low-res, upscale it:
- Open your ComfyUI output folder to find the rendered clip.
- Use a video enhancement app to upscale by 2x or 4x and apply detail enhancement.
- Choose a model tuned for AI-generated content for cleaner results without harsh artifacts.
Upscaling after generation lets you keep iterations fast while still delivering a sharp final.
Frame Interpolation
If you generated at 16 fps:
- Use frame interpolation to convert to a higher frame rate (for example, 24, 30, or 60 fps).
- Interpolation fills in missing frames for smoother motion.
- Export once you are satisfied with sharpness and timing.
This step improves motion fluidity without re-running the full generation.
Tips and Troubleshooting
- VRAM matters: If you hit errors or slowdowns, reduce resolution, shorten frame count, or move to a cloud GPU with more VRAM.
- Keep inputs clean: Clear, well-lit source footage and a sharp reference image produce better swaps and tracking.
- Mask expansion: Increase the Expand value if you see edge tearing, clipping, or outlines near the subject.
- Frame count: Start small to confirm settings, then scale up frames for longer shots.
- Background choice: For a straightforward replacement, keep the default connections. For motion transfer with the reference background, disconnect the Background Image and Mask nodes as described.
- Prompt simplicity: Stick to a short, direct description. Avoid overly detailed text that can introduce noise.
- Output fps: Match your source fps if you plan to intercut with the original footage in editing.
Conclusion
Wan 2.2 Animate inside ComfyUI makes free character replacement and lip-sync practical with solid motion fidelity and reliable subject tracking. The workflow above focuses on stable settings, mask control, and clear choices for background and motion source, so you can produce clean results and iterate efficiently.
Start with manageable frame counts and moderate resolution, confirm your mask expansion, and keep prompts short. Then upscale and interpolate to finish with a sharp, smooth final video. With careful inputs and a few key tweaks, you can swap characters, restyle performances, and maintain convincing lip-sync—all in a single, repeatable pipeline.
Recent Posts
Wan 2.2 Animate Guide: The Best AI Character Animation Yet
Discover why Wan 2.2 Animate sets a new standard for AI character animation. Learn how it works, fluid character swaps, step-by-step setup, and pro tips.
Animate Any Image in ComfyUI with WAN 2.2 with GGUF
Step-by-step ComfyUI workflow using WAN 2.2 + GGUF to animate any image with realistic motion, cloth sim, and 10+ sec clips—no VRAM limits.

WAN Animate v2: Infinite AI Videos in ComfyUI
Learn how to use WAN Animate v2 in ComfyUI to generate endless AI videos. Download the new model, explore the detail enhancer workflow, and see the full model list.